
The Viral Dubai Pistachio Chocolate Bar is the ultimate dessert sensation I know many of you have seen this past year - this delicious Dubai creation had taken social media by storm and have us in a chokehold. Here's a complete step-by-step guide to making this STUFFED out-of-this-world delectable chocolate bar at home. And if this is your first time learning about it, let us fill you in.

Dubai's Fix Dessert Chocolatier started it all, posting their creative stuffed chocolate bar called Can't Get Knafeh of It - creamy pistachio and smooth tahini mixed with toasted shredded kataifi pastry dough to make the most satisfying crunchy filling, all encased in milk chocolate. Fix offers many flavors, but this pistachio knafeh one was the one people became captivated by. And when I say they made a social media sensation - let's just say they were the definition of the word VIRAL. I know, we hate that word by now. But that's truly what it was - they were talked about everywhere. The price of pistachio cream has steadily increased for months, 1 continuously see them mentioned on every social media app I open with people recreating their bars at home, and the popular Dubai chocolatier still sells out within minutes to this day.
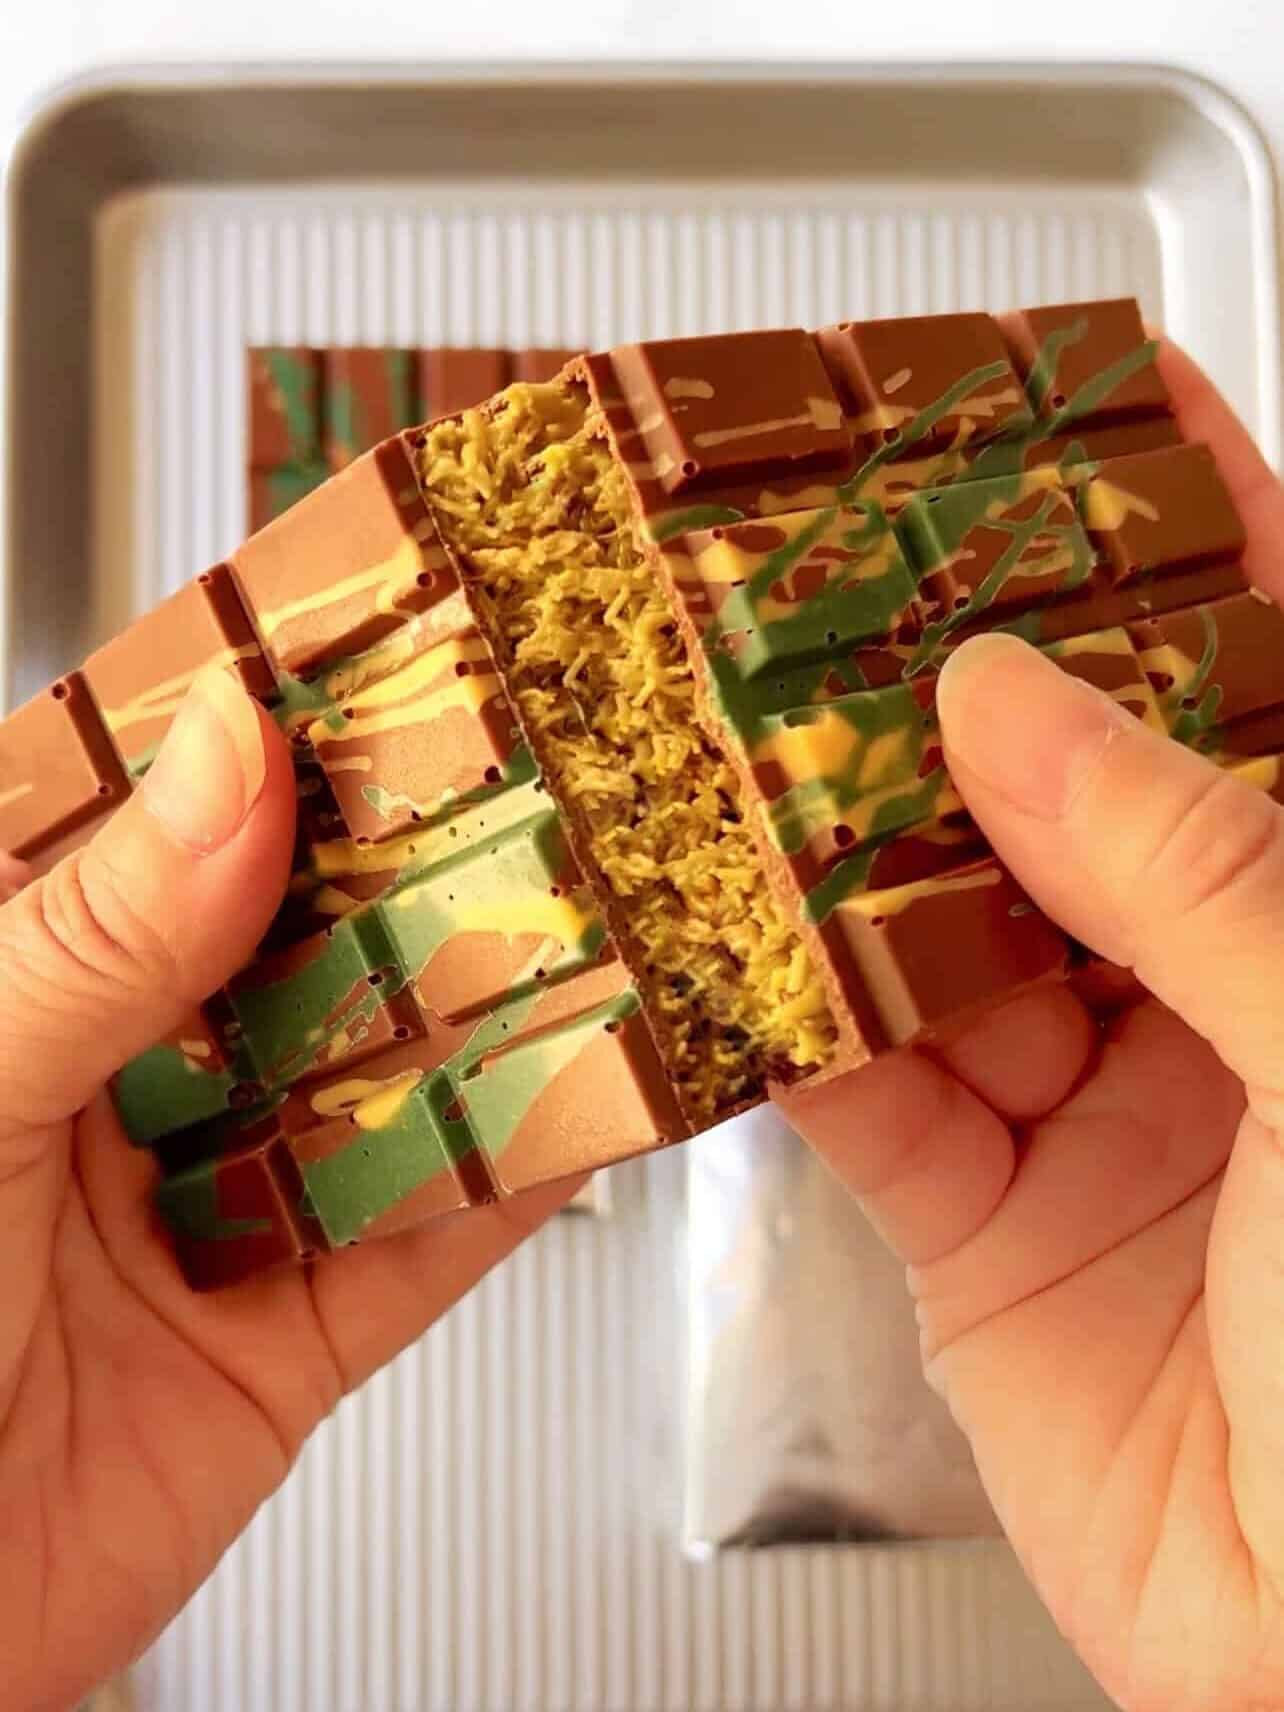
So as you can imagine, everyone who didn't live close to Dubai suffered from great FOMO - myself included. We all were dying to try one of these viral Dubai pistachio chocolate bars - they looked so good! So we had to make it ourselves. After a few test batches and making some tweaks along the way, I can say confidently this recipe is an amazing copycat. I've made many bars by now and had friends and loyal followers try them. I adjusted the filling recipe even further and I've even gotten better at assembling them! So trust me when I say the recipe card yields better chocolate bars than even the outdated photos you see in the instructions. The best way to describe the texture? Imagine a creamy CRUNCHY and nutty pistachio Kit Kat bar. And friends agree - it's absolutely worth the hype.
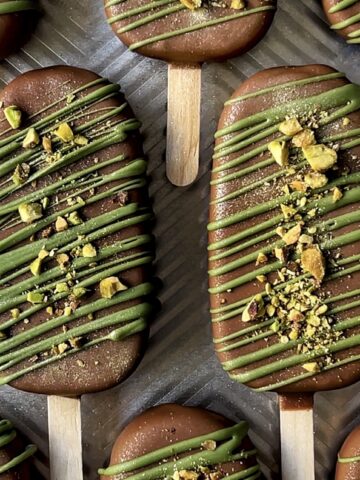
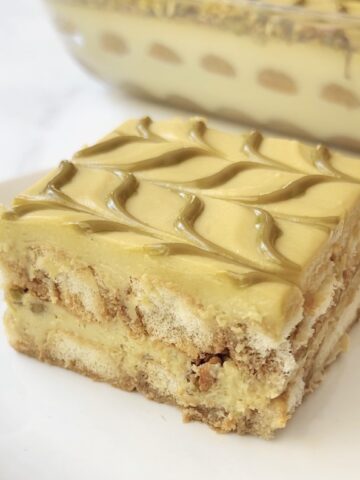
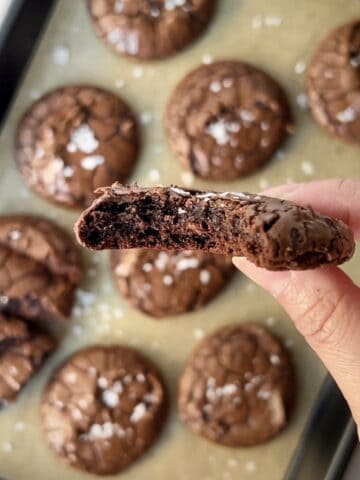
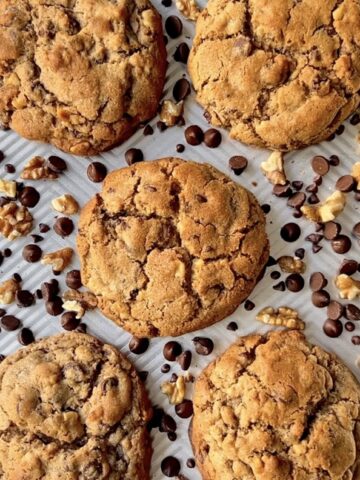
Have you also seen the latest Baskin Robbins ice cream inspired by these chocolate bars? A few select locations in CA have been selling them $10 a bar and they look amazing! Since I wasn't visiting CA anytime soon, I knew I had to recreate them. Be sure to check out my Dubai Pistachio Ice Cream Bars recipe - I think they came pretty close to Baskin Robbins! If you can't get enough pistachio, don't leave without looking at my Pistachio Tiramisu - it would be amazing for the holiday! And if you're looking for more cookie inspiration, my giant Levain-Inspired Chocolate Chip Walnut Cookies, and Brownie Cookies are always a no-brainer.
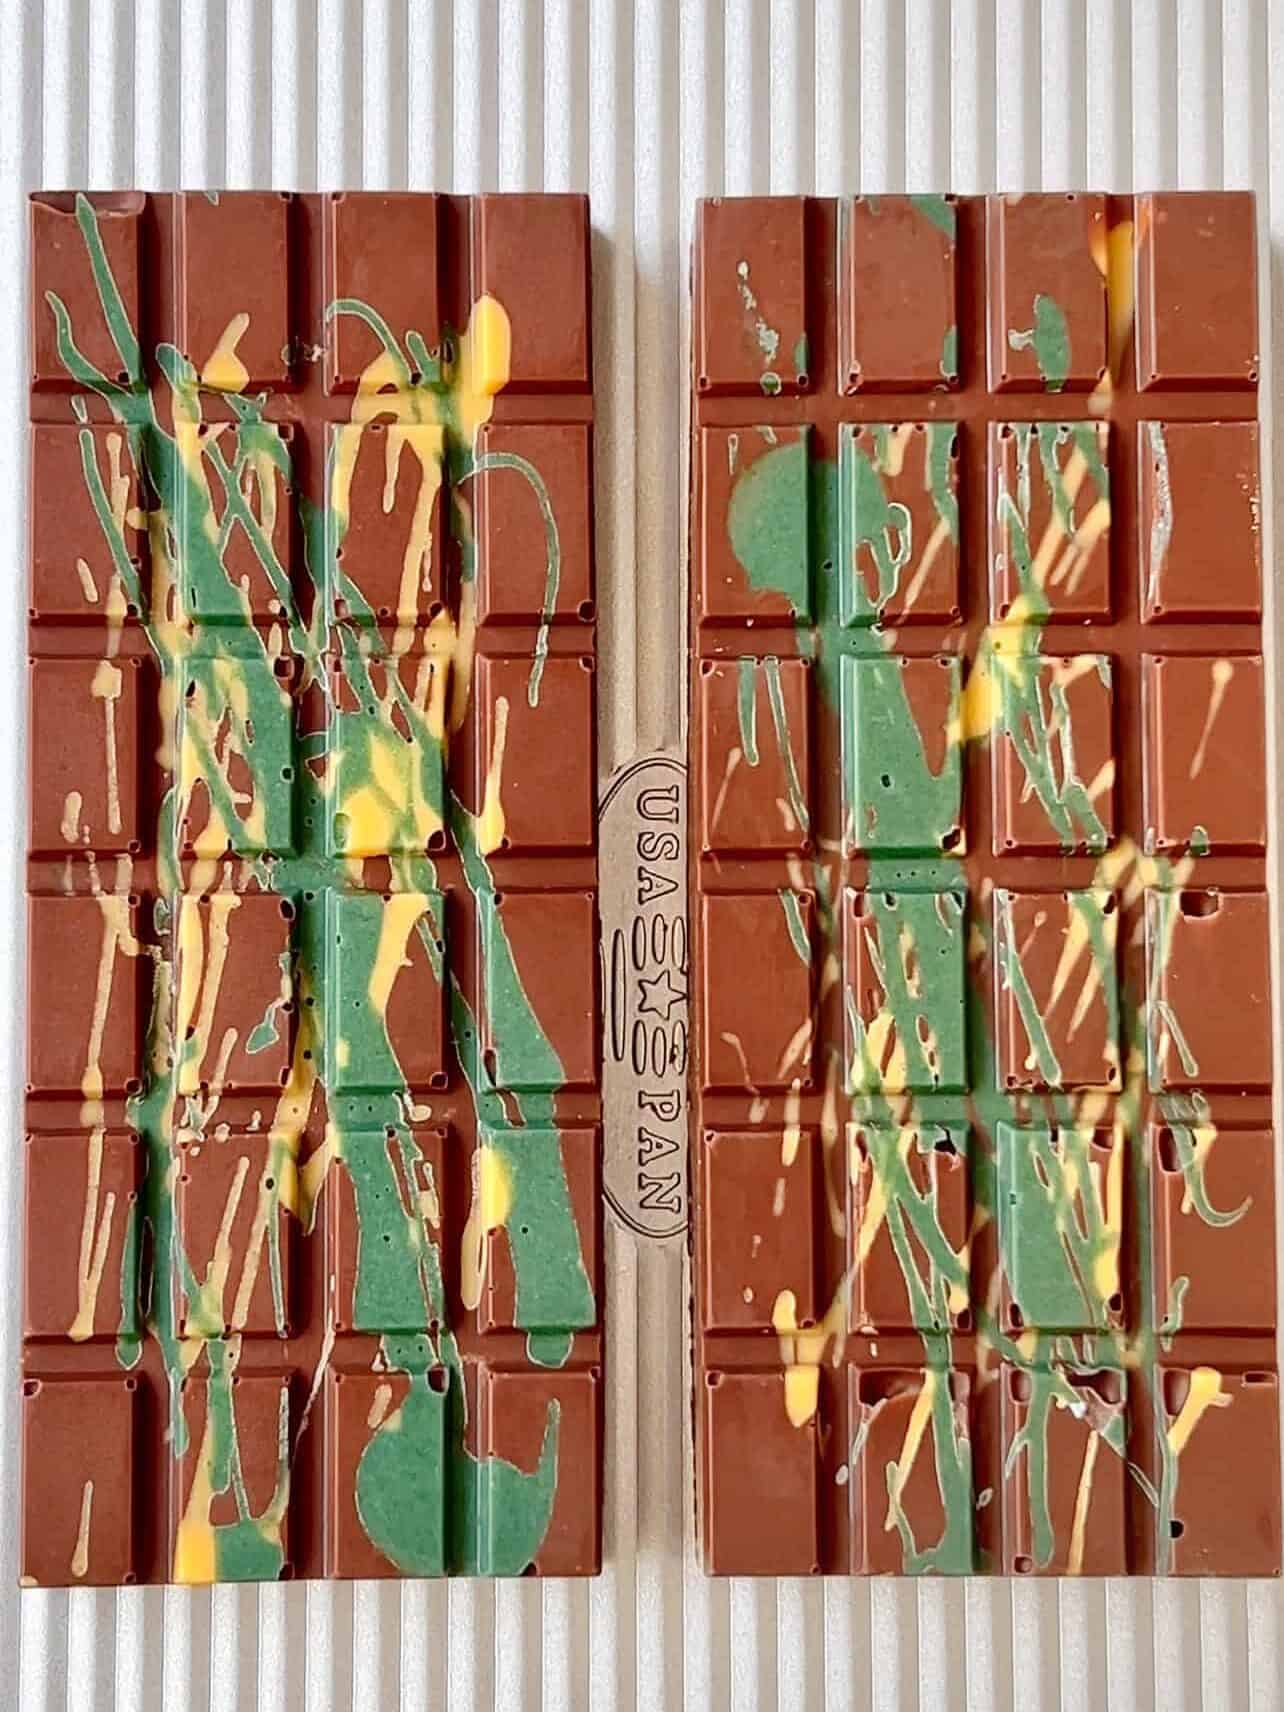
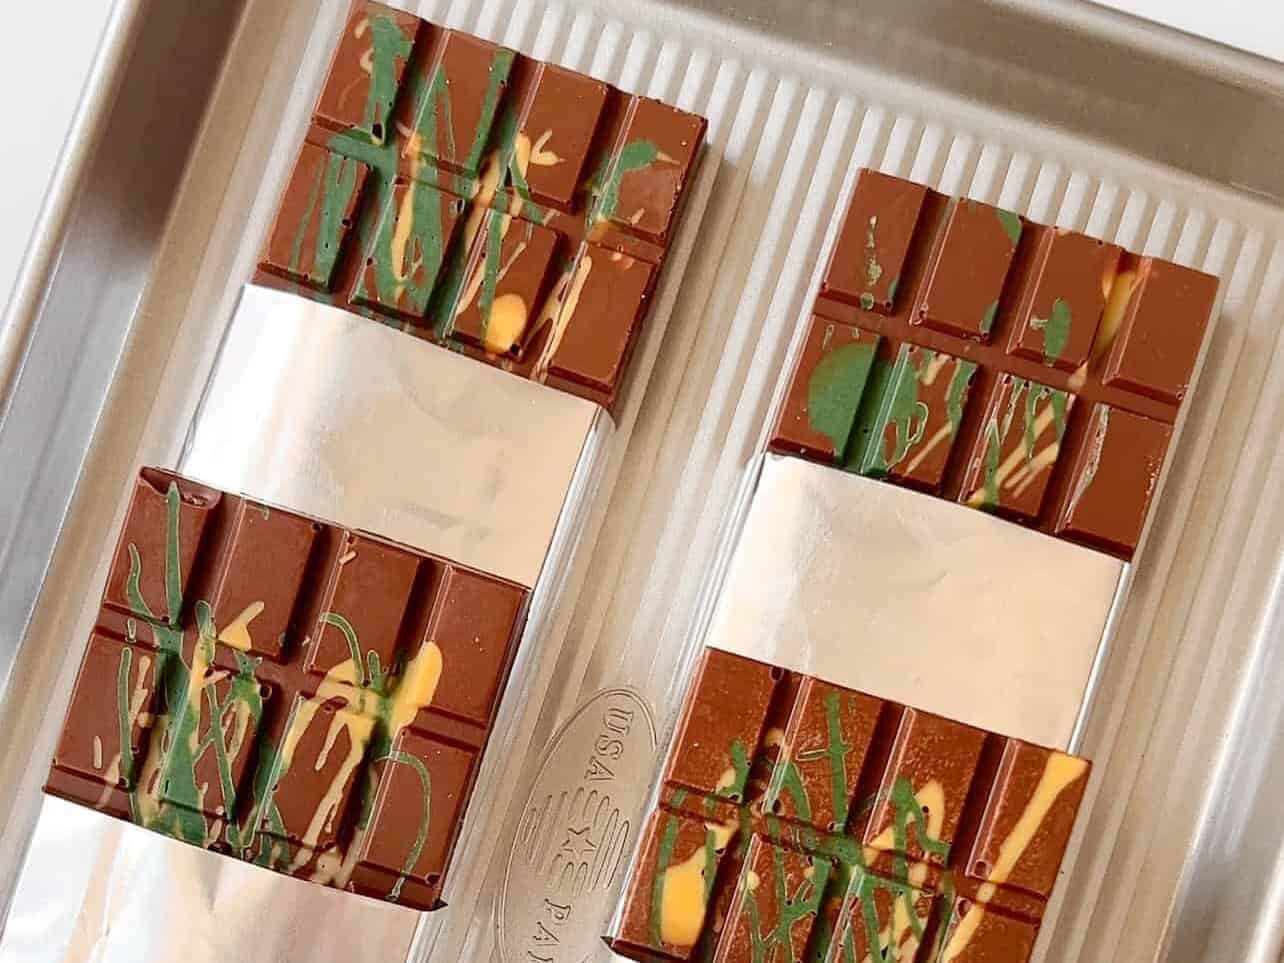
This image above was taken back in June. Since then, I have listened to followers' feedback and increased the pistachio cream in this updated recipe to make the filling even creamier. So get ready. Here's all you need to know to make this incredible viral Dubai pistachio chocolate bar at home!
Jump to:
What Is Knafeh?
Forgive me if I get this paragraph wrong, as I have never tried knafeh. So I will try my best and keep my fingers crossed that my information is as accurate as can be. Please let me know!
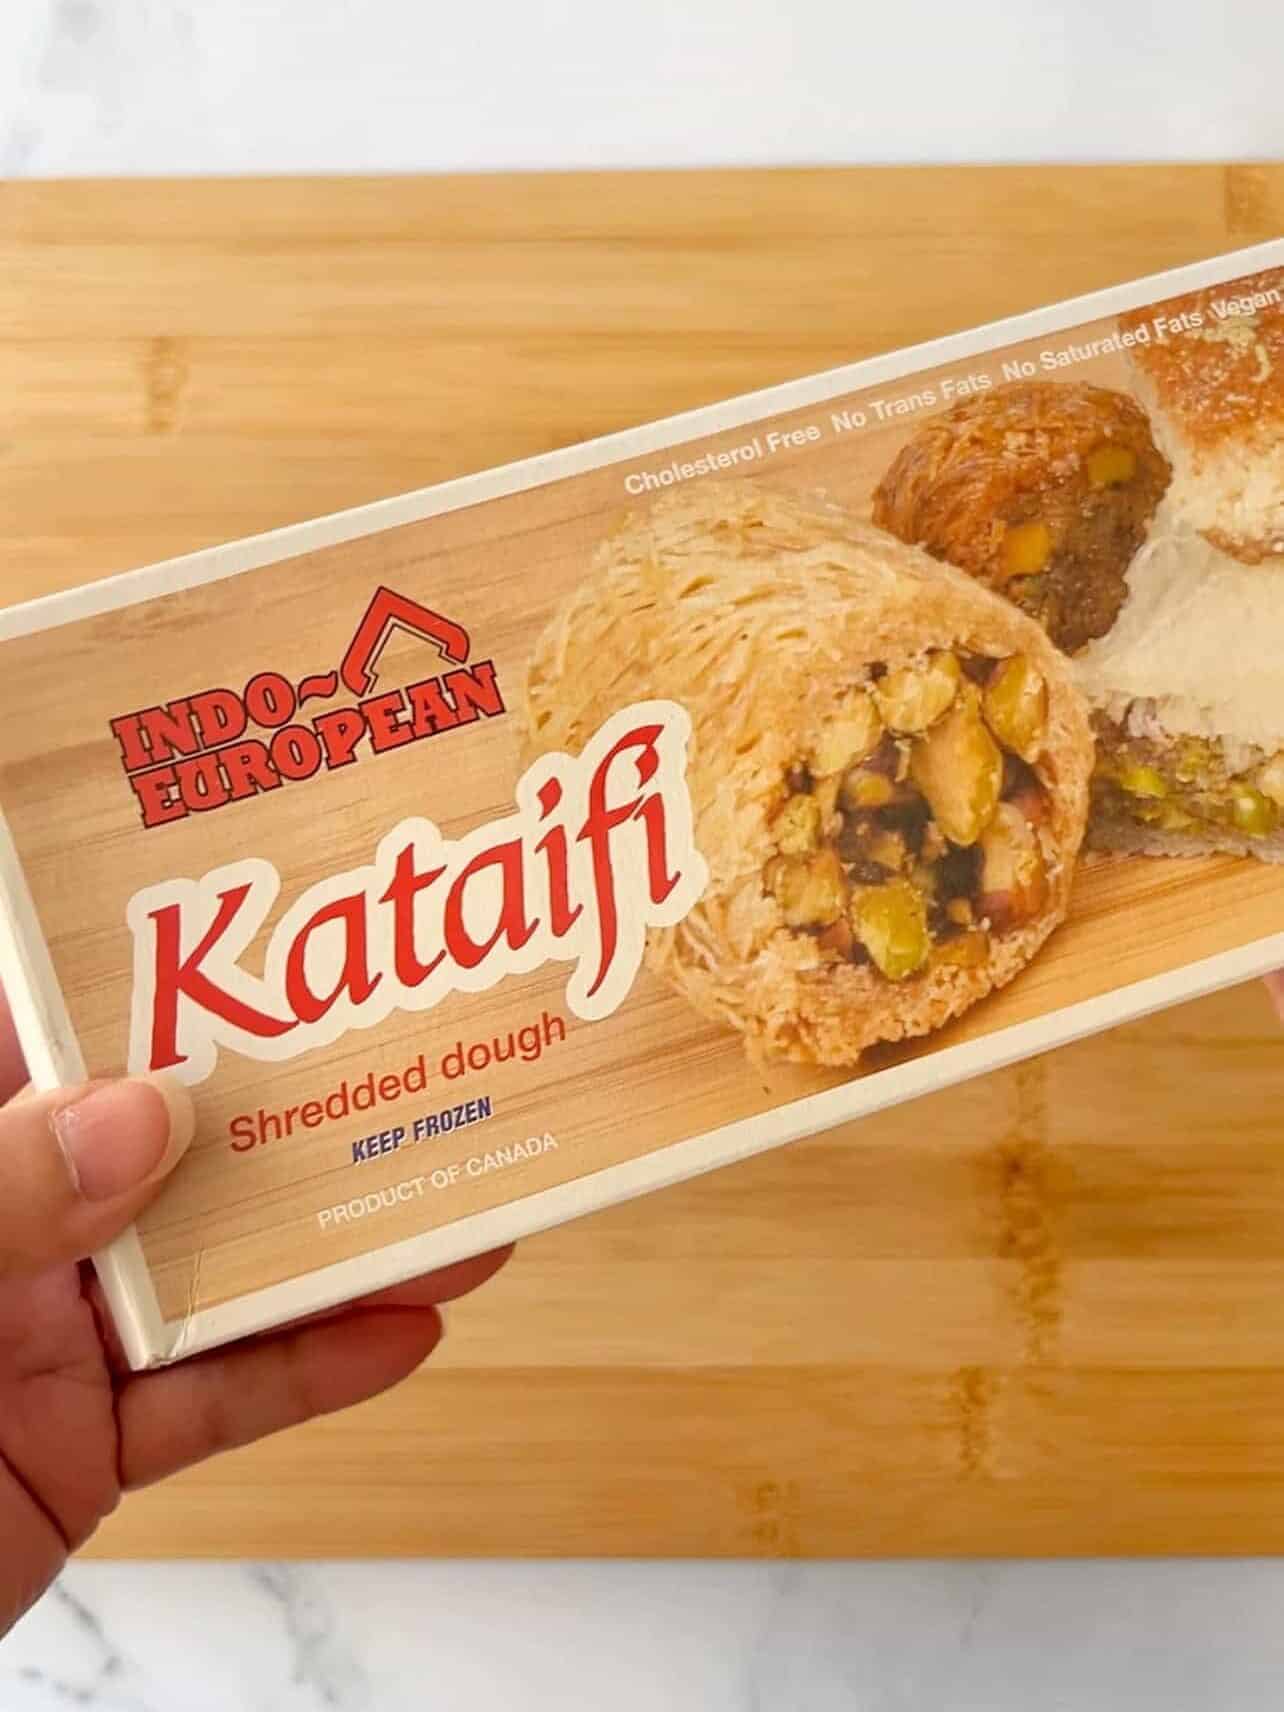
Knafeh is a traditional Arabic dessert made with spun pastry called kataifi. Kataifi is what I thought to be delicate thin strands of shredded phyllo dough. Typically, this spun dough is soaked in a sweet syrup called attar and layered with cheese, clotted cream, or nuts in some regions. I've also learned that many cultures such as the Greek have very similar desserts and call their dessert kataifi, which makes it all so confusing. And they all seem to pronounce it differently - kunafeh, kunafa, konafi, and so on. So here's the box I bought at the store below, I found it at a Mediterranean/Middle Eastern market. Is kataifi the ingredient, and the dessert people make with it called knafeh?
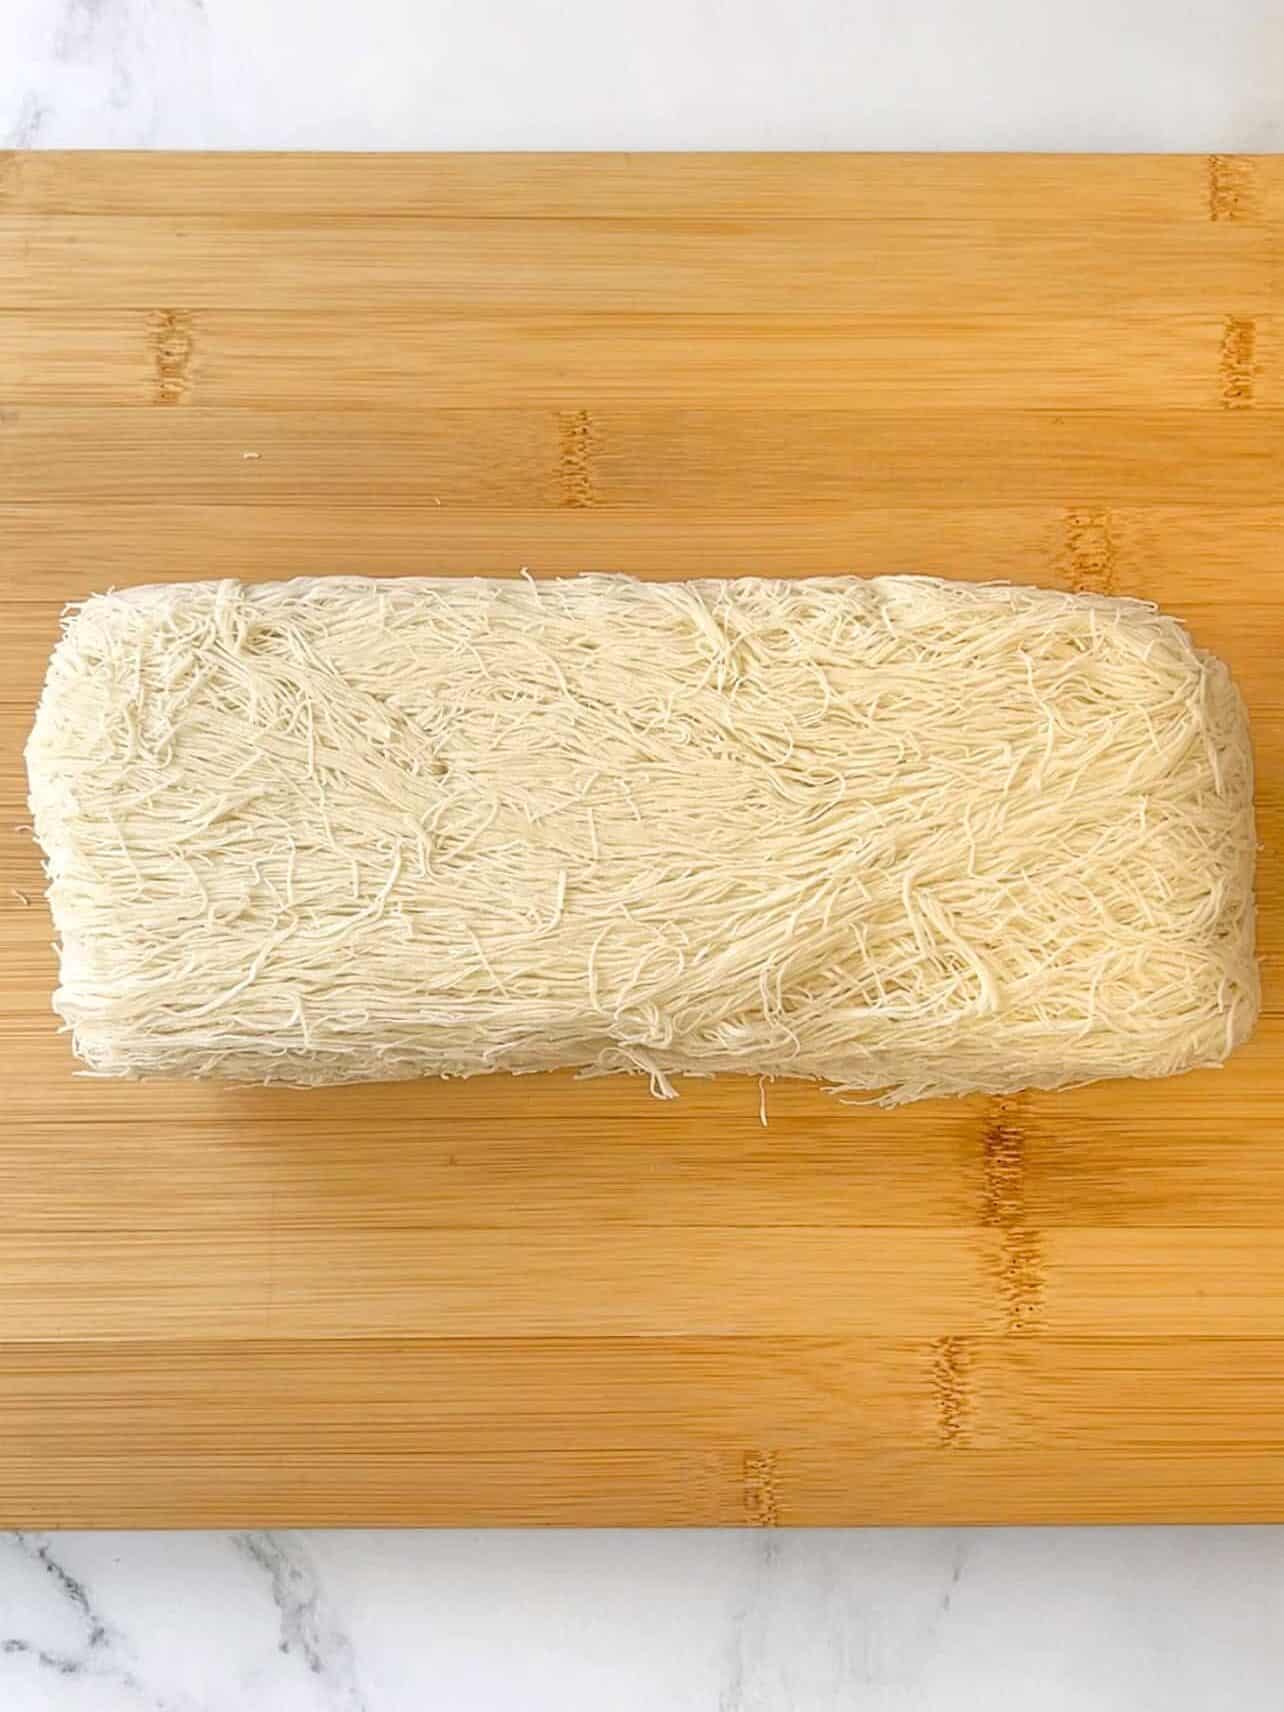
For easiest handling, take out the kataifi shredded dough to thaw at room temperature 2 hours in advance. You can chop with a knife or I recommend pulsing it in a food processor if you own one.
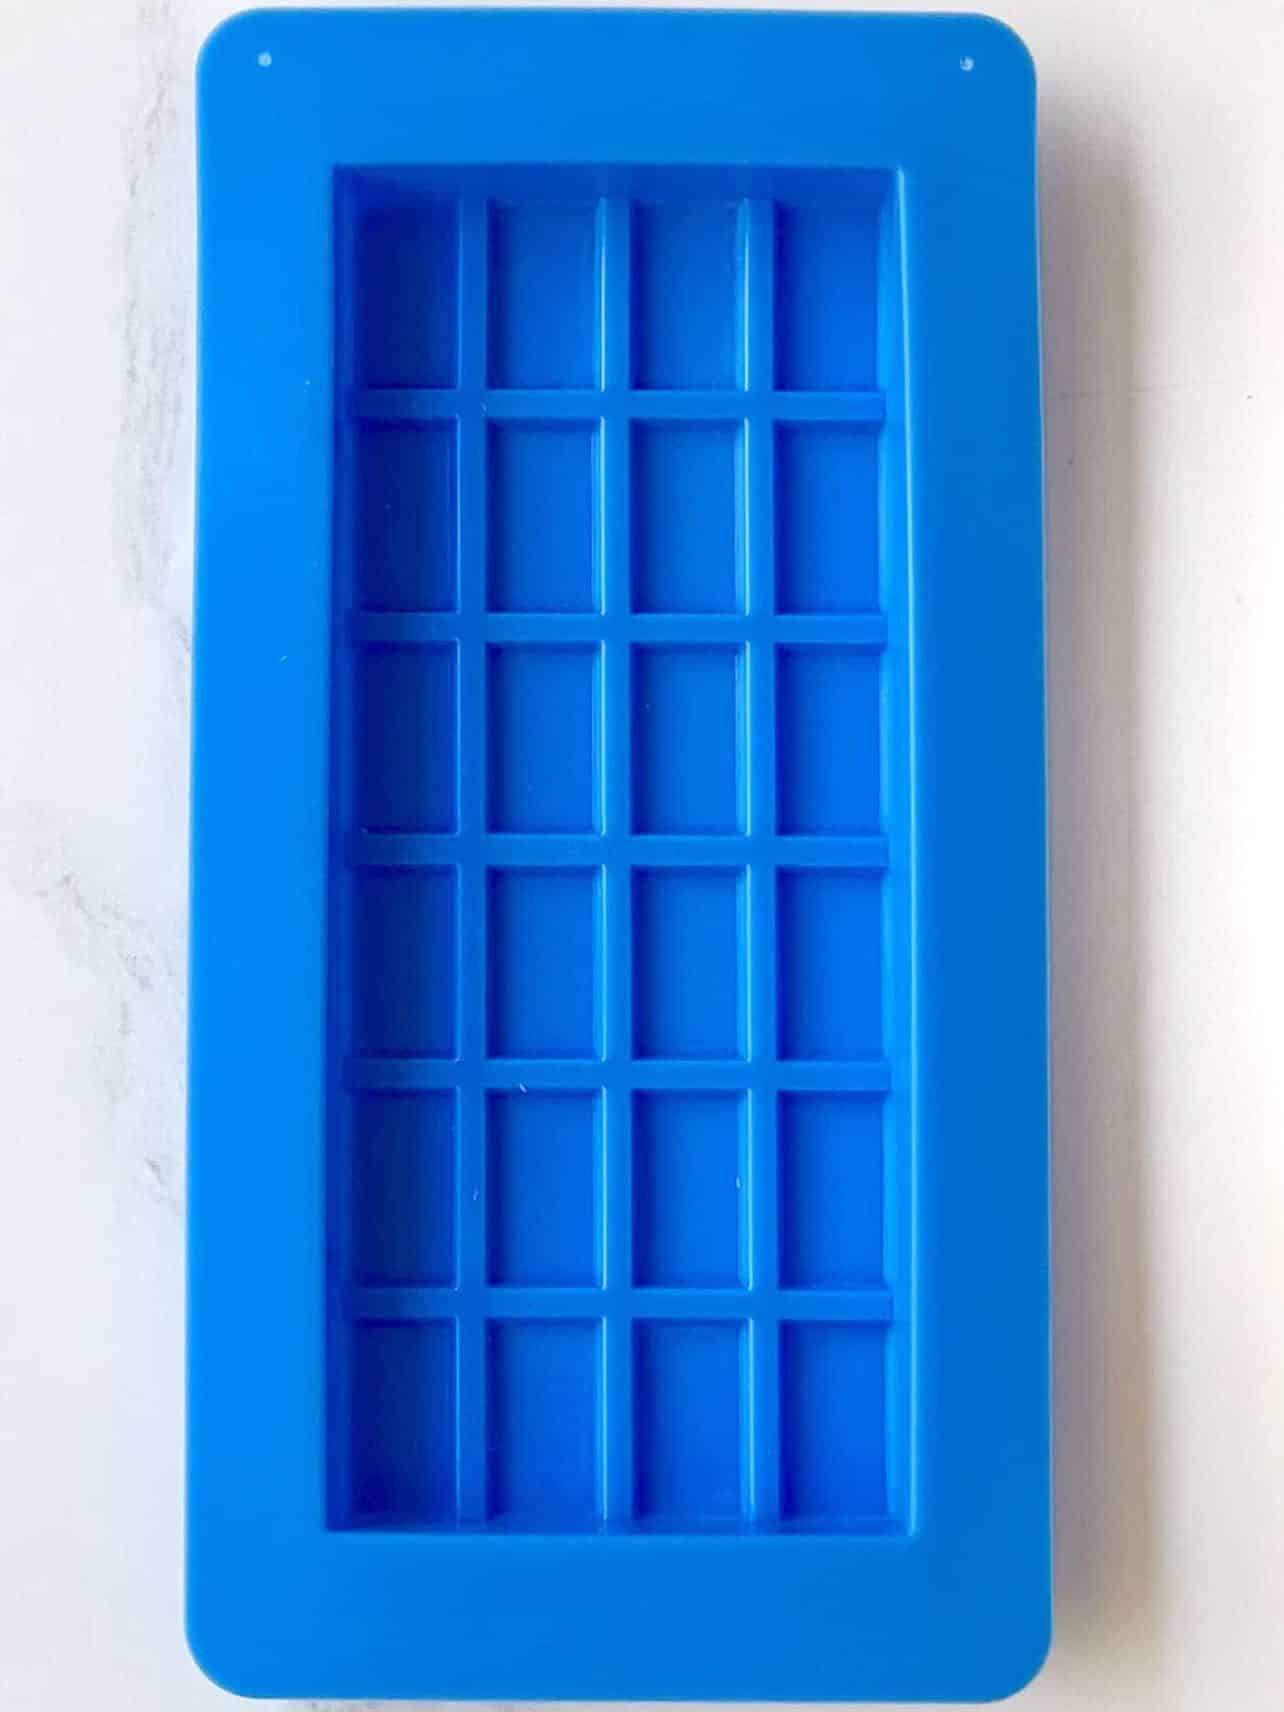
Chocolate Mold
This is the silicone chocolate bar mold I used. I searched high and low for the exact replica the original Dubai chocolatier used for their bars, but I had no such luck. You can find many molds on Amazon now because of the popularity of this bar, I would just recommend you use one that has at least ½-inch (1.27cm) depth or more. Many molds are too thin, and you definitely want adequate room for the filling. This recipe yields 4 bars, so I suggest you buy 2 or 4 molds. I started with 2 molds and alternated my batches.
Tempering Chocolate
Tempering is the process of heating and cooling the chocolate to reach a certain temperature before adding them in molds. It creates that smooth glossy finish you see on candy bars, and it has that snap when you break it. This also prevents it from melting easily. If you've ever eaten any chocolate treat that looked dull in color, perhaps even streaky, and melted in your fingers as you ate it, you had chocolate that was NOT tempered. The taste is the same, since we're not adding additional ingredients to the chocolate.
Don't worry, if you're just casually making this pistachio chocolate bar for you and your family, and you don't care if your chocolate is tempered, simply melt your chocolate slowly and pour it into your mold.
If you do want to try tempering your chocolate and have a thermometer handy, here's a very basic run-down:
- Melt milk chocolate in microwave or over a double boiler. Keep a few small chocolate pieces reserved on the side.
- Once chocolate reaches 113ºF (45ºC), remove it from the heat. Sprinkle in and stir your reserved chocolate pieces until it melts in. Allow chocolate to cool until it reaches 84-86ºF (28-30ºC), then it's ready to use. This is called the seeding method and your chocolate is now tempered.
- If you're using dark chocolate, the temperature goals are slightly different. Heat until it reaches 120ºF (48ºC) and cool until 88-90ºF (31-32ºC).
You can Google more information about tempering chocolate, or watch this short video on one of my favorite creators, Benjamin the Baker, who explains it very well.

Ingredients For Viral Dubai Pistachio Chocolate Bar
- Kataifi: spun pastry dough also referred to as shredded phyllo dough. You can find them in the freezer section at many Mediterranean or Middle Eastern markets, or purchase online.
- Butter: To toast the kataifi. If you use salted butter, omit salt in the recipe.
- Milk chocolate: The original Dubai version uses milk chocolate. It is also incredible with any dark chocolate between 56%-65%.
- Tahini: Thin paste made from ground sesame seeds. The taste is earthy, nutty, and slightly bitter. You can find it at most major supermarkets in the same aisles as the peanut butter. If a brand offers a few flavors, choose the original.
- Salt: Just a pinch to enhance all the flavors and balance with the sweetness.
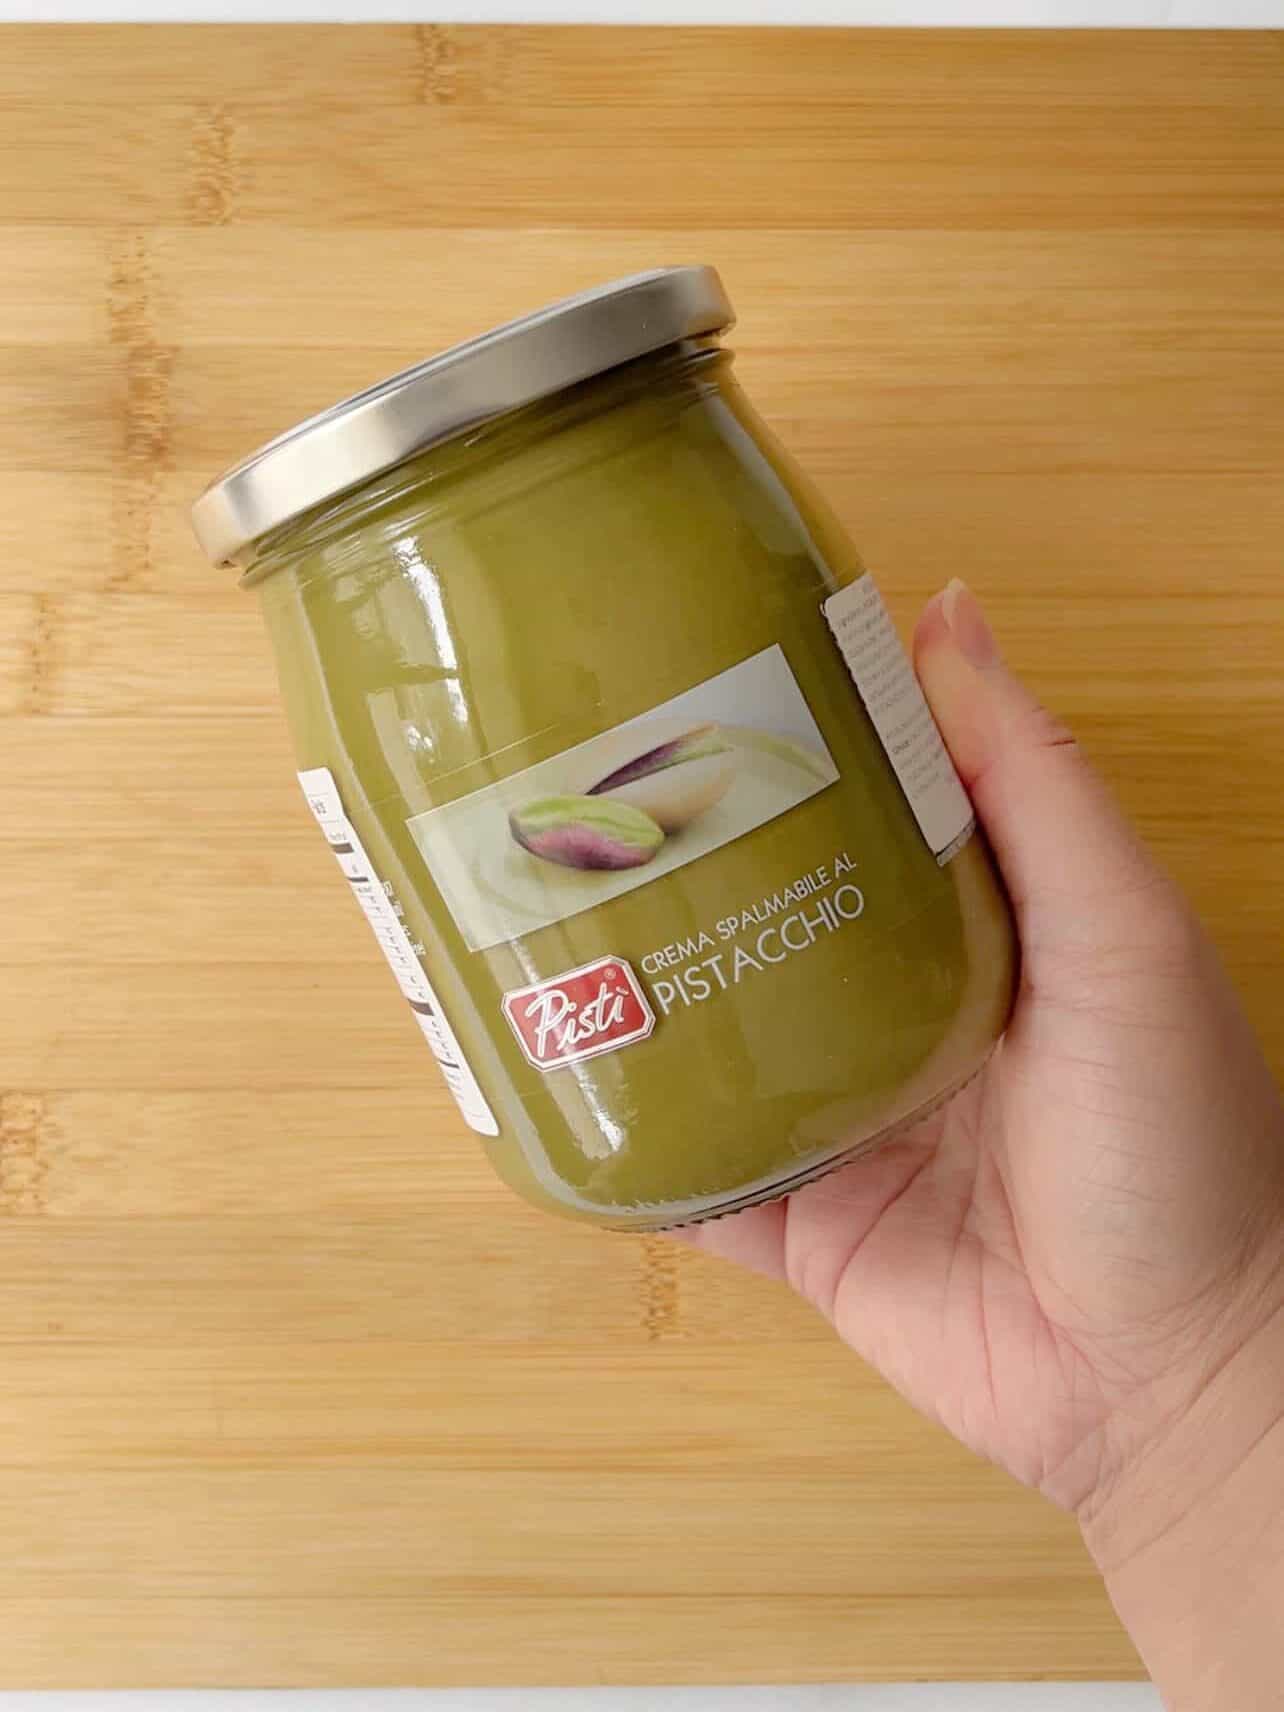
- Pistachio cream: Brands seem to label pistachio cream, pistachio butter, and pistachio paste interchangeably, making it very confusing so please read the ingredients. We are looking for the version that has a spreadable consistency similar to Nutella, containing pistachios, a sweetener, milk powder, and oil. My favorite jar is Pisti Pistachio Cream, and of course always feel free to use homemade.
How To Make The Viral Dubai Pistachio Chocolate Bar
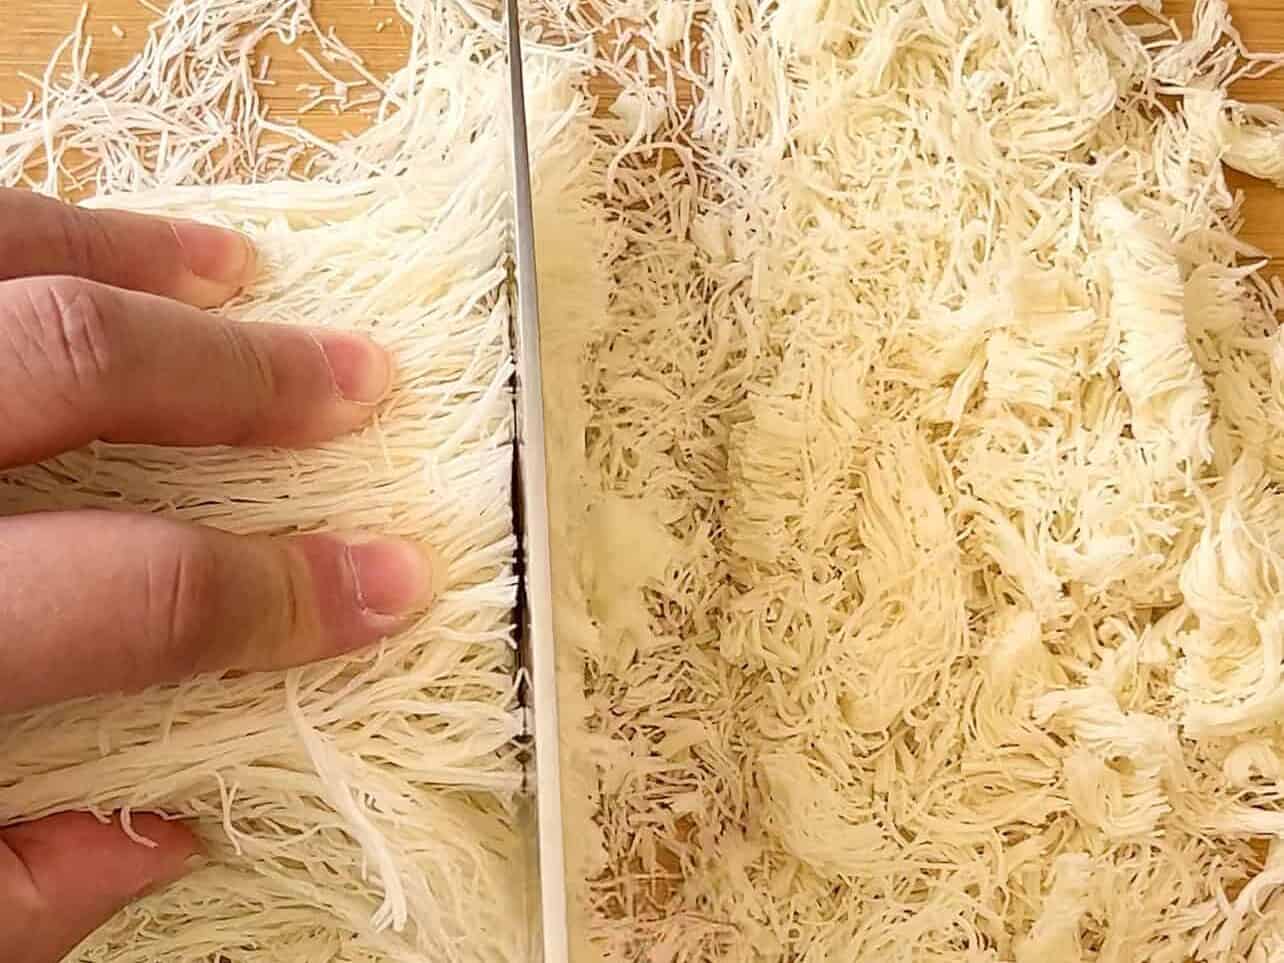
Chop thawed kataifi with a knife, or shred in a food processor.
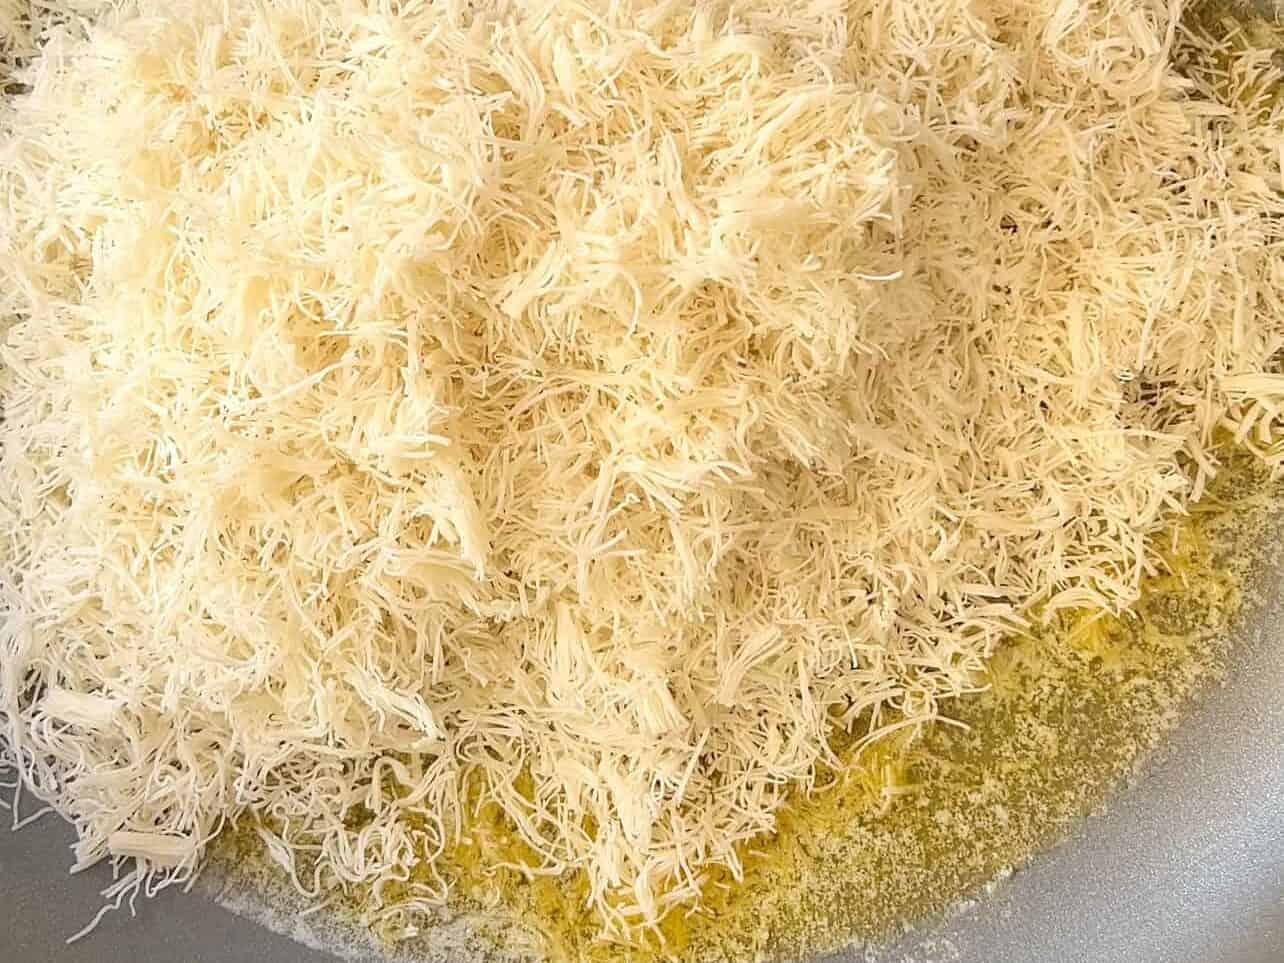
Melt butter in large pan, then add kataifi and stir until toasted. Alternatively, you can toss butter with kataifi in a. bowl, and bake at 350ºF (175ºC) on flat sheet for 30-35 mins tossing halfway.
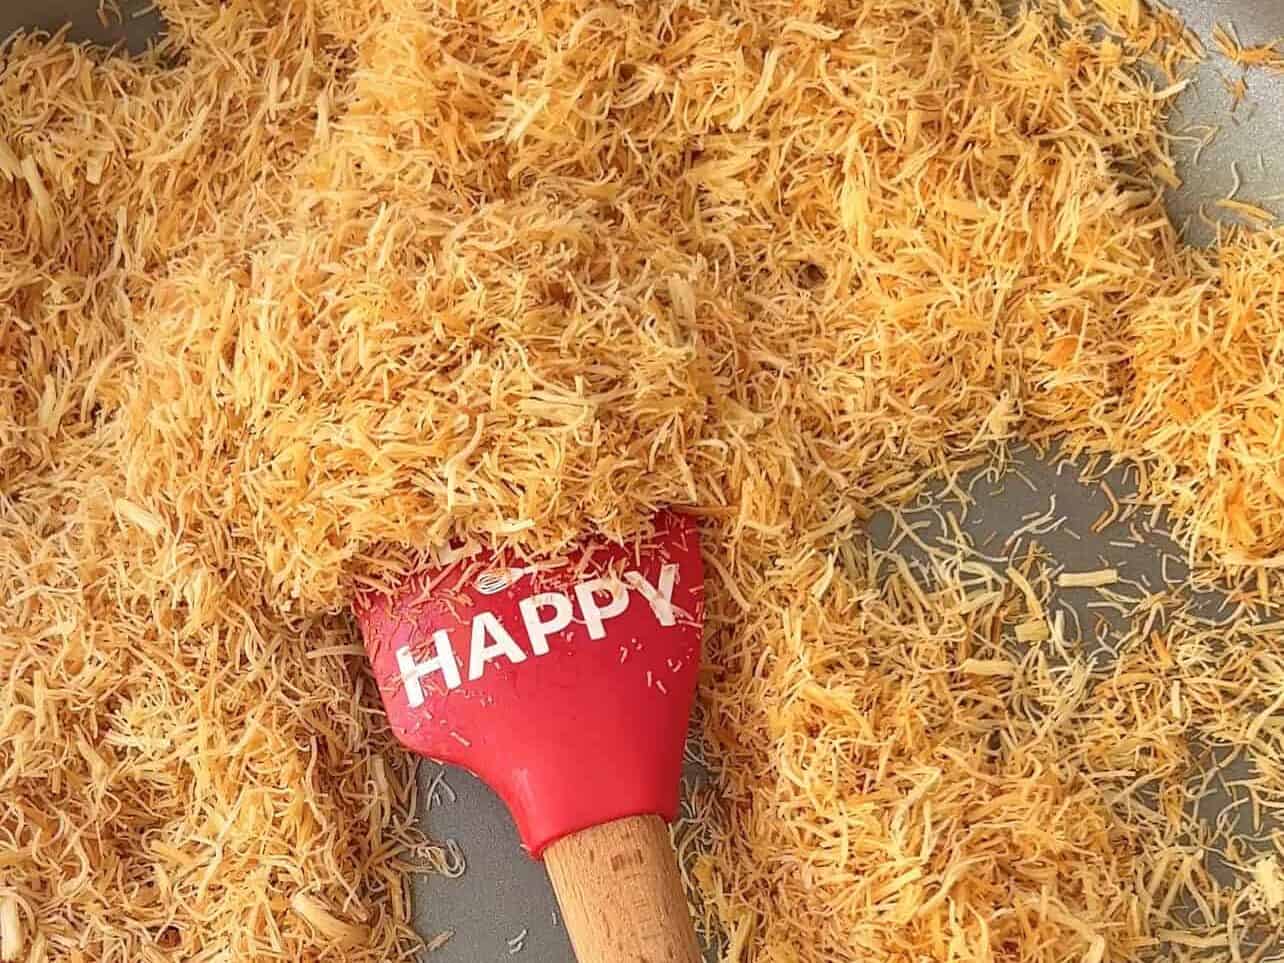
Stir consistency until golden brown. Turn off heat and set aside to cool completely.
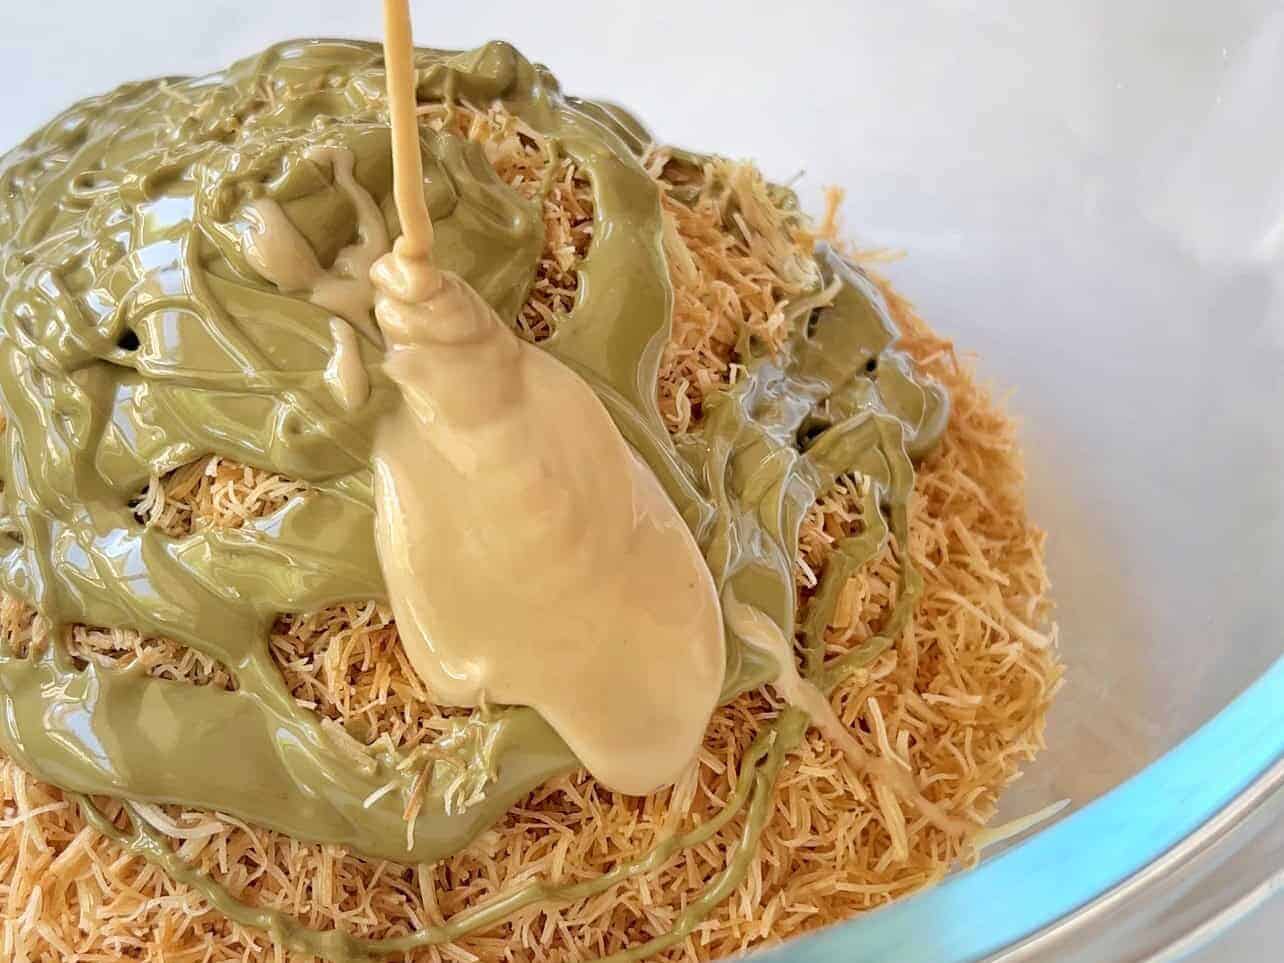
Combine and mix toasted kataifi, pistachio cream, and tahini.
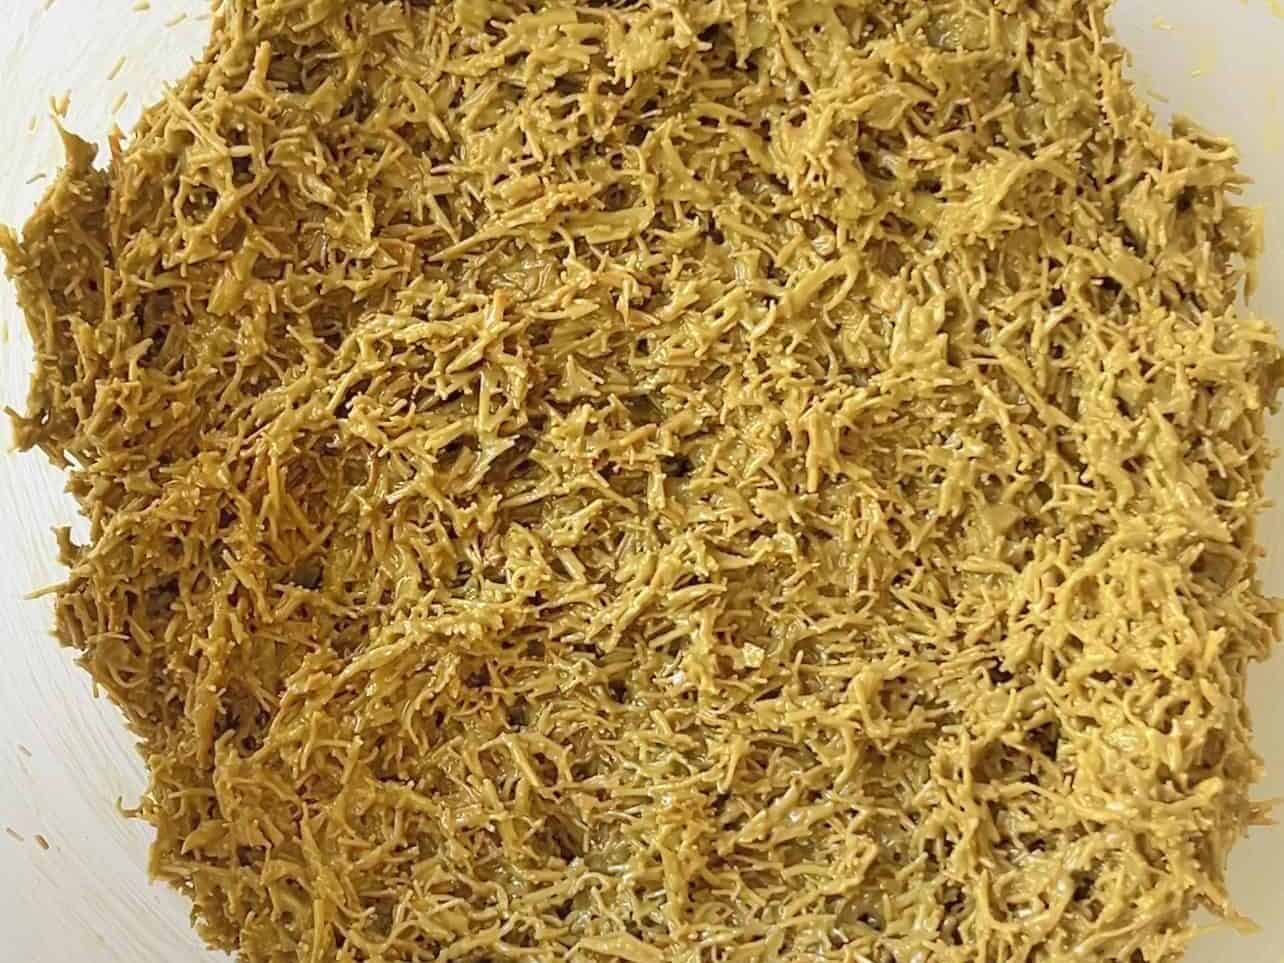
Update: We are adding more pistachio cream, so the filling will appear even creamier than texture in this photo.

Melt and cool chocolate. Please refer to Tempering Chocolate section above if you want to properly temper your chocolate.
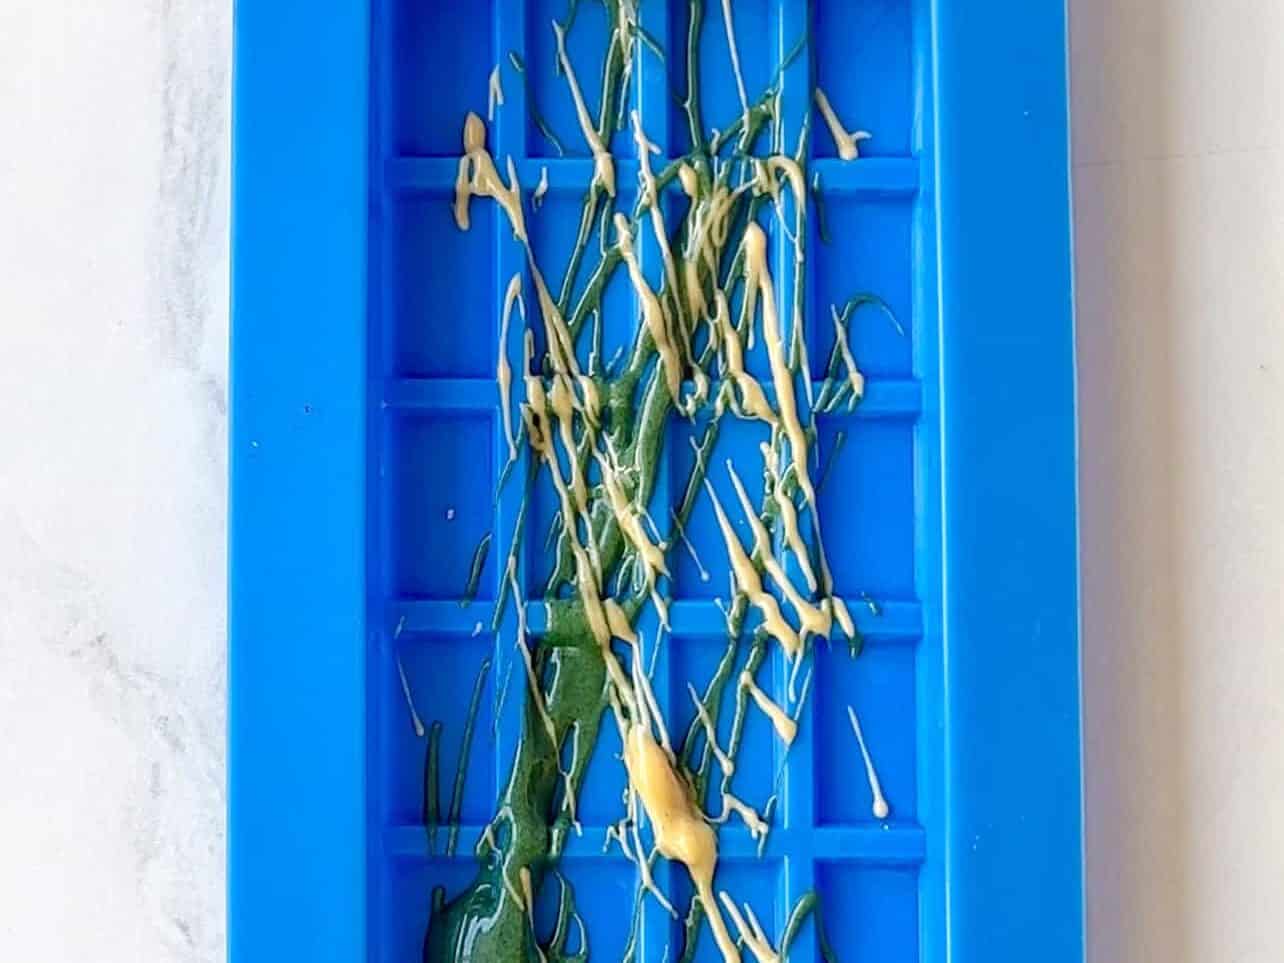
Melt any decorative chocolates and drizzle in chocolate mold. Fridge to set.
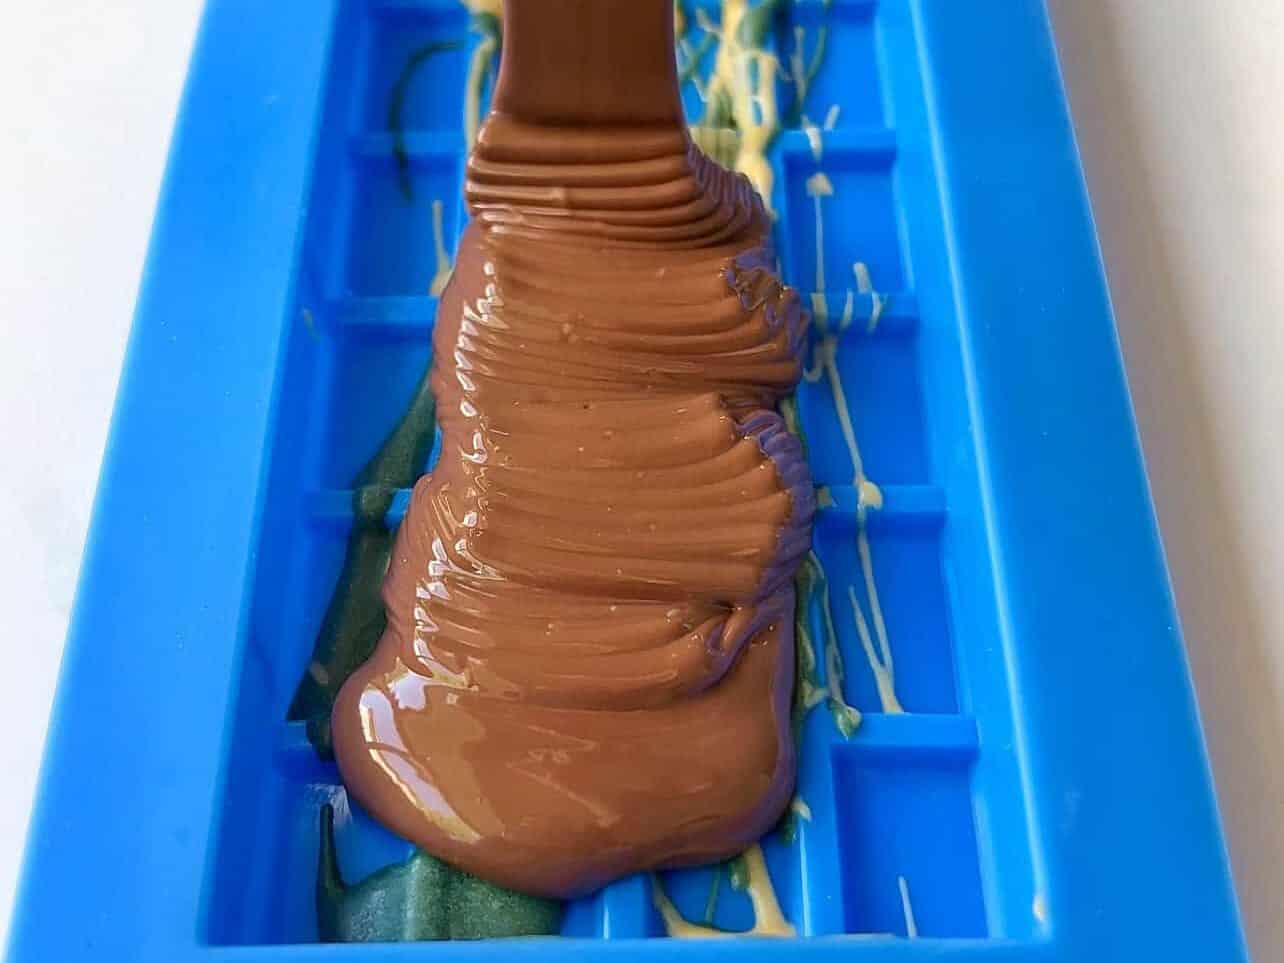
Pour chocolate into mold. Tap mold on counter to get rid of air pockets.
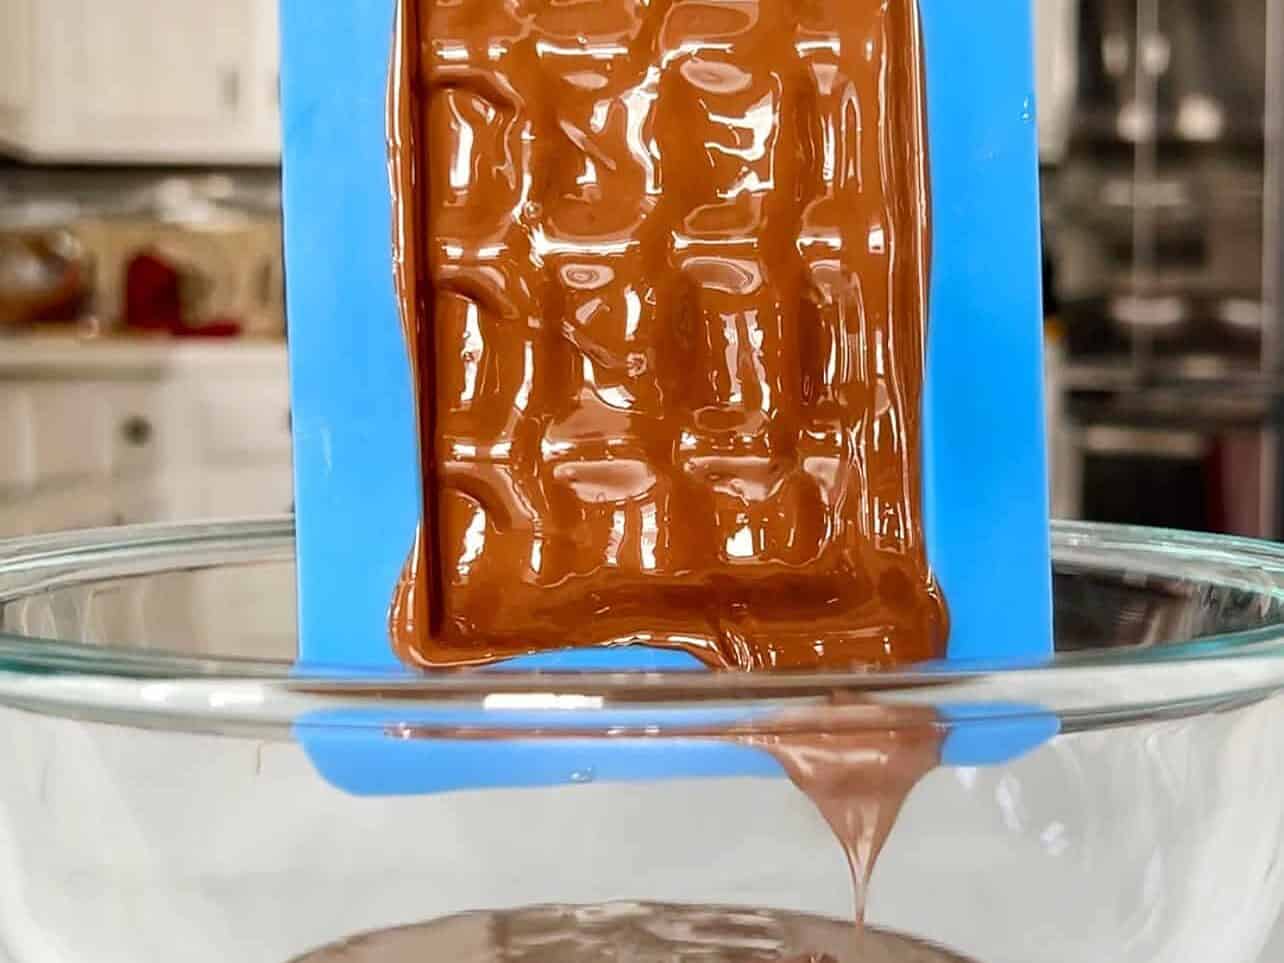
Tilt mold sideways or upside down to allow excess chocolate to drip off. You want an even thin coating of chocolate. Tap mold a few times on the counter to prevent air pockets. Chill in fridge to set.
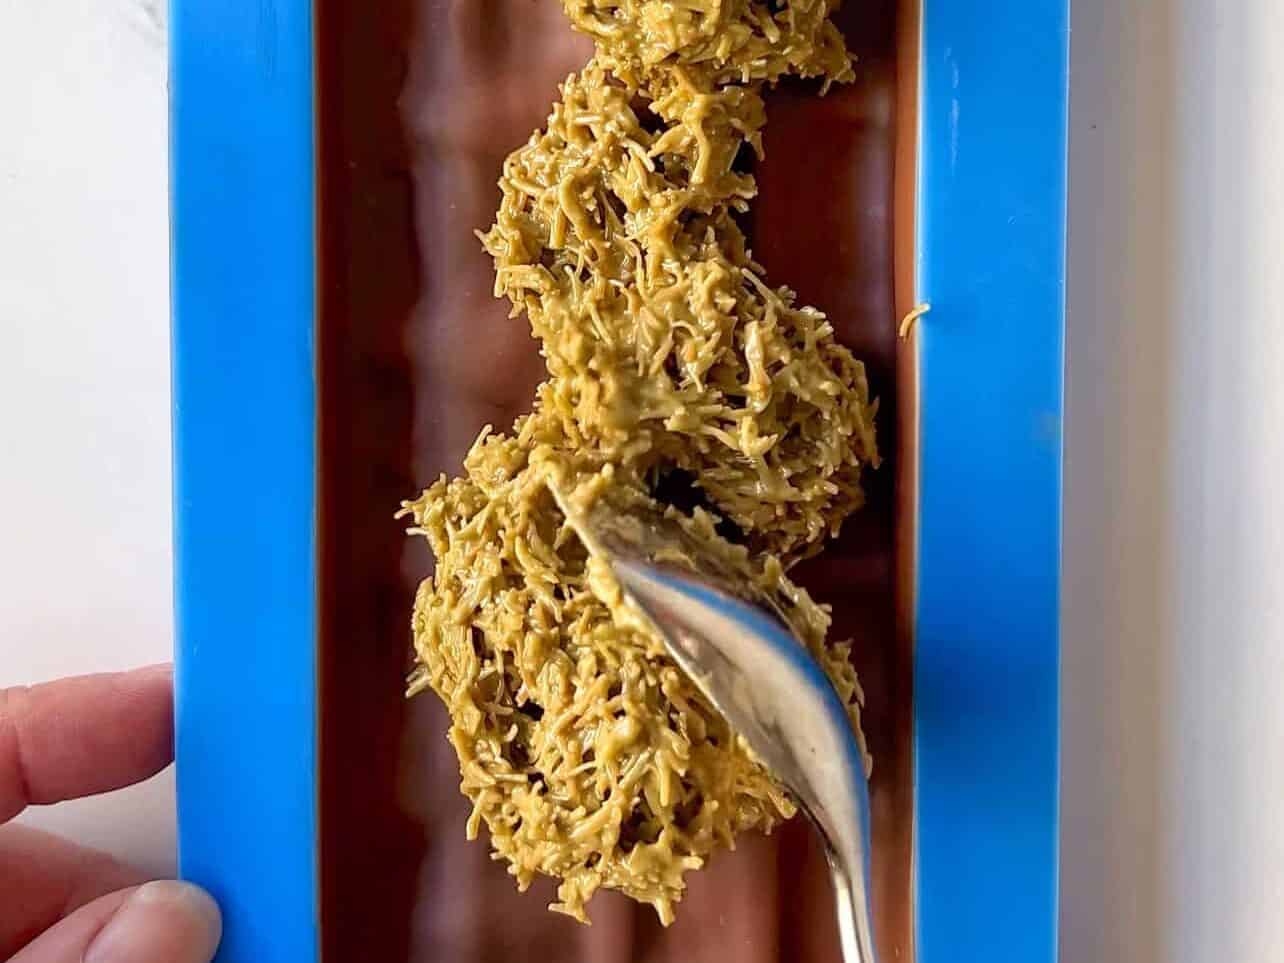
Spoon in filling. Do not overfill. Chill mold once again.

Pour last layer of chocolate and spread evenly to cover filling entirely.

These molds are overfilled. You should be able to smooth out the last layer of chocolate without seeing the filling texture as you do here. Be sure not to leave any gaps. Give molds a few taps on the counter, then chill in fridge.
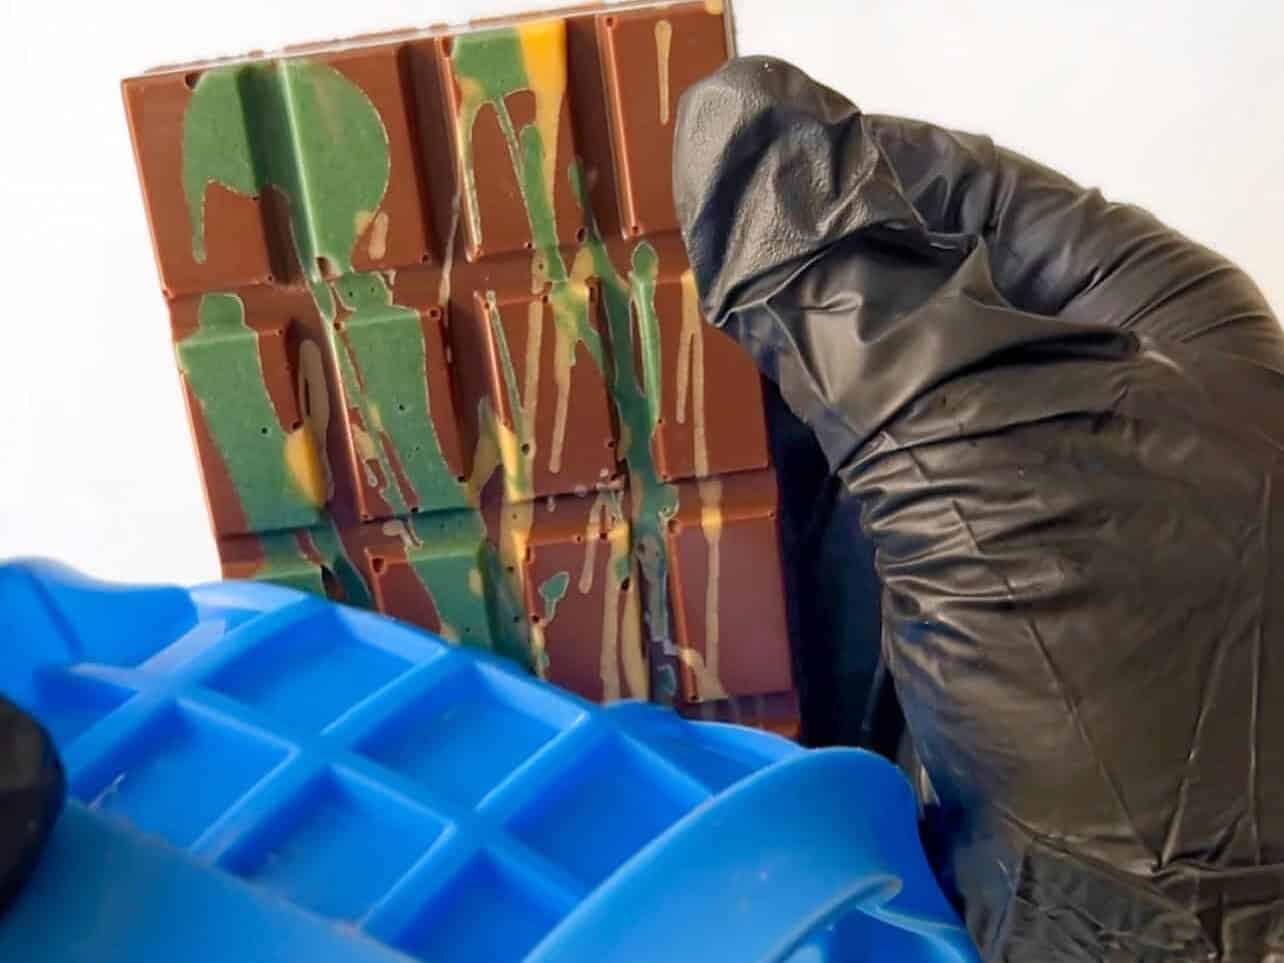
Chill 1 hour minimum to overnight. Unmold carefully by releasing suction off all sides, then gently peeling mold away starting at the corners.
Admire your hard work and enjoy. Leftovers best kept in fridge.
Suzy's Tips For Success
- Use a food processor if you own one: It's definitely the easiest and fastest method to shredding the kataifi. If you don't, you can always chop it with a sharp knife.
- Plan ahead and thaw kataifi: Kataifi is sold and should be stored in the freezer. Plan ahead and thaw on the counter for 1-2 hours. I've never done so, but I'm sure you can also defrost the night using the fridge.
- To maintain crunchiness, cool down toasted kataifi: Many followers wrote in saying their filling didn't remain crunchy. The best tips I can give is add only the recommended amount of butter to pan, toast the kataifi until it's golden and crisp, and set it aside to cool down completely before coating it with the pistachio cream.
- Tempering chocolate: optional, but recommended. Please refer to Tempering Chocolate section above for full details.
- Avoid adding too much filling: Use a spoon or offset spatula to pat down filling evenly all the way to the corners. Look at the mold at eye level, and leave a few millimeters for the final chocolate layer. This will help you spread chocolate evenly and smoothly to seal in the filling.
- Re-melt your chocolate for final coating: Once you've added the filling and ready to seal it with the final chocolate coating, your chocolate has probably set and no longer a pourable consistency. Re-melt it in microwave (or over a double boiler), and temper if desired.
- Chill the bars and remove from mold gently: Chill 1 hour in fridge minimum, 2 hours is ideal. Pull mold sides to release the suction, then gently peel away starting from the corners.
- Prepare your bar in stages: Depending on how many chocolate molds you have, you may have to re-melt (and re-temper) your chocolate - do this as needed. Be mindful of your chocolate temperature and consistency.
How To Store Viral Dubai Pistachio Chocolate Bar
Keep refrigerated. You can store in airtight container in fridge for 7-10 days, or freeze in freezer-safe container or ziplock bag for up to 3 months. Thaw in fridge overnight before serving.
FAQ
I searched high and low for pistachio cream nearby, and ended up having no luck finding it. Many people find it at Costco if you live in Canada or the UK. You can also search specialty Italian markets. I finally ended up buying my pistachio cream jars from Amazon.
Brands seem to label pistachio cream, pistachio butter, and pistachio paste interchangeably, making it very confusing so please read the ingredients. We are looking for the version that has a spreadable consistency similar to Nutella, containing pistachios, a sweetener, milk powder, and oil. I tried a few different brands, and my favorite is Pisti Pistachio Cream. It seems to be every creators' favorite, I rarely see anyone online use a different jar.
I did find a jar of pistachio butter at Walmart that was surprisingly (and suspiciously) almost 5 times cheaper than the Pisti brand. I have to say it was tasty, however the texture and consistency is much more gritty. Will it work for these chocolate bars? I'm pretty sure they will, since the filling is crunchy. Would it work for my pistachio tiramisu where I'd like the filling to be ultra-creamy? Probably not.
If you want a vegan option, I have tried this vegan pistachio cream. I prefer the other two options, but it does the job if you want to make your chocolate bar dairy-free.
Be sure to add only the recommended amount of butter to pan, toast the kataifi until it's golden and crisp, and set it aside to cool down completely before coating it with the pistachio cream. I've done this for all my batches, and the filling has remained crispy crunchy for weeks.
Don't worry, I feel many people who have created this bar simply melted their chocolate and poured it into their mold without tempering. I understand it's a process many of you don't want to bother with, and that's okay! I'm just here to give you all the information I've learned. Not tempering your chocolate will still be just as delicious. However, your chocolate may bend instead of snap, and have a dull finish. It may melt between your fingers, but hey - your kids may not think that's a bad thing! Tempering it will prevent it from melting quickly and give you that shiny candy bar gloss.
Unless you can make or find gluten-free phyllo dough for the filling, I'm afraid no.
Yes. Use vegan butter and dairy-free dark chocolate. Amazon also has a vegan pistachio cream available.
You Might Also Like...


Equipment
- 2-4 chocolate molds
- thermometer optional
- small offset spatula optional
Ingredients
- 3 tablespoon unsalted butter
- 8 oz kataifi
- 3 tbsp tahini
- ¼ teaspoon salt
- 16 oz milk chocolate bars roughly chopped
- 10½ oz pistachio cream
- any color candy melts for decoration, melted optional
Instructions
- Remove kataifi from freezer to defrost for 1-2 hours. This will make chopping it easier, or shred in a food processor. Melt butter in large pan on medium heat and add kataifi, toasting it for 8-10 mins or until golden brown. Transfer to large mixing bowl and allow to cool completely.3 tablespoon unsalted butter, 8 oz kataifi
- Add pistachio cream, tahini, and salt to cooled kataifi. Mix until well combined and set saide.3 tablespoon tahini, 10½ oz pistachio cream, ¼ teaspoon salt
- Optional: melt any decorating candy melts in small bowls using the microwave. Drizzle desired decorations in chocolate mold, and chill in fridge for 10 mins.any color candy melts for decoration, melted
- Melt the milk chocolate in a large bowl also using the microwave, or alternatively over a double boiler. If you wish to temper your chocolate, reserve a small handful of chocolate and melt the rest until it reaches 113℉ (45℃). Remove bowl from the heat and stir in the reserved pieces until it melts in. Cool chocolate until it reaches 84-86℉ (28-30℉).16 oz milk chocolate bars
- Pour milk chocolate into mold. Tilt mold sideways or upside-down to allow excess chocolate to drip off back into chocolate bowl. We're trying to layer a thin even coating. You can also use an offset spatula to scrape off all extra chocolate. We will be re-melting the chocolate bowl, so avoid wasting any! Once you finish the first layer, tap mold on the counter a few times to allow chocolate to settle and to get rid of any air bubbles. Transfer back to fridge for another 10 mins to set.
- Spoon filling into chocolate mold and spread evenly. Be sure to leave room for the final chocolate layer - do not overfill. Chill mold in fridge for 10 more mins.
- Re-melt (or temper) milk chocolate. Then, pour over filling and spread evenly to seal in the filling. Tap mold again gently a few times on counter to create a smooth finish. Chill mold in fridge for 1-2 hours minimum before enjoying. Carefully detach finished bars from mold. Keep refrigerated.
Looking for other recipes like this?
Shannon says
I made this recipe and they turned out beautifully. I did have trouble with candy melts for the drizzle. Once I added my food coloring it would never become the right consistency for drizzling so I left it out. Other than that they turned out really good and everyone keeps asking when I’m making them again
Suzy says
I'm so glad you were happy with them, I bet they came out beautifully! Be sure you add oil-based food coloring. I made the mistake of using gel food coloring at first, which doesn't work with melted chocolate or candy melts. Thank you for trying the recipe, Shannon! I appreciate so much you taking the time to write in.
Carla says
I’ve been craving this chocolate bar for a long time now and my impatience got to me so I decided to finally try to make my own with your recipe. I used shredded and dried kadaifi and toasted it following your instructions and I think it still has the same outcome if I were to use the frozen one.
Question! What should or could I do with leftover pistachio-shredded phyllo filling? I’d eat it but I think my blood sugar would spike 😂 Thank you for your easy to follow, delicious recipe, Suzy!
Suzy says
Hi, Carla! I'm so glad you tried my recipe. I store the leftovers in an airtight container and snack on it as dessert! I melt a small amount of chocolate over it and eat it with a spoon!
Matilda says
This recipe is perfect! Im so happy I can make this at home anytime I want. It is surprisingly simple to make and makes a good amount too. Recently, a local restaurant sold some commercially prepared Dubai chocolate bars and I tried it out of curiosity and it was nowhere near as good as this recipe. Thank you Suzy for this fabulous recipe!
Suzy says
That makes me so happy, Matilda! Yes, this Dubai chocolate bar is sold all over the place now. I'm so happy you tried this recipe - thank you so much!