
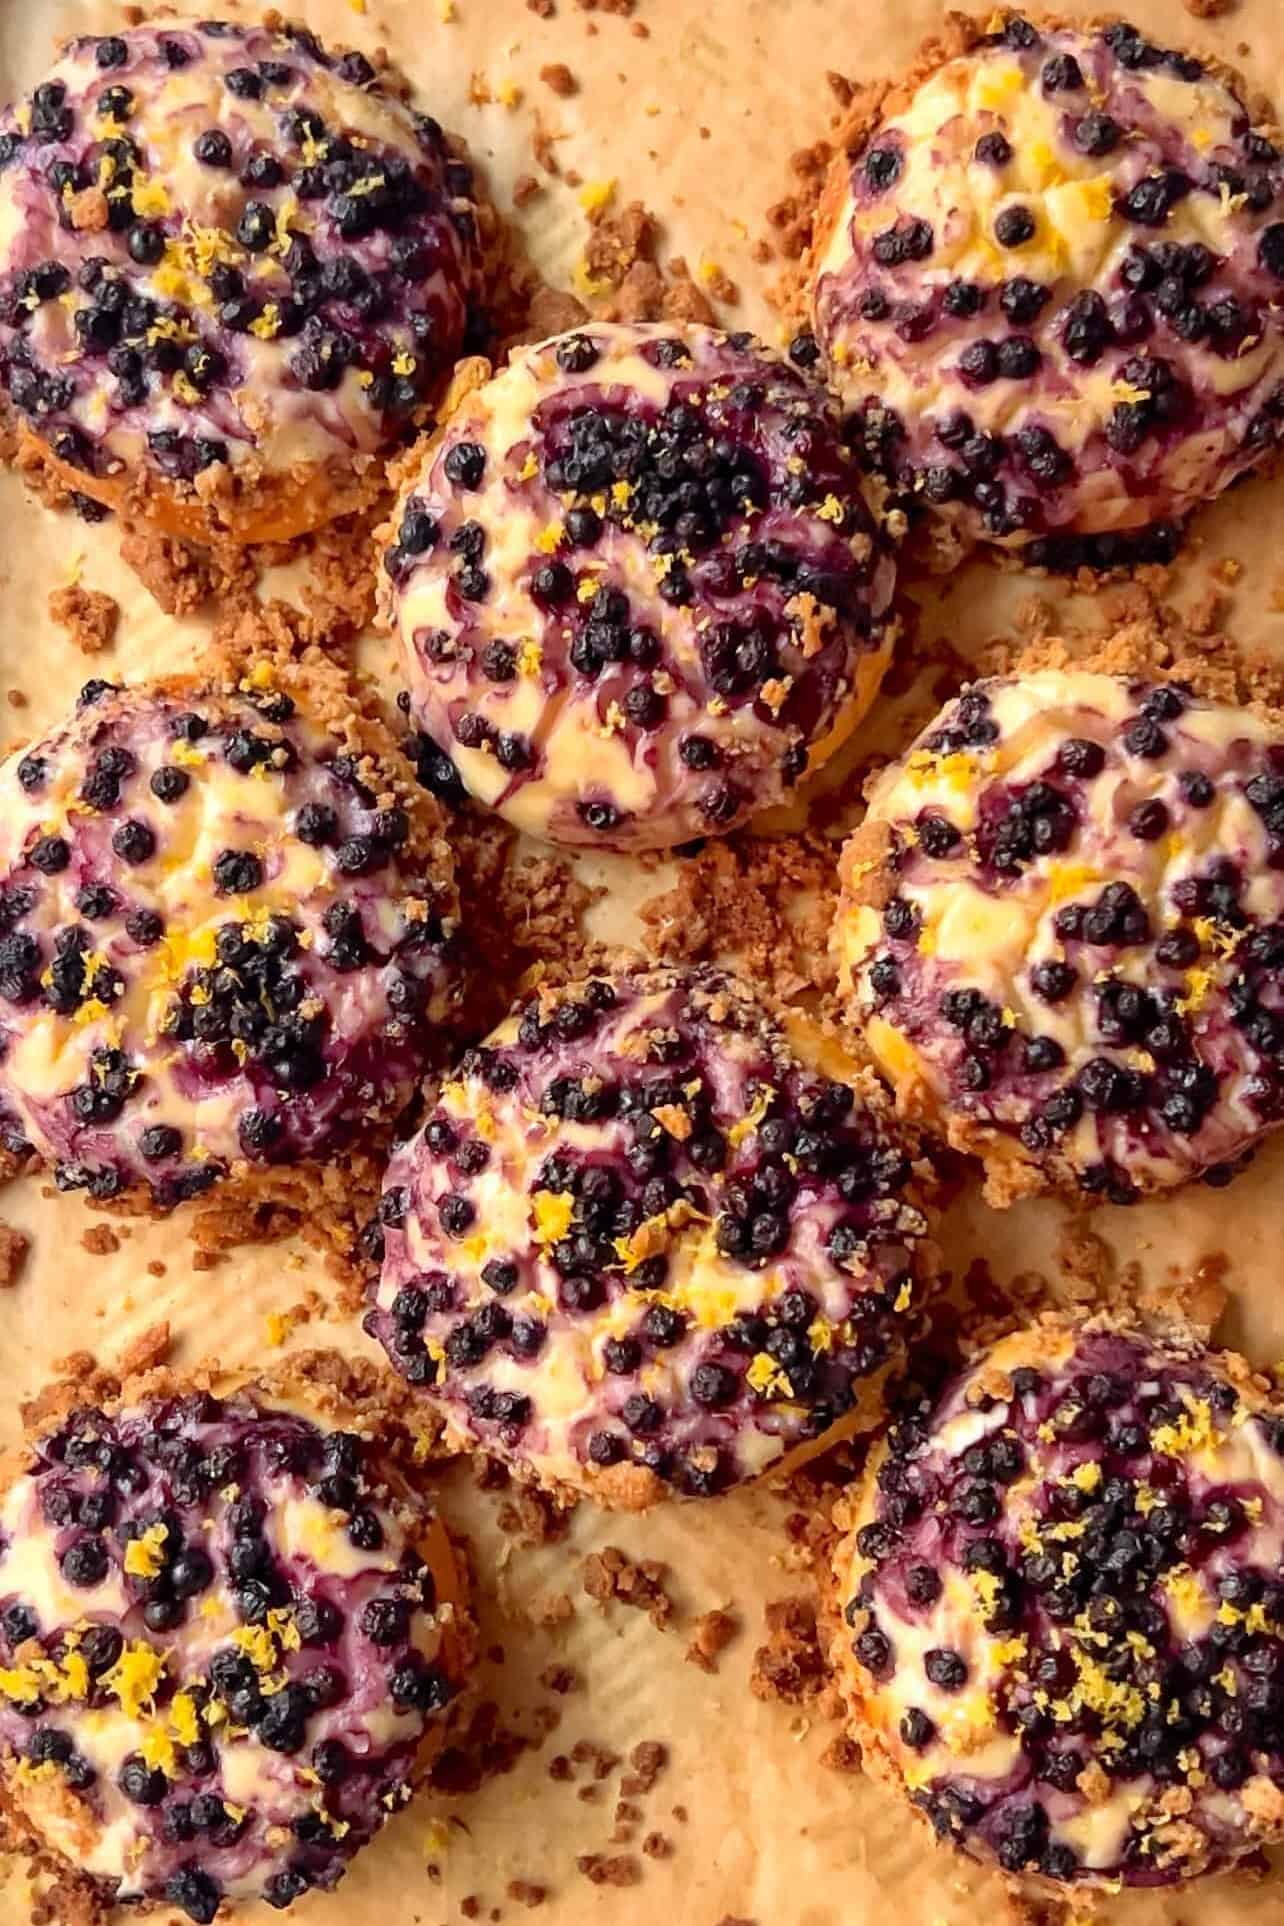
These Blueberry Lemon Cheesecake Brioche Rolls will make you question if you're eating breakfast or dessert - and honestly, who cares? Imagine a classic creamy blueberry lemon cheesecake and a bakery-style soft brioche had a delicious little love child - 100% worth it and absolute heaven.
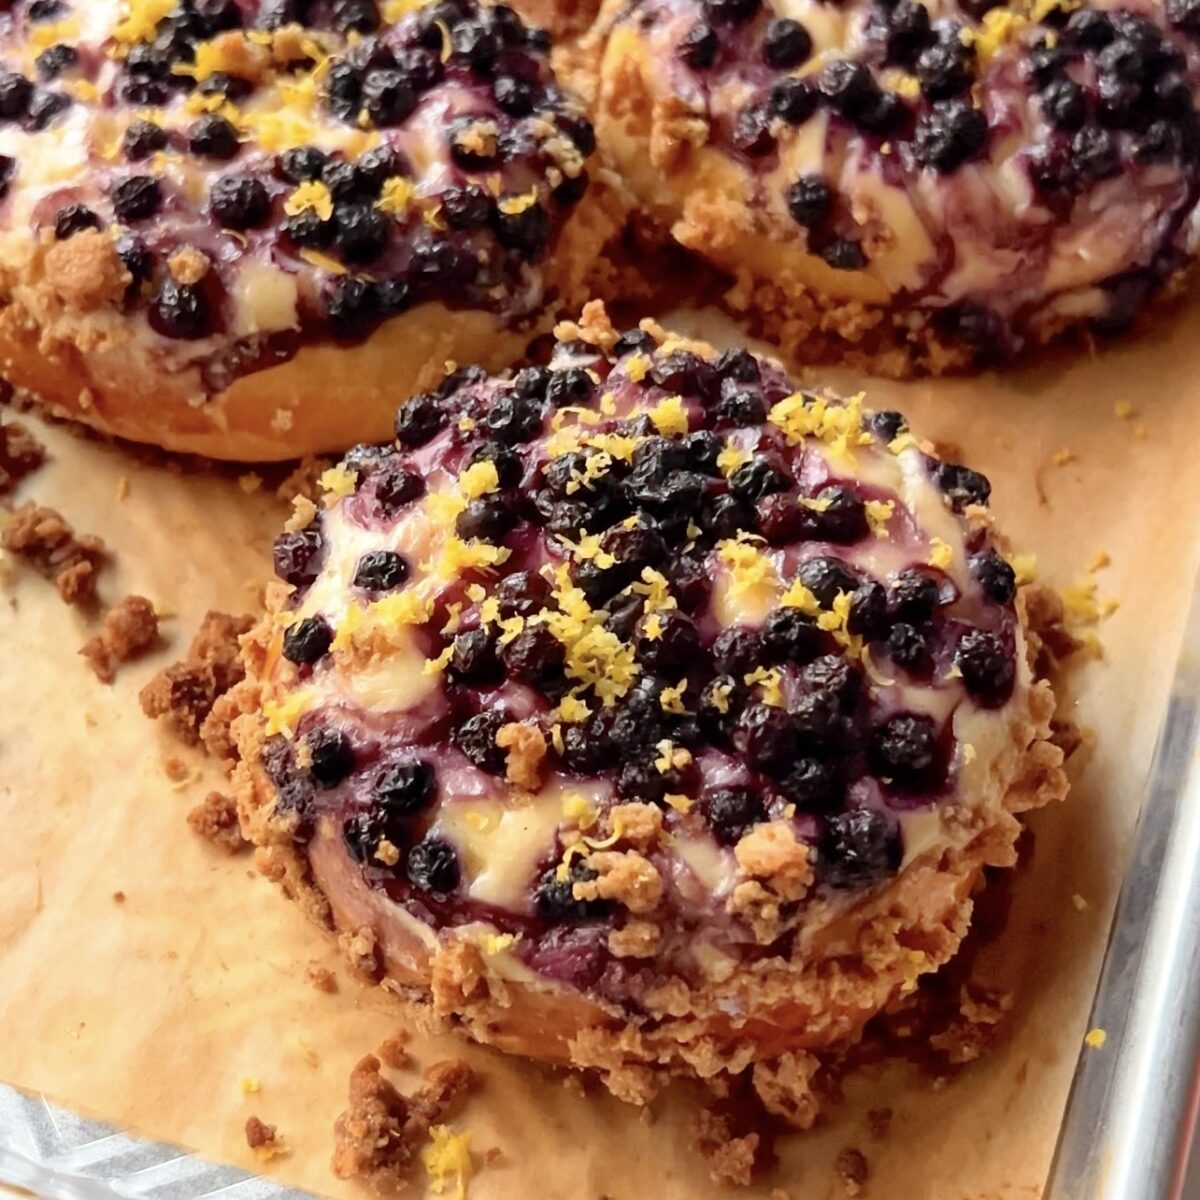
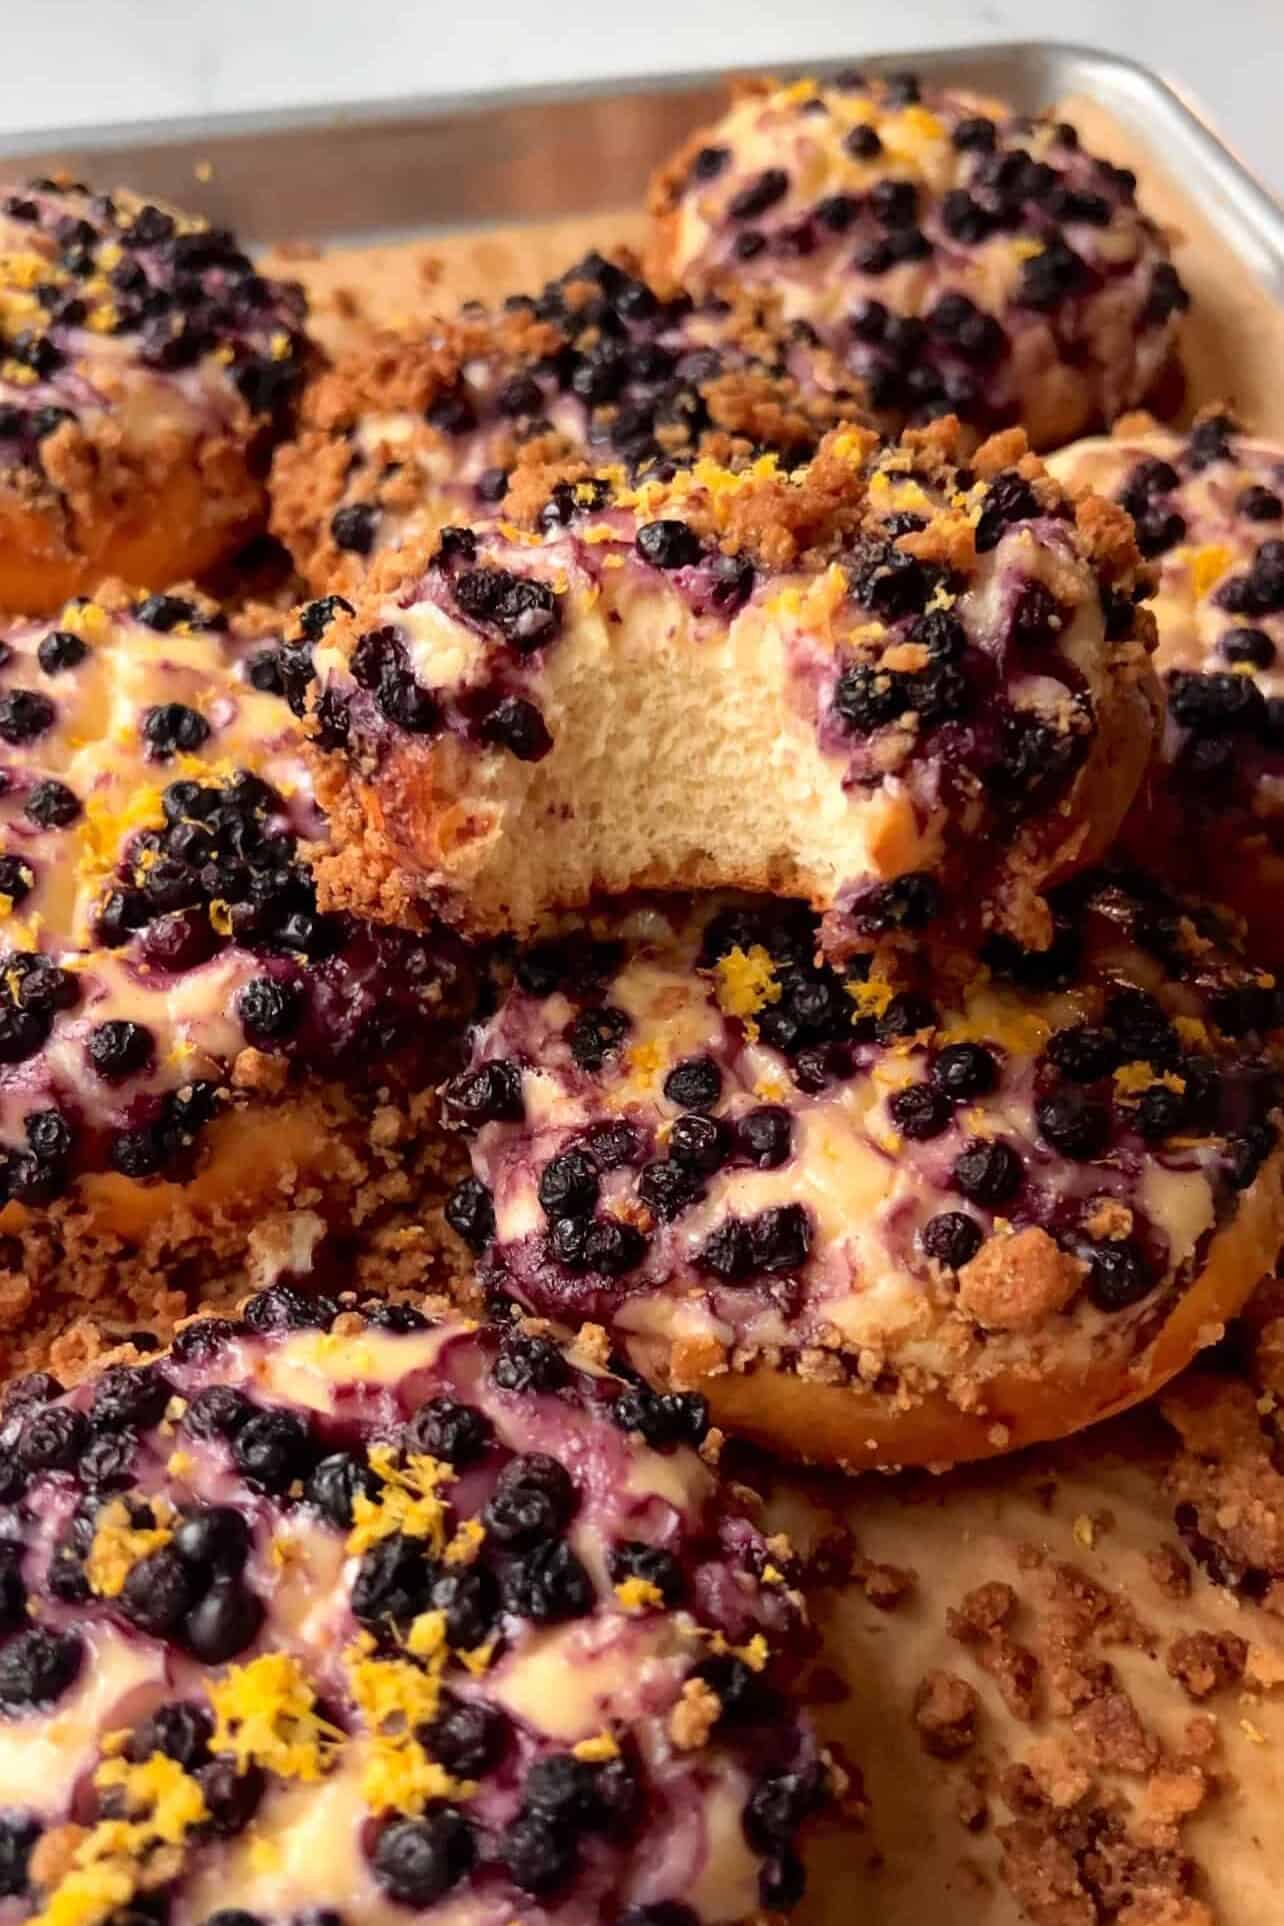
Pillowy brioche, a tangy-sweet cheesecake center, bursts of wild blueberries, an unapologetic sprinkle of buttery graham-cracker crumble, and finished with a pop of lemon zest to keep it bright. These Blueberry Lemon Cheesecake Crumble Brioche Rolls look and taste like the kind of fancy danish you'd pay way too much for at a viral trendy bakery. But here's the best part - not only are they incredible, but you sprinkled them with bragging rights. And THAT, my friend, takes them completely over the top. *wink*
Looking for more bright berry and lemon treats? Try my Starbucks Copycat Lemon Loaf, Moist Lemon Raspberry Cupcakes with Lemon Cream Cheese Frosting, and one of my more popular recipe the 4-Ingredient Lemon Posset Brûlée!
Jump to:
Explaining Tanzhong And Why You Should Use It
If you've ever torn into a cloud-like slit oof Japanese milk bread and wondered how it stays so soft, one of the methods to achieve this is the tangzhong method. The process is easy and simpler than you think - cook a small amount of flour and liquid from the recipe into a thick gel-like paste, then add it back into your dough. This little step allows the starch to soak up more moisture, which leaves you with extra fluffy bread that stays fresher longer. Translation: you're now making bakery-level bread that are still amazingly airy on day three.
Is this step optional? Yes. Does every recipe need it? No, especially if you bake up batches that don't last long and devoured the same day. But once you try tangzhong, you'll see the benefits instantly and want to use it in every future bread recipe.
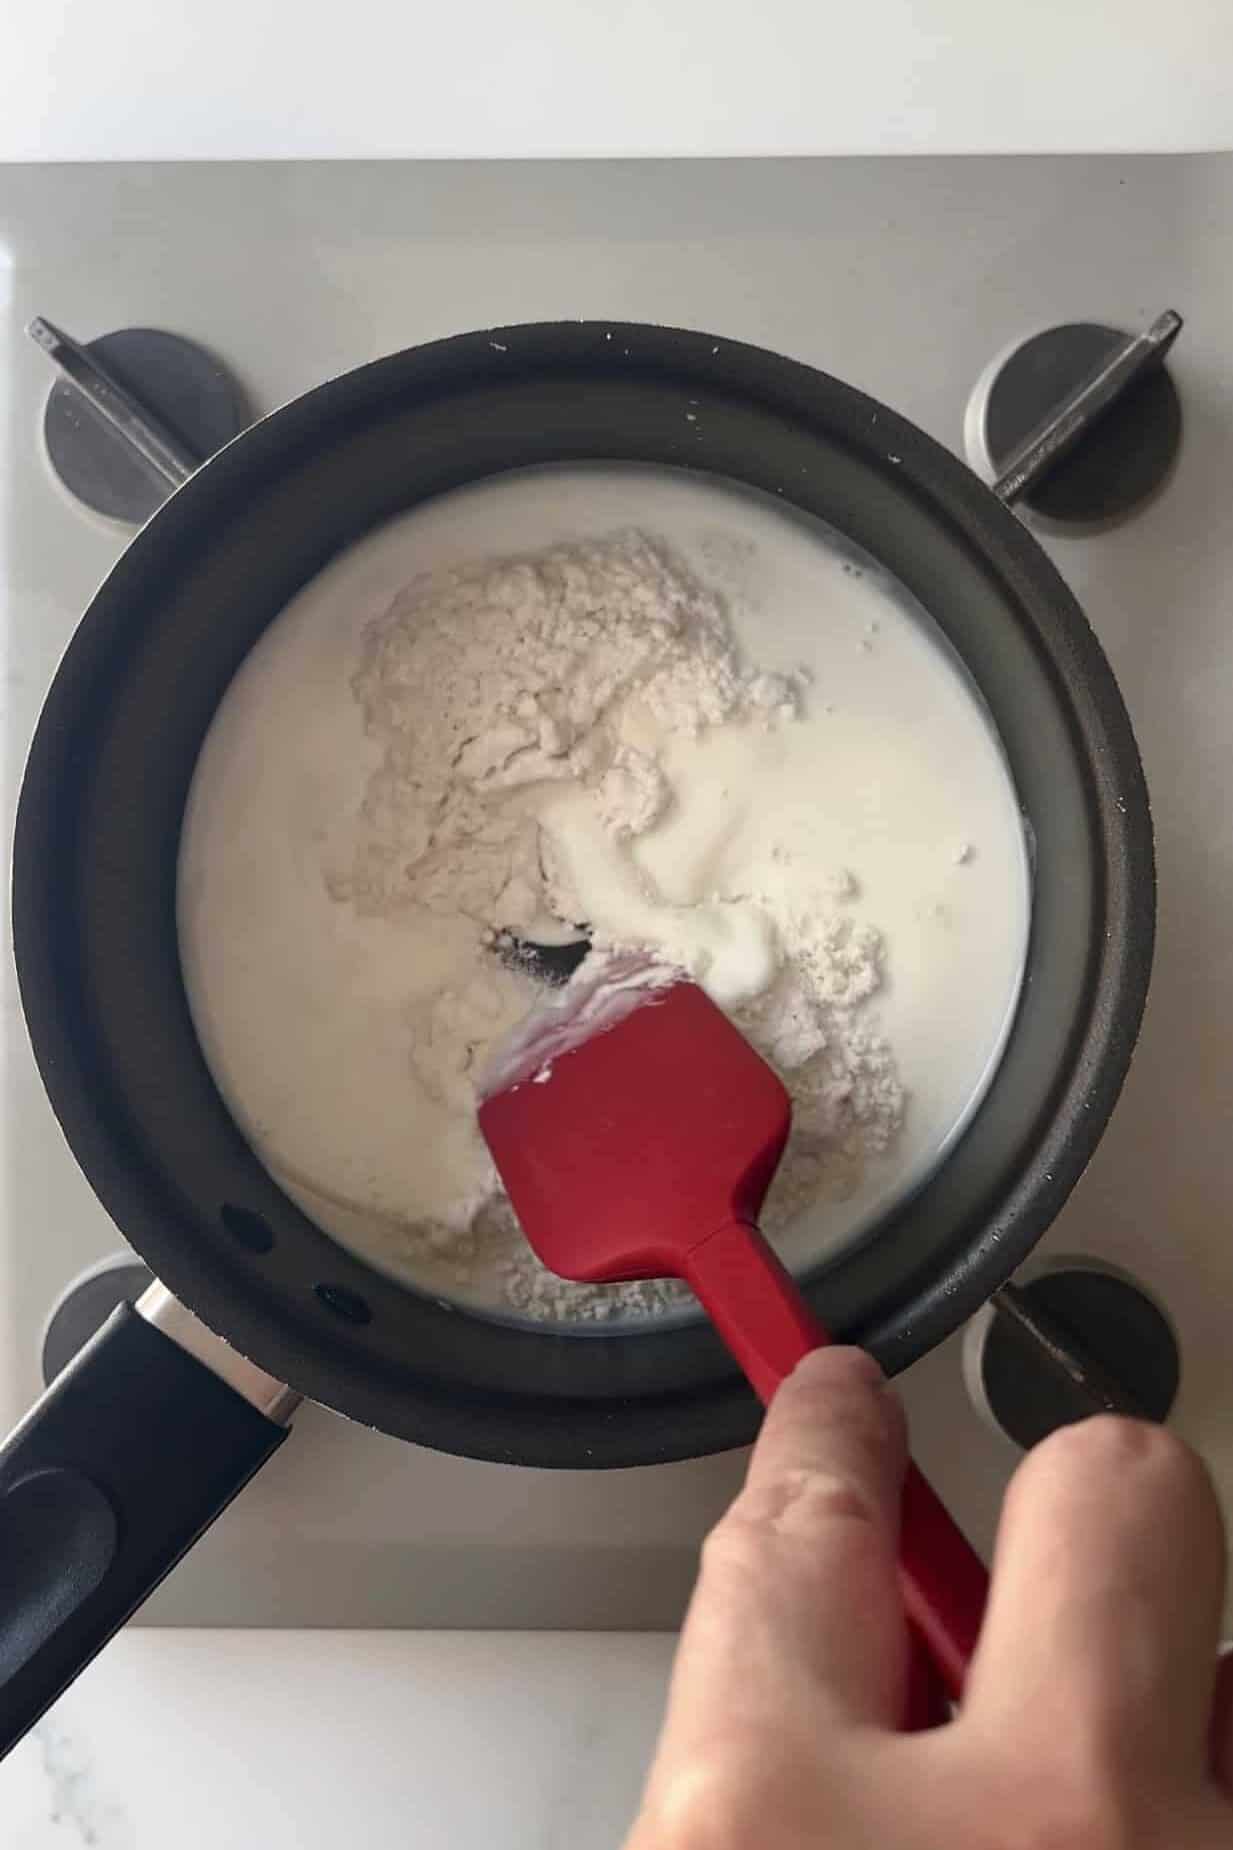
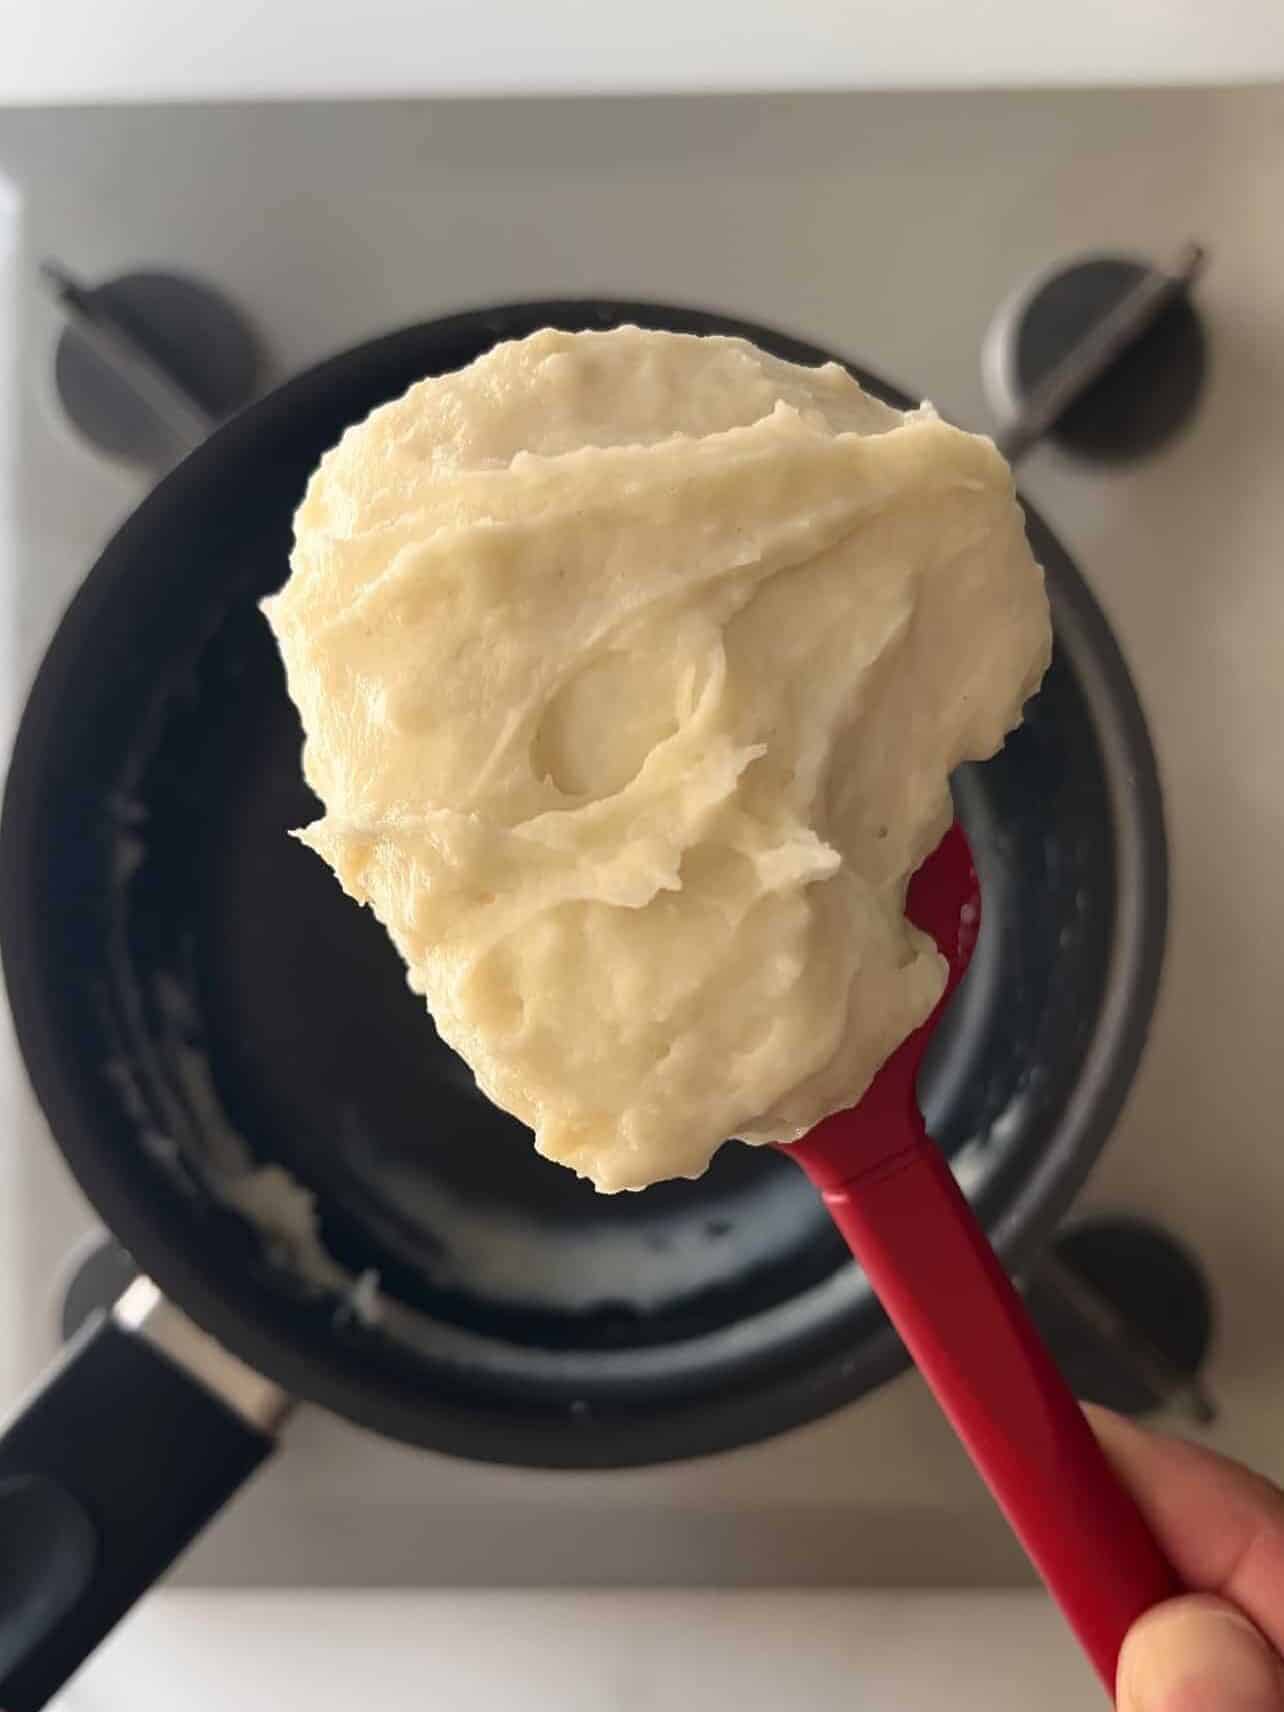
Most recipes will specify the amount of flour and liquid to make your tangzhong paste - typically 2½ - 3 tablespoon of flour and 5 times the amount of liquid by weight. The process is simple - stir both in a small saucepan on medium-low heat until it turns into a thick gel-like paste. The consistency is very similar to creamy mashed potatoes.
Can I incorporate tangzhong with other bread recipes? Yes, absolutely! Make sure your recipe states your flour and liquid needed in grams (or ml). Take out 20g of the flour and 100g (ml) of the liquid from the desired recipe - that's it! Once you cook the tangzhong, allow it to cool slightly then add the entire paste back into the recipe and proceed with all the other dough ingredients as normal - minus what you subtracted for the tangzhong. Remember: the tangzhong is part of the recipe. It is NOT extra flour and liquid added in.
Which breads is tangzhong not necessary? Tangzhong is best for soft enriched breads that you want to remain tender, such as brioche, milk breads, sandwich loaves, and cinnamon/dinner rolls. You can skip it when making leaner loaves such as sourdough, baguettes, or any breads you intend on freezing.
Key Ingredients You'll Need
- Instant dry yeast: Brioche dough naturally requires longer proofing times, so I recommend using instant dry yeast instead of active dry yeast for its faster rise. If you only have active dry yeast available in your area, use the same amount indicated and activate or bloom it first - combine warm milk, yeast, and a tiny of sugar from the recipe and mix in a small cup or bowl. Allow it to sit for 10 minutes - it should show activity with foam and bubbles. Add this with the rest of your dough ingredients and proceed with next steps. If you see no yeast activity, discard and buy fresh yeast.
- All-purpose flour: Feel free to use bread flour (or a mix of both!). Typically classic brioche uses bread flour for its high protein content, however, I wanted to achieve a softer slightly less chewy crumb for these rolls so we opted with all-purpose flour.
- Milk: You can use various milks, but whole milk works best for richer flavor. Feel free to use alternative milks such as soy, almond, or oat milk but I highly recommend using similar fat content versions. Avoid using 2% or skim milk as the lack of fat may negatively impact the final bread texture.
- Eggs: Unless a recipe specifies, use large eggs.
- Butter: Unsalted. If you enjoy using salted butter, adjust the salt added into the recipe to your preference.
- Cream cheese: Softened at room temperature. Philadelphia brand seems to be the creamiest.
- Sour cream: You can also swap in plain yogurt, Greek yogurt, or buttermilk.
- Lemon/Zest: Soak fresh lemon with baking soda and water, then rinse thoroughly before zesting and juicing.
- Vanilla bean paste: Paste packs a lot of flavor in this filling, but use vanilla extract or vanilla bean interchangeably.
- Graham crackers: Use all-purpose flour if you prefer making classic crumbles.
- Salt: Coarse kosher works great for most baking.
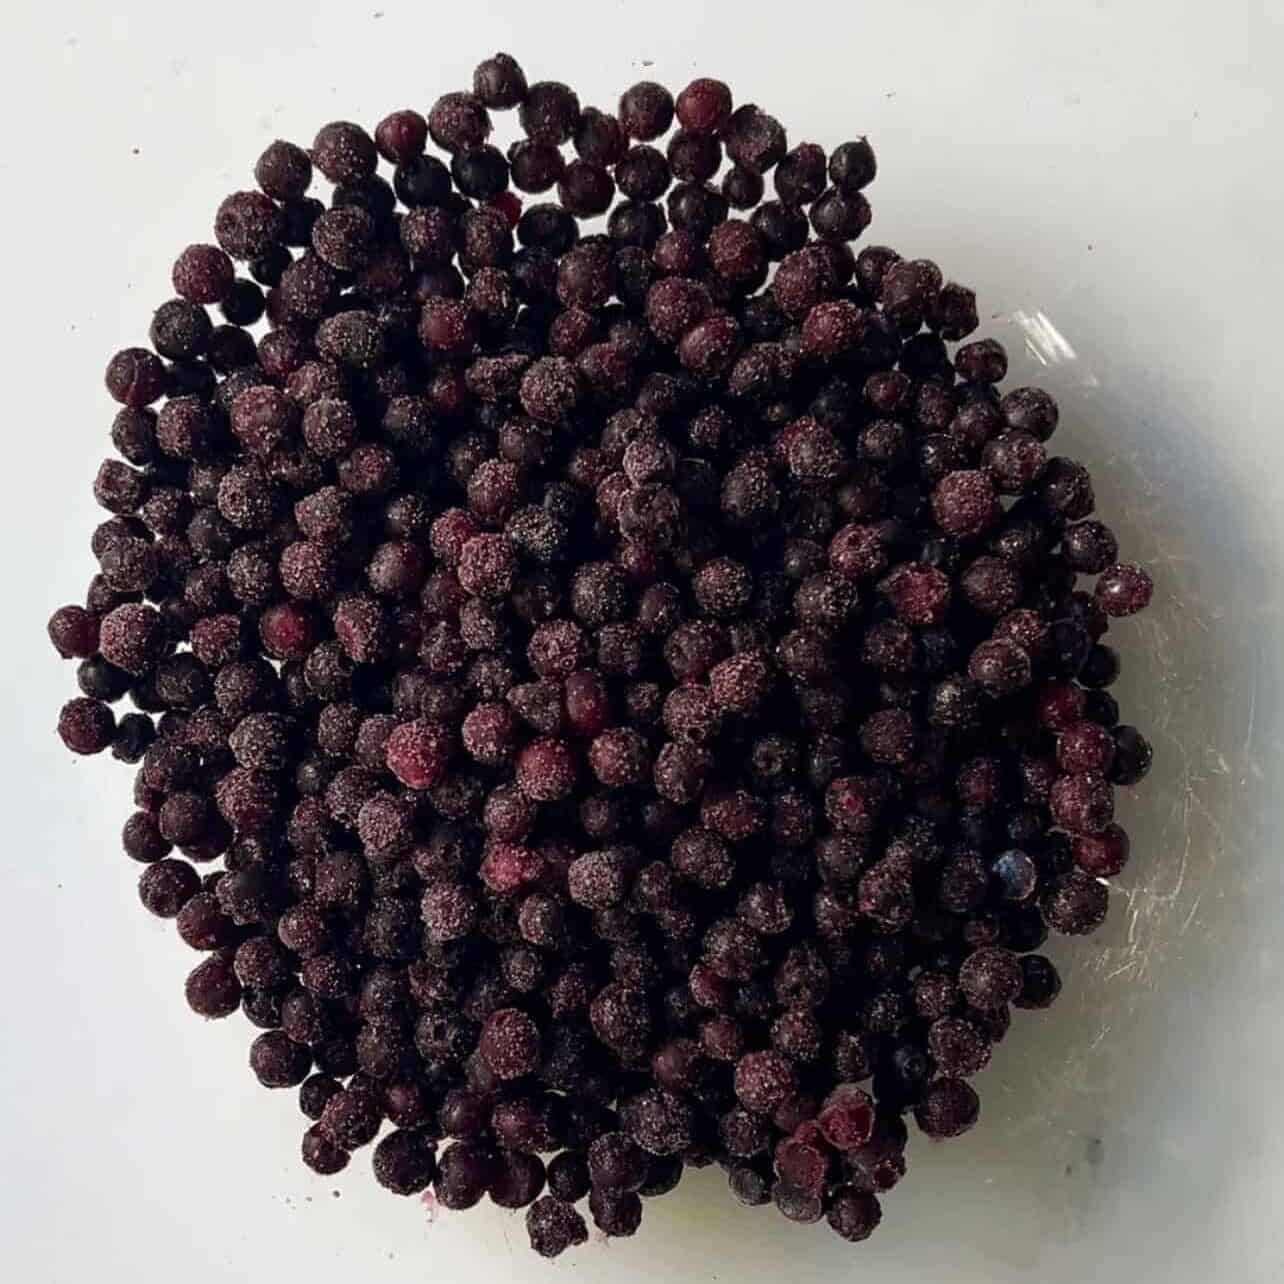
- Blueberries: Use fresh or frozen. I personally feel the smaller wild blueberries packs the most flavor. They're also convenient to have on hand year round and you can use it straight from the freezer.
Instructions
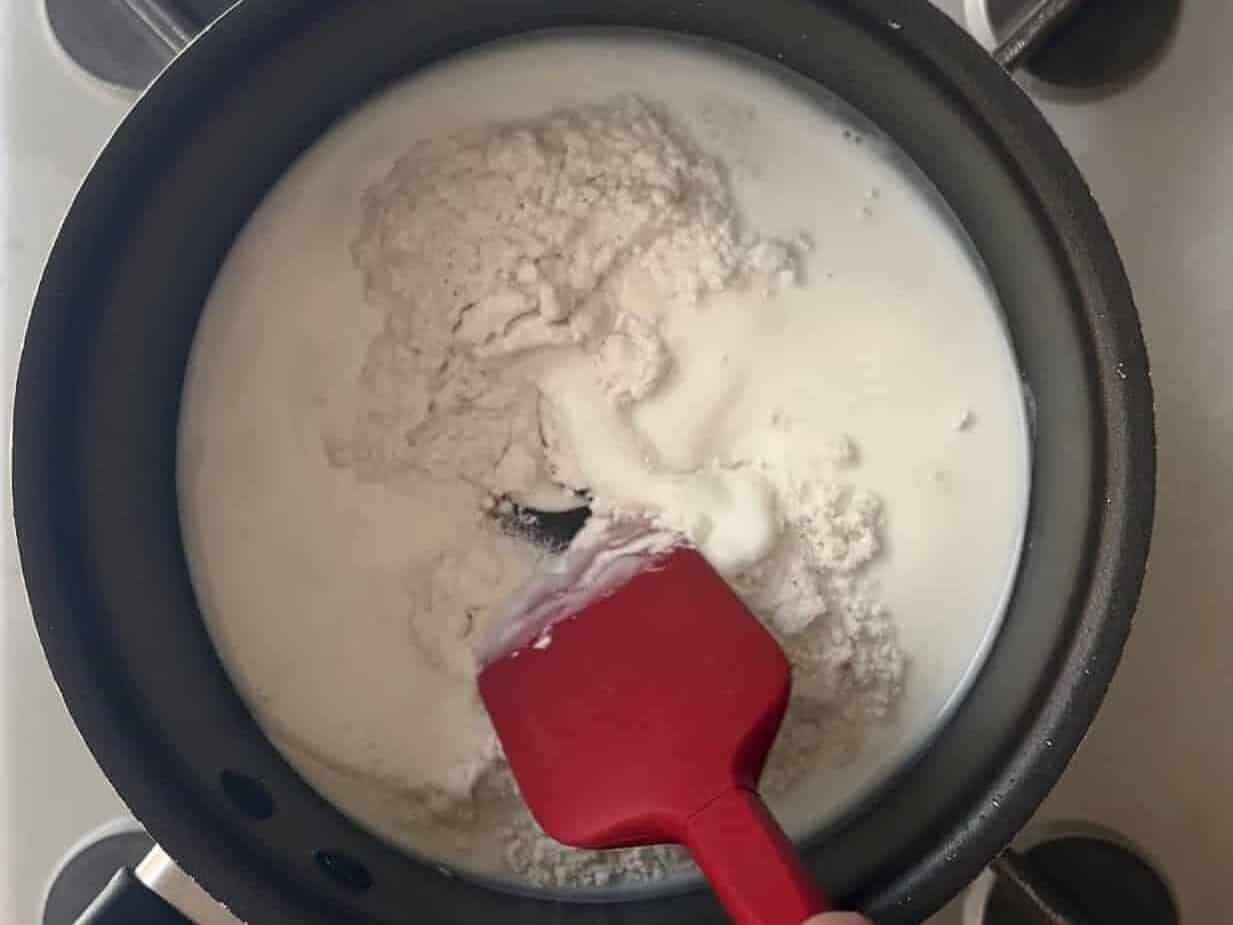
Make the tangzhong: Combine flour and milk in a small saucepan and stir over med-low heat until it turns into a paste. Do not leave the stove - this will happen quickly. * If you decide to skip the tangzhong step, simply add the flour and liquid back into the original recipe and proceed as normal.
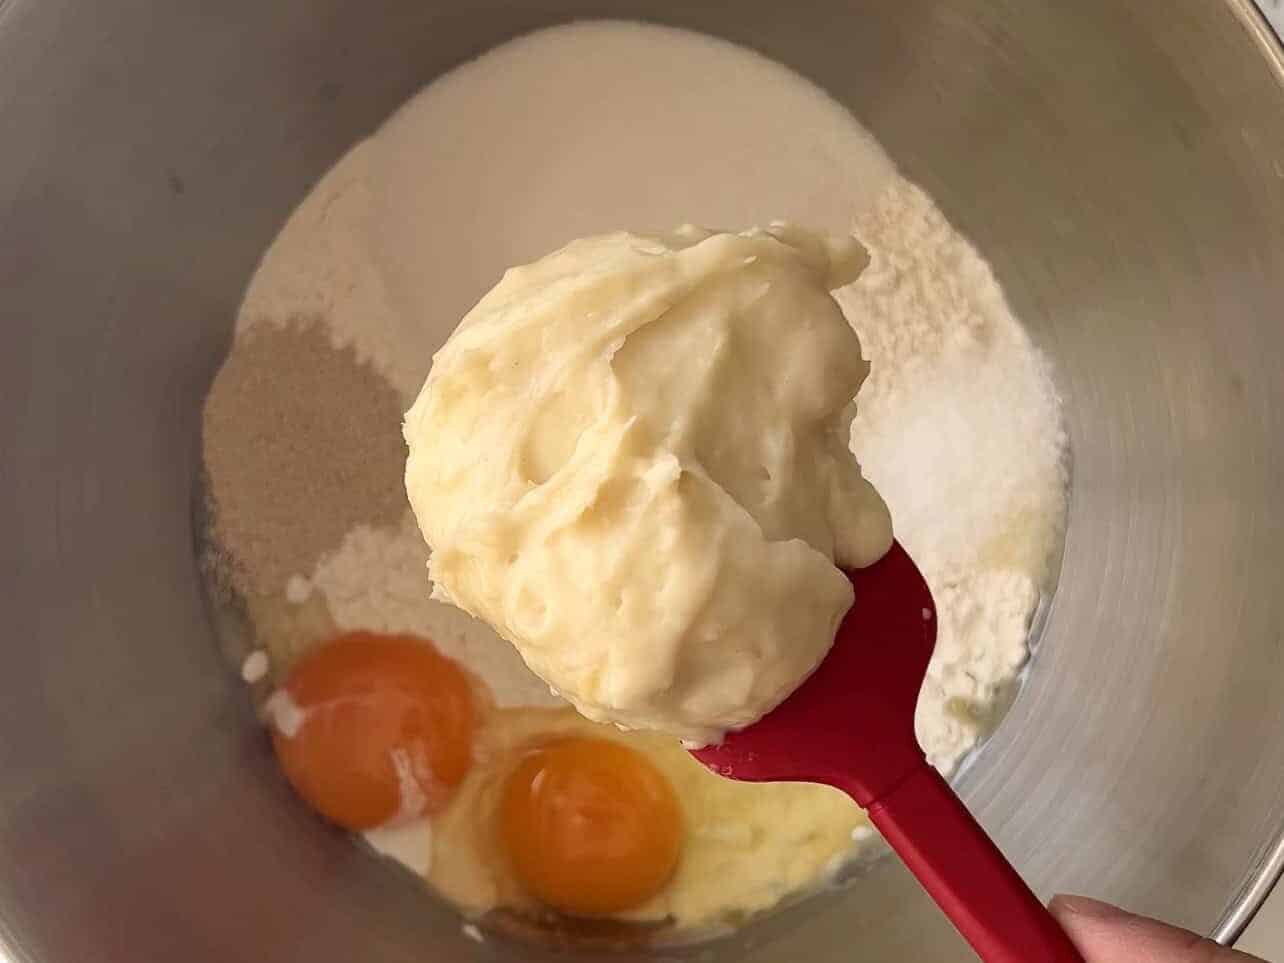
The paste should resemble texture of creamy mashed potatoes. Allow it to cool slightly, then. add it to your dough ingredients (except the butter).
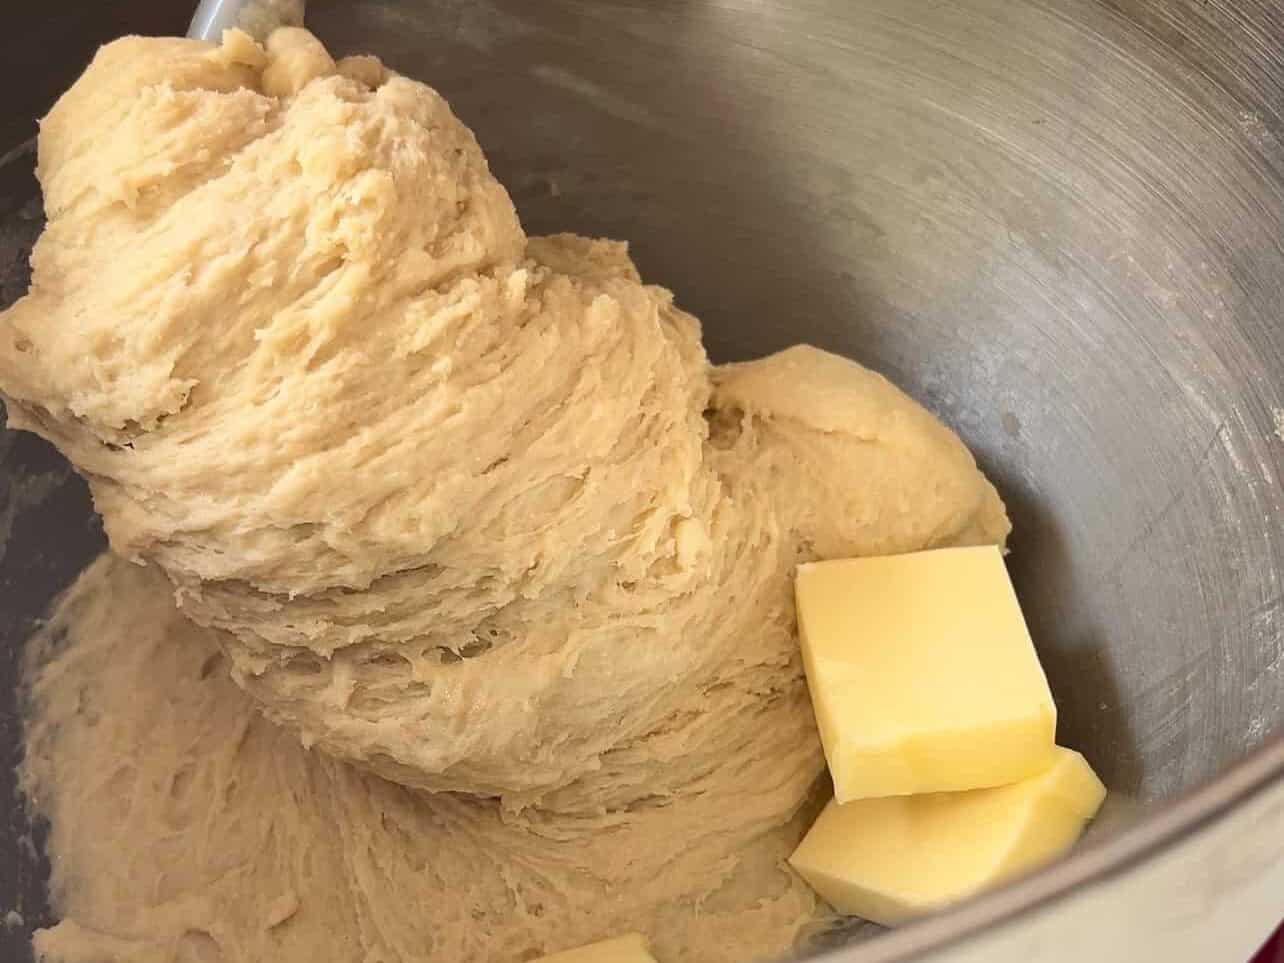
Knead dough until shaggy and all visible flour has been absorbed. Add in your softened butter, and continue mixer on med-high for 15 mins or until dough is smooth and passes the window-pane test.

Cover the dough and store in a warm area. Allow it to rise for 1½ - 2 hours depending on your kitchen temperature or until it has visibly doubled in volume.

Punch to degas the dough - one of my favorite steps!
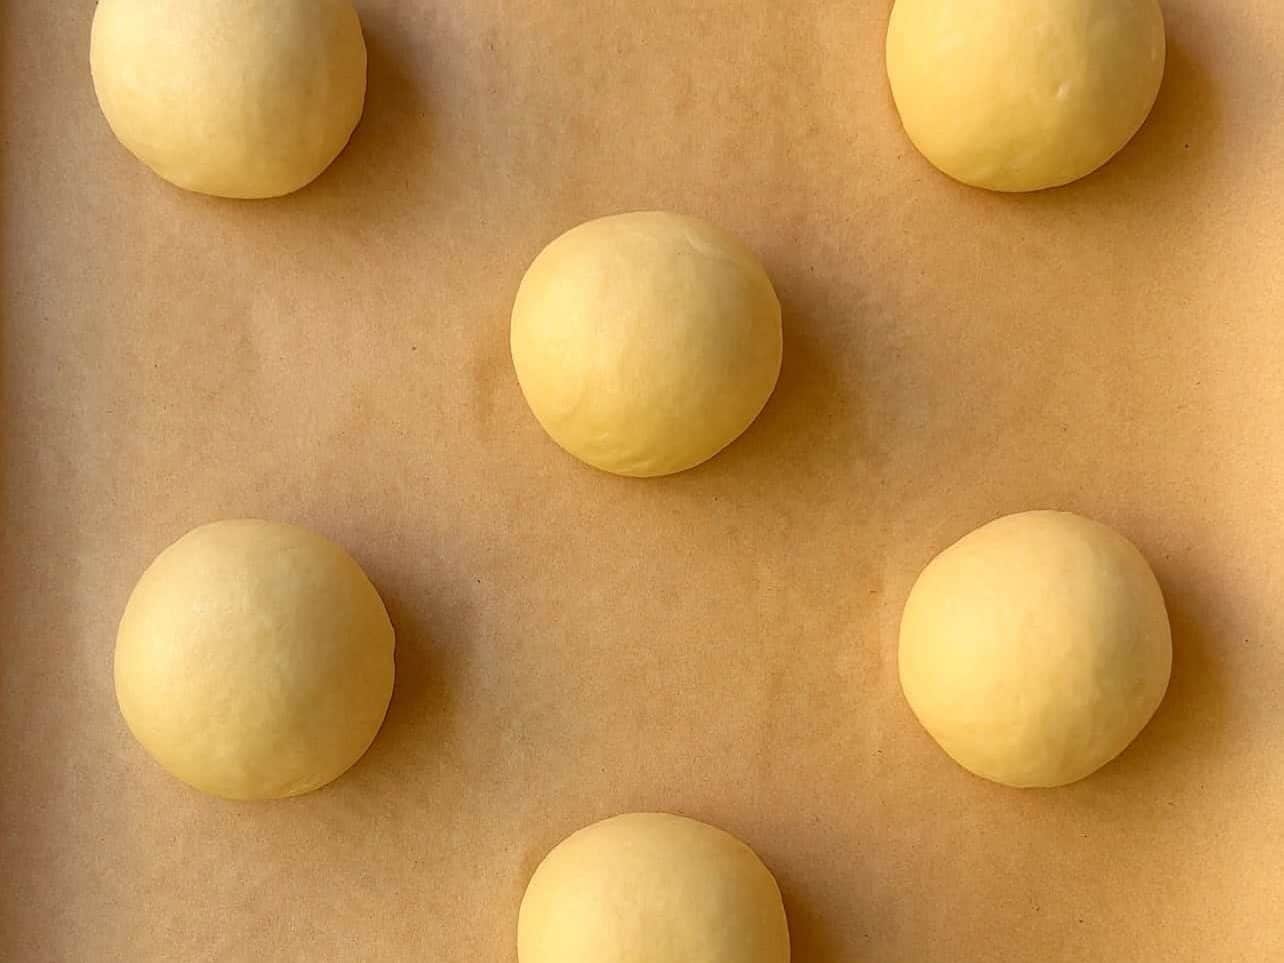
Divide into 10 equal dough balls and place onto parchment lined baking sheet. Cover, store in a warm area, and allow to rise for final proof.
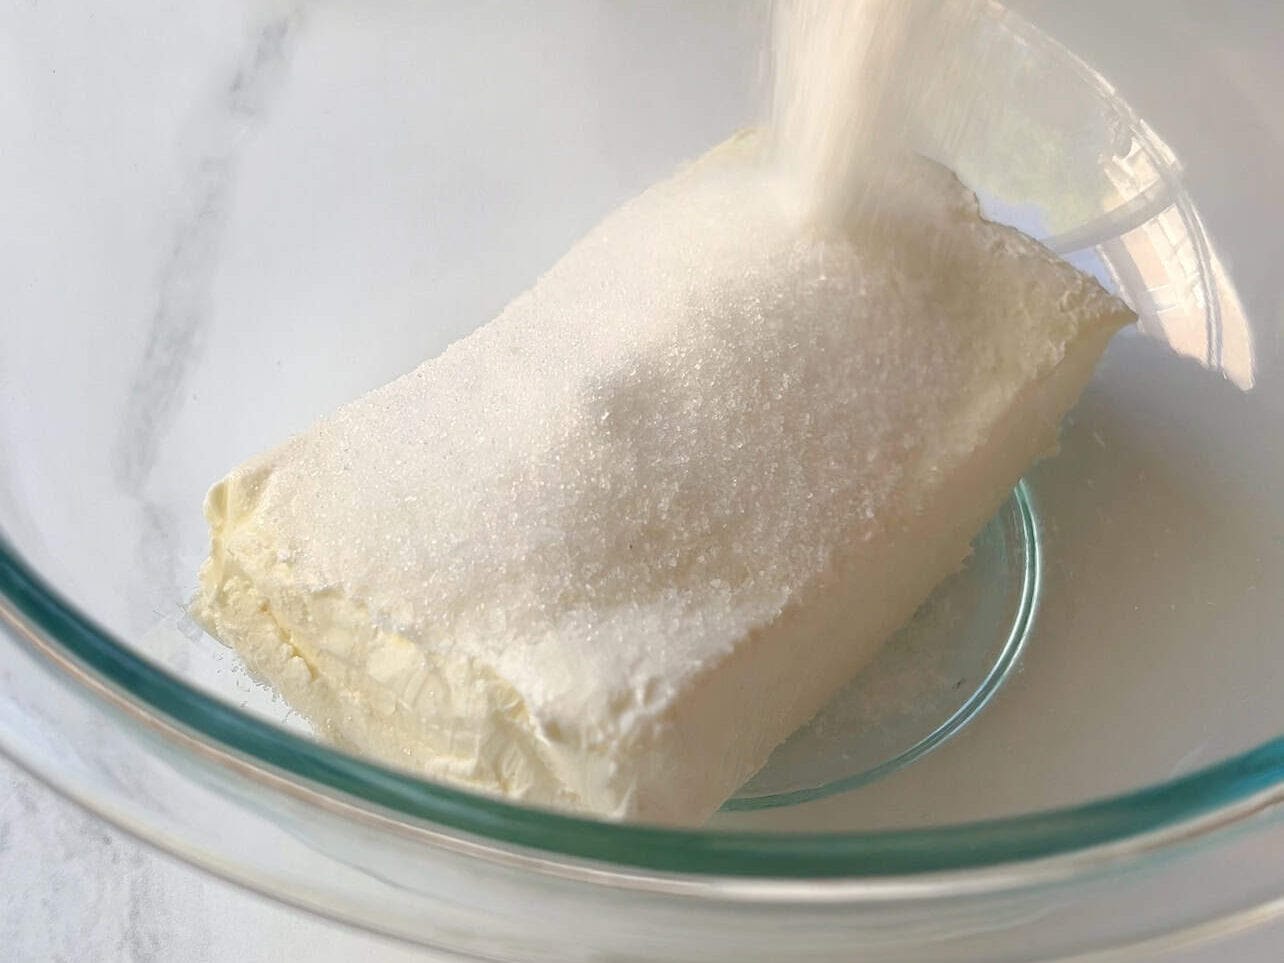
Be sure to use softened room temperature cream cheese. Fold in sugar until fully incorporated. You can use a handheld or stand mixer, but I find it unnecessary. Simply using a spatula to mix prevents air pockets and yields a silky consistency.
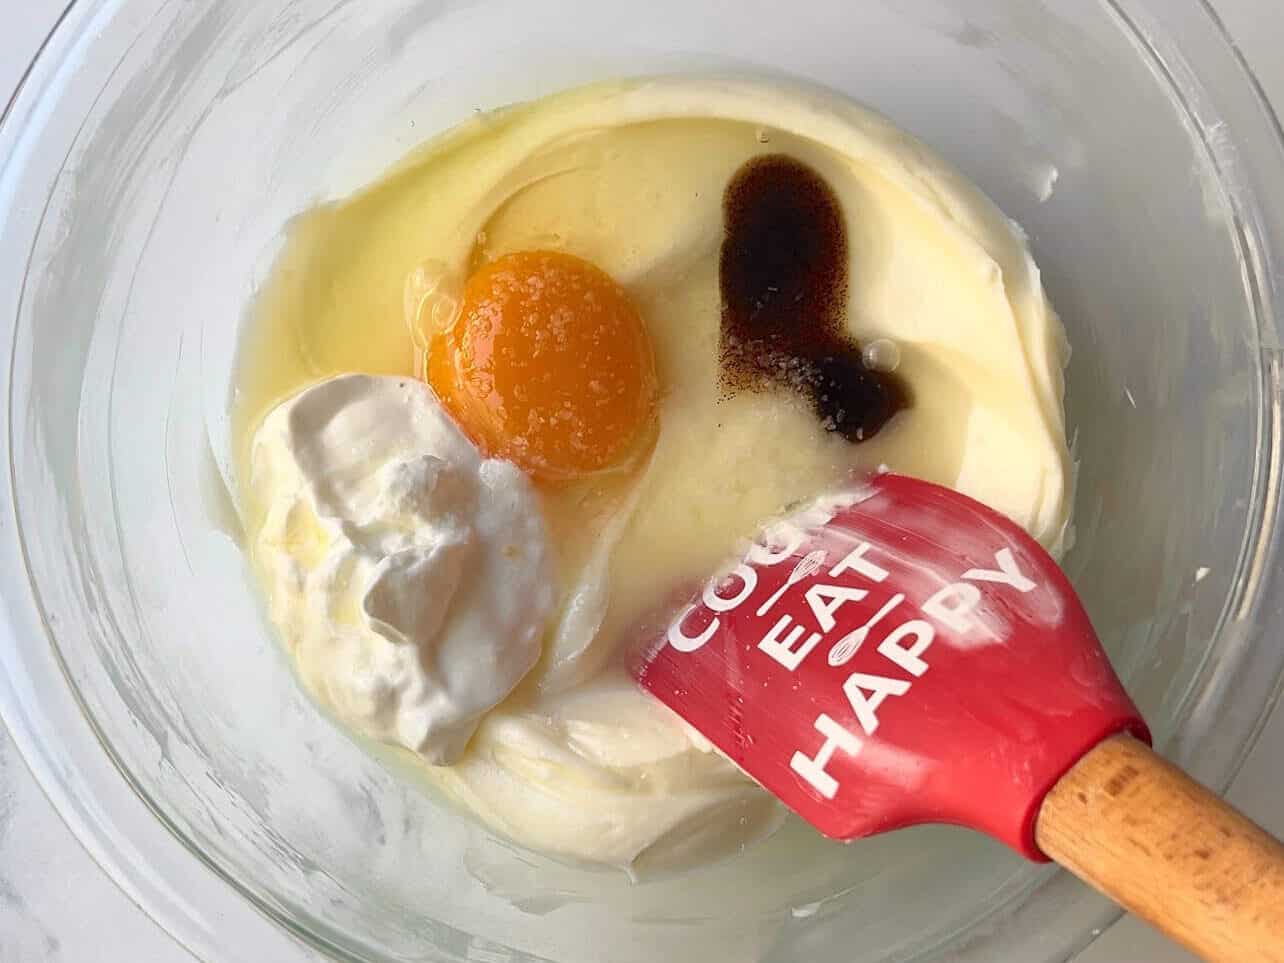
Add the remaining cheesecake filling ingredients and mix with a spatula.
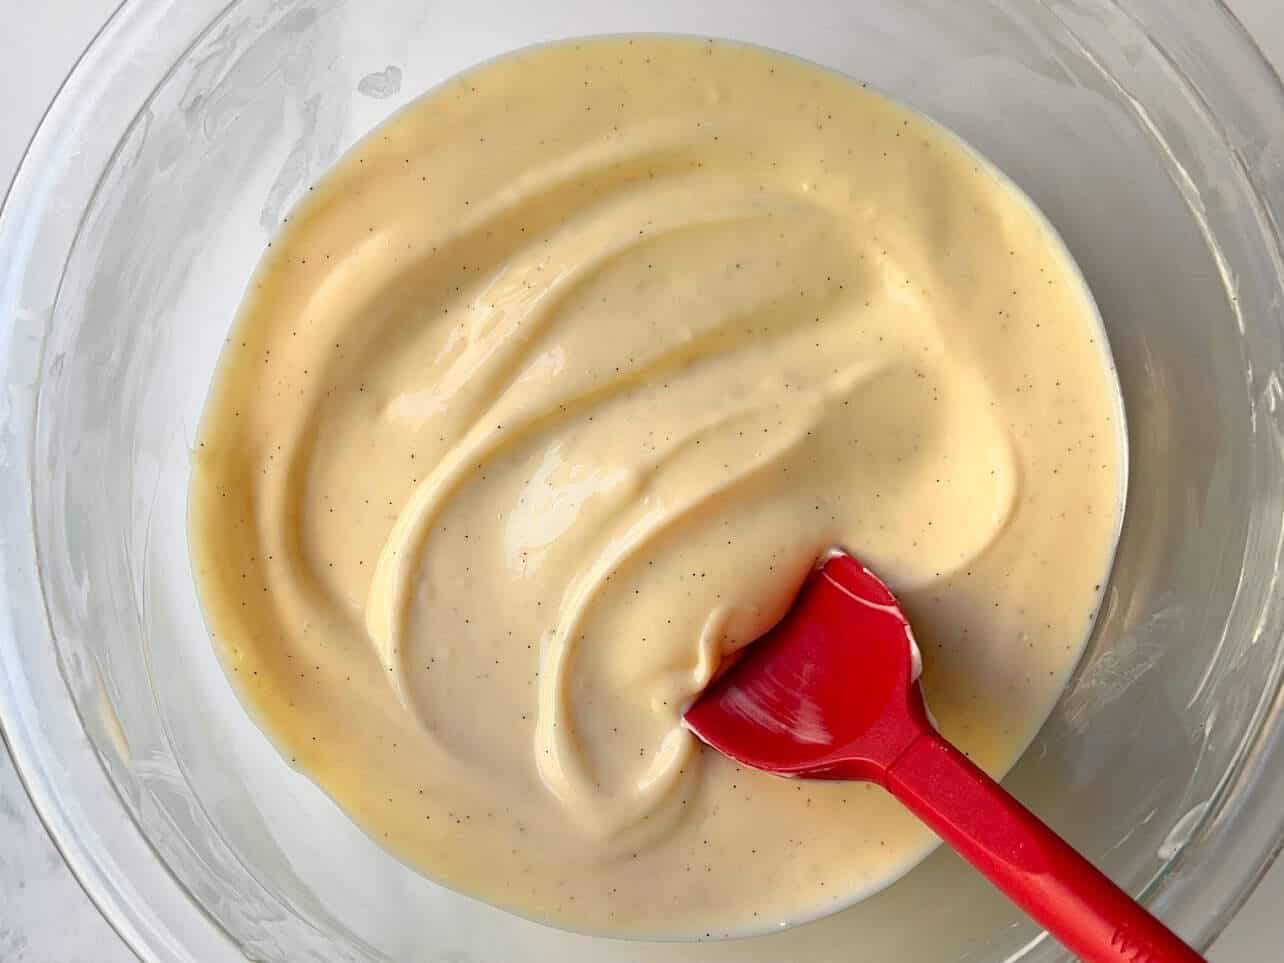
Texture should be smooth, not runny, and similar to a pudding. Cover and set aside.
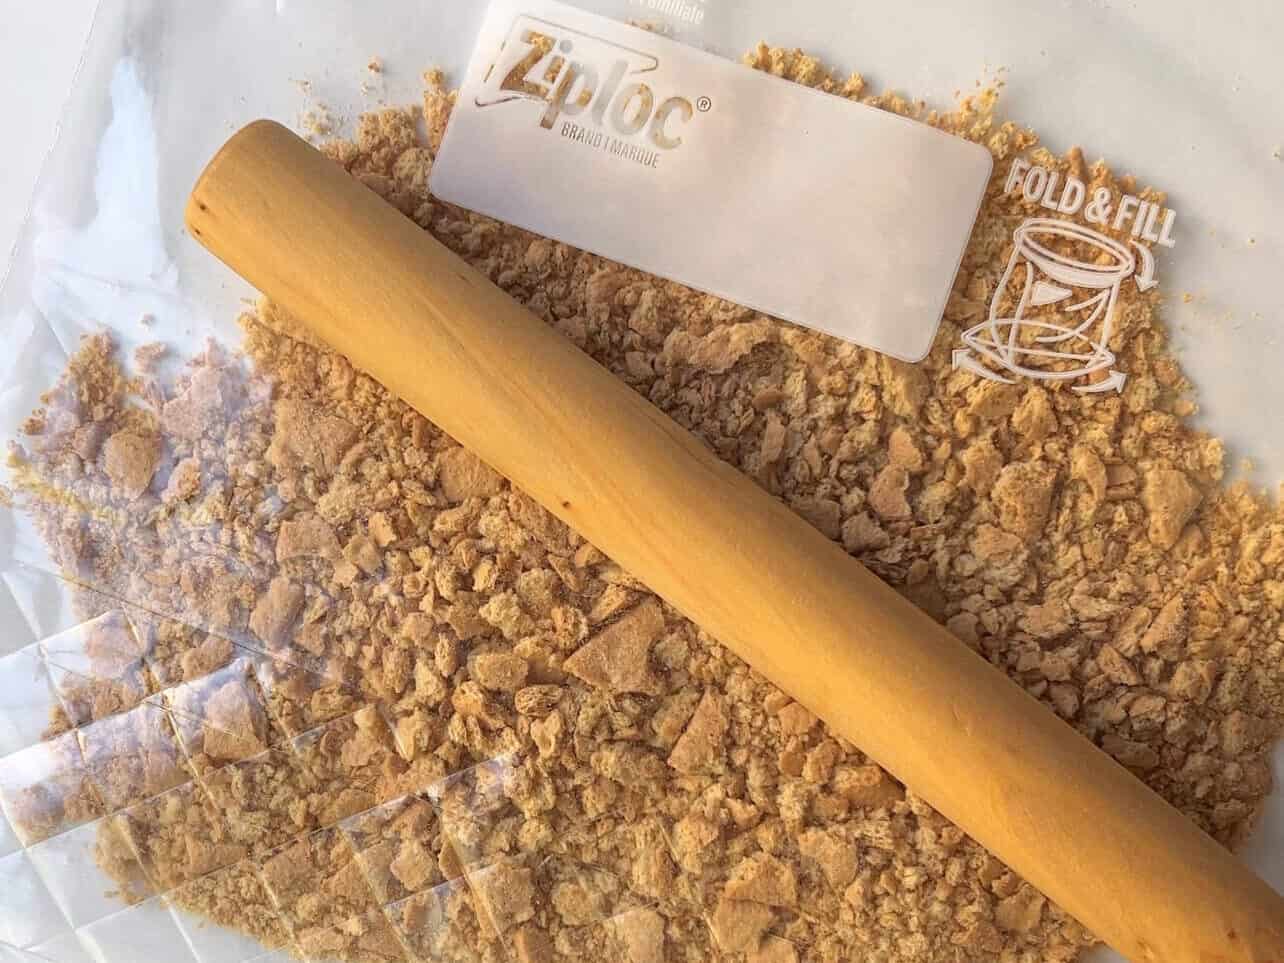
Make the graham-cracker crumble: Roughly crush crackers in a ziplock bag with a rolling pin, or in a food processor. You can decide how finely you want the crackers - I like to keep a variety of both fine and bigger pieces.

Pour crushed crackers into a mixing bowl with the rest of the crumble ingredients and mix.
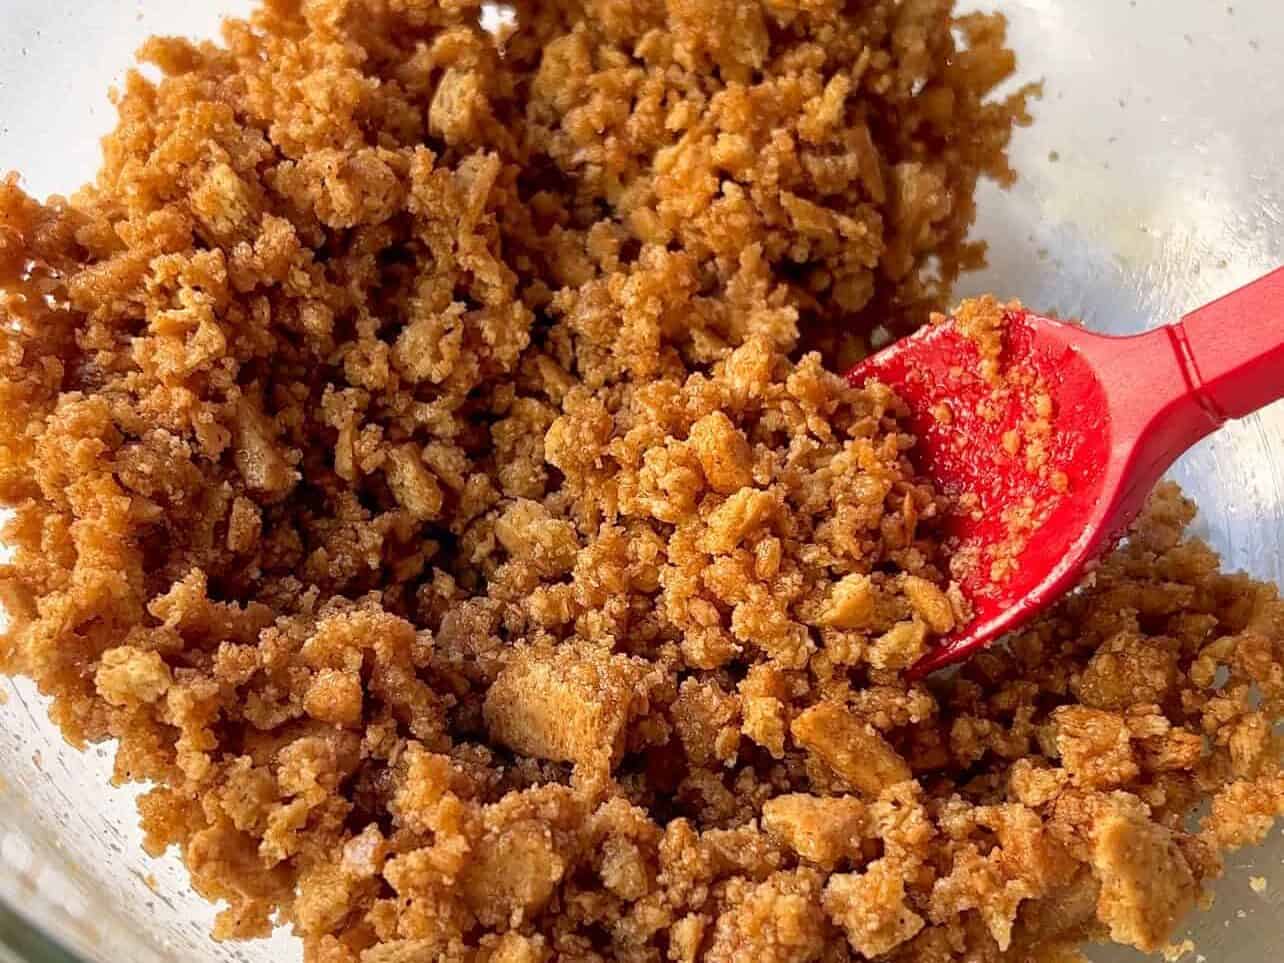
If you desire a softer crumble, you can increased the amount of melted butter. This is the consistency for a more crunchy crumble.

To check if dough is ready to bake, poke it with your finger. What you're looking for is the indent to remain for a few seconds, then slowly retract back to its original shape. If the finger poke springs back immediately, then allow it to proof for longer. Under-proofing your dough usually results in gummy and dense bread. Totally proof time will vary depending on temperature of your kitchen. In my 72ºF house, my dough proof time is usually around 2 hours.
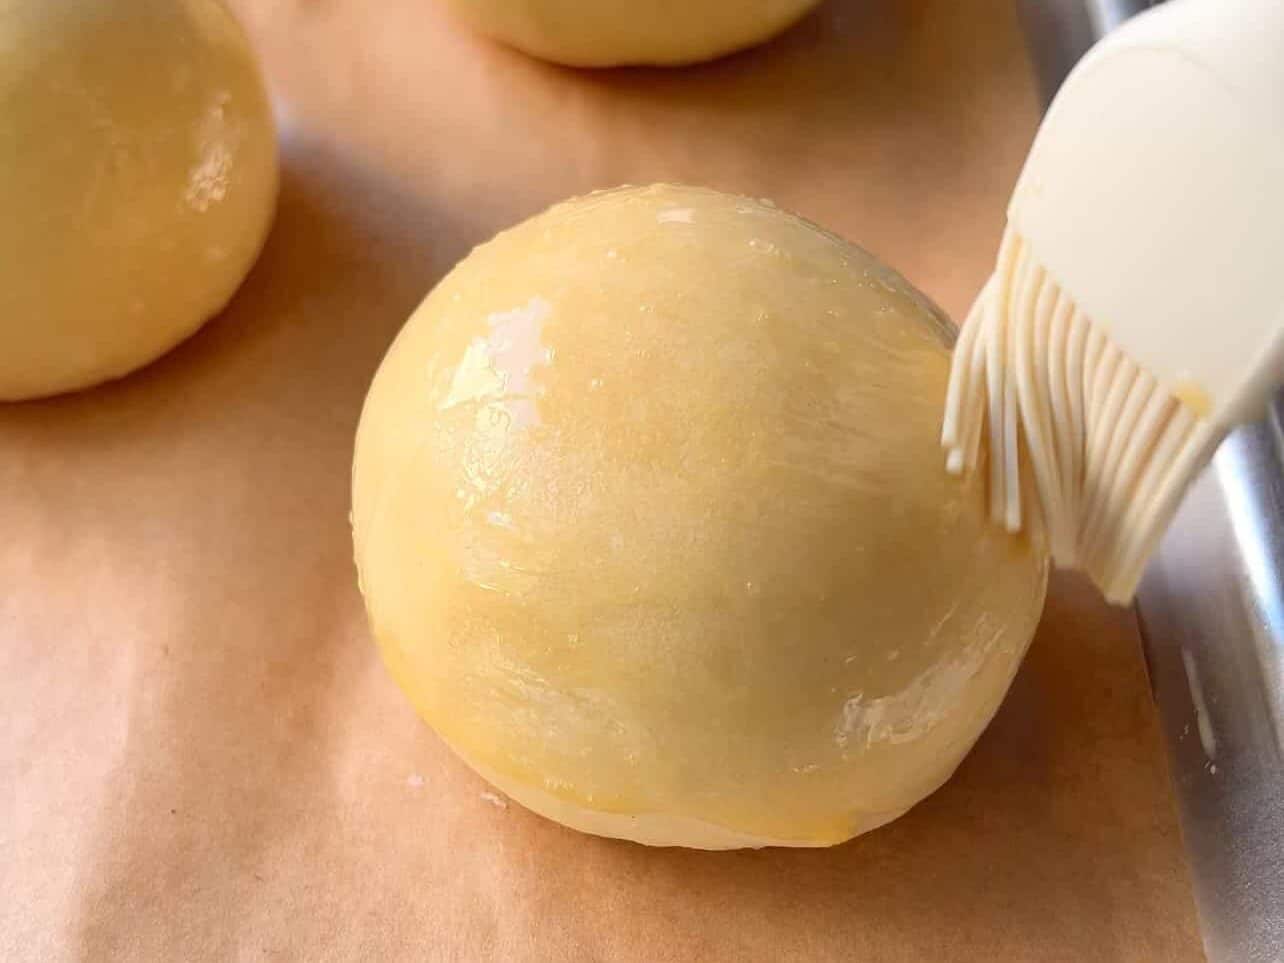
Once dough has proofed, brush with an egg wash.
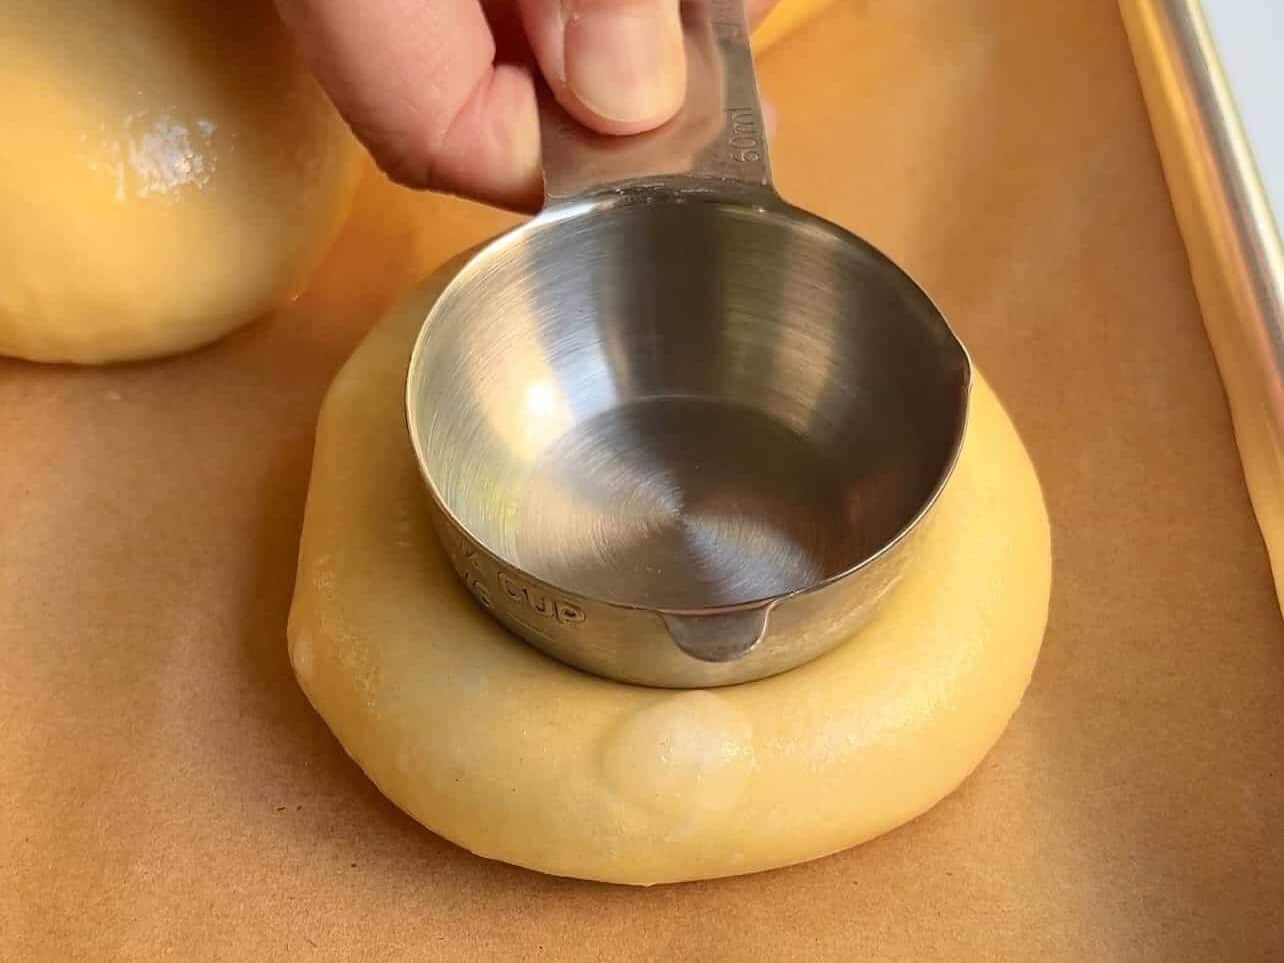
Form a center crater for the filling. You can use your fingers to stretch the dough or any round cup. Pro tip: to prevent sticking, apply egg wash to the cup bottom as well.
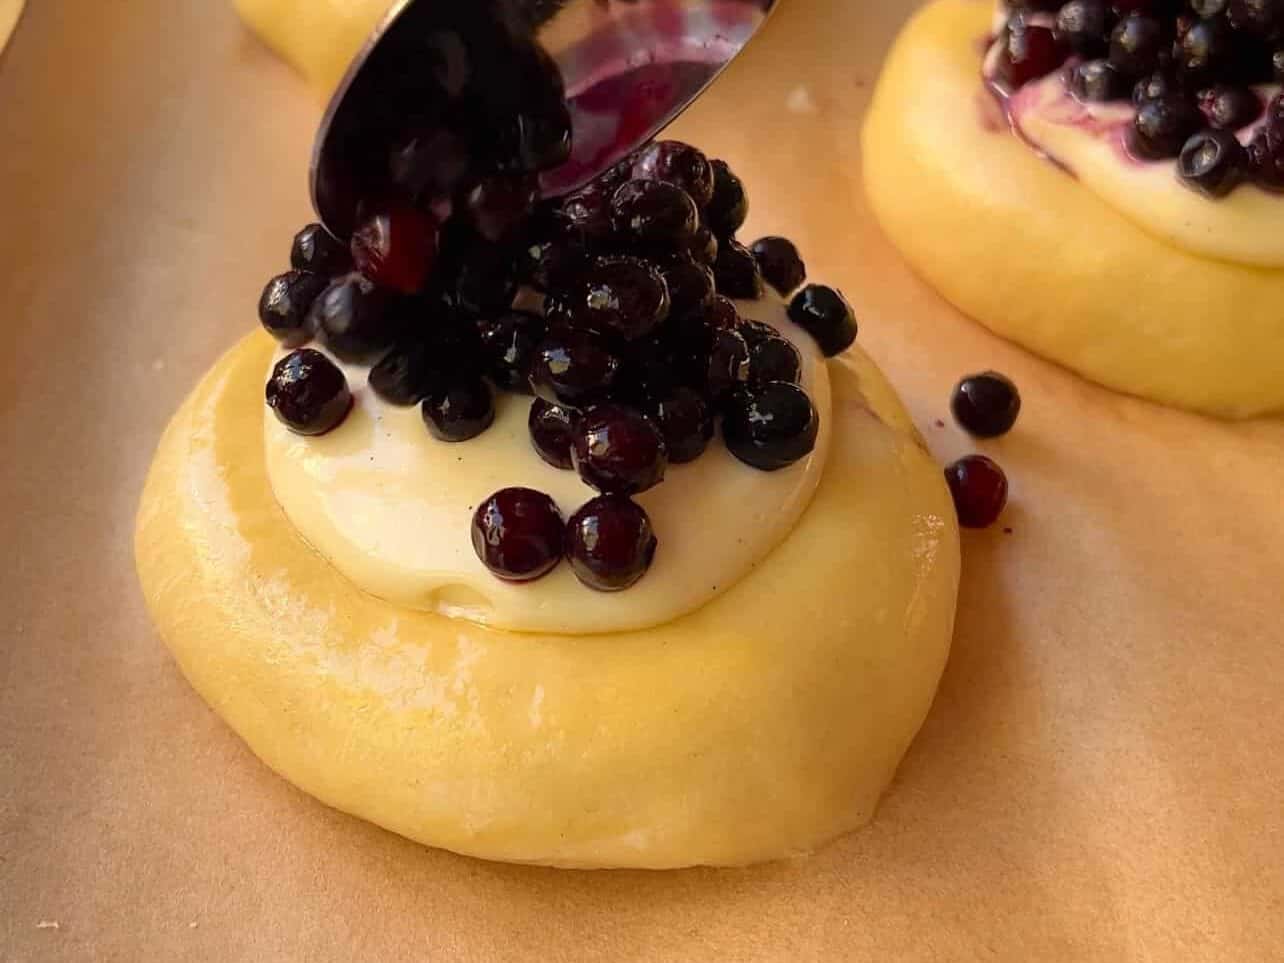
Scoop cheesecake filling in the center, then spoon the blueberries on top.
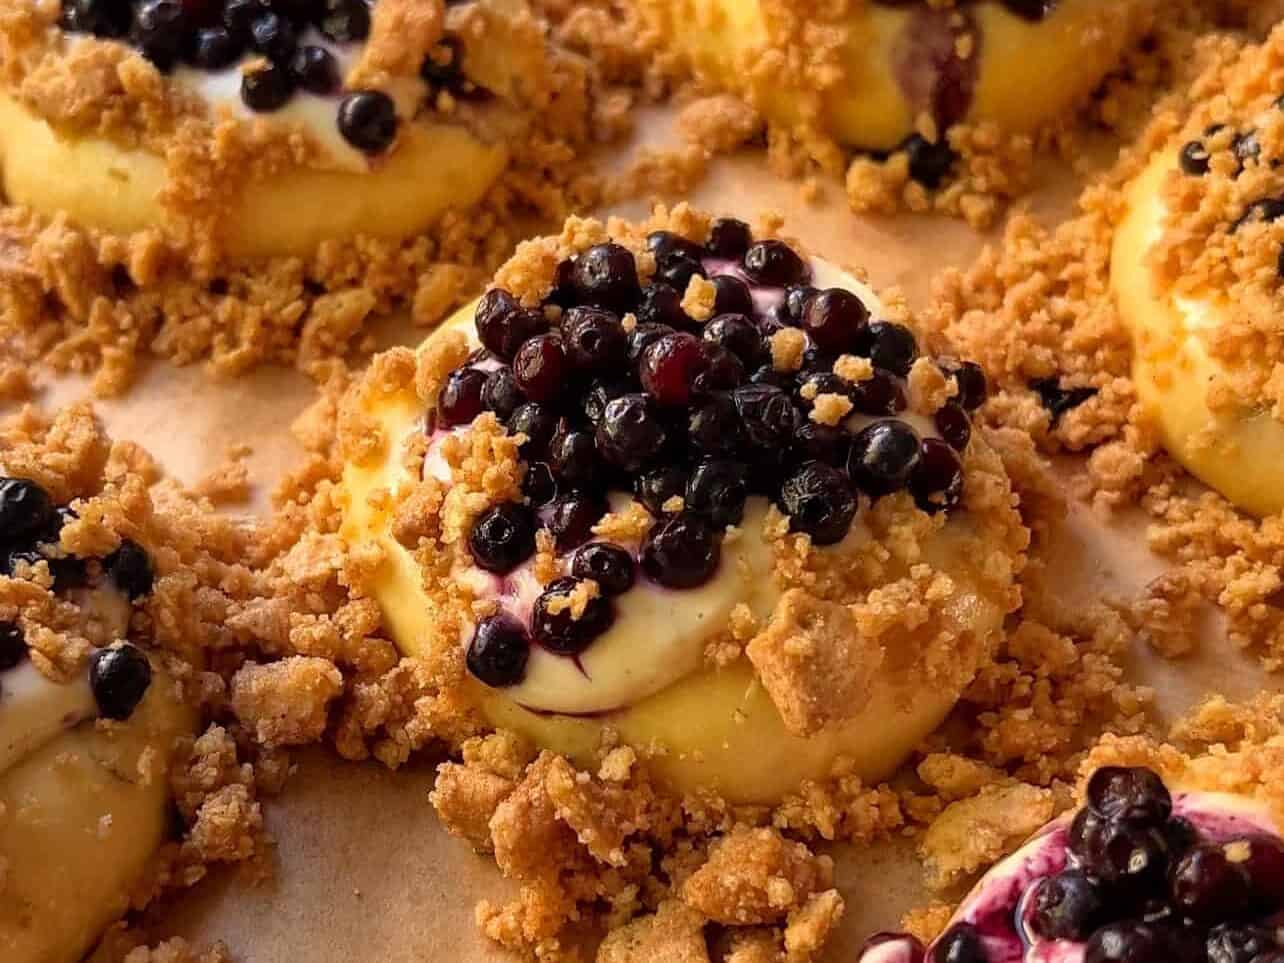
Sprinkle on the graham cracker crumble and transfer into the oven.

Zest lemon once baked, cool slightly before transferring to wire rack, and enjoy!
Suzy's Tips For Success
- Visual cues > recipe times: As I provide time guidelines like all recipes, many of the my tips and images will teach you to trust proven visual cues more than sticking to what's written in recipes. I get it, we all love following what the recipes say to a tee - I'm the same way! Here's the thing we need to consider: temperature. Your kitchen may be cooler or warmer than mine, and that is a big determining factor on how our dough reacts. If your kitchen is warmer, things will happen faster. If it's cooler, your dough will react slowly. So if you learn to look for visual cues rather than sticking to the recipe, you will learn how to work with any dough.
- Measure your flour and ingredients accurately: For best results, use a kitchen scale. They will give you the reassurance you need that you have the right amount of ingredients. I'm not saying you cannot achieve successful bakes using measuring cups, but this usually comes with time and experience. Flour is the the most common ingredient people do not measure correctly, so grab that scale. Once you use one, you'll wonder how you went so long without one.
- Allow enough time for dough to rise and proof: This isn't a quick bread recipe, so give yourself ample time on bake day. If you rush the process, you will be able to tell by your finished bread texture.
Best Way To Store/Reheat
These Blueberry Lemon Cheesecake Crumble Brioche Rolls are best eaten day of baking. You can store leftovers in the fridge for up to 2 days. To reheat, bake in 350ºF (175ºC) oven for 5-10 minutes or in 10-second increments in the microwave.
Although I do not recommend freezing (shame to do after adding that tangzhong paste!), you can freeze after completely cooled, wrapped individually in aluminum foil/ ziplock bag for up to 3 months. To reheat, preheat oven to 350ºF (175ºC) and allow frozen rolls to thaw for 30-45 minutes on the counter. Bake 5-10 minutes on aluminum foil until evenly warmed.
FAQ
Yes, absolutely! No need to thaw if using frozen.
I always recommend using the full-fat version. Why? It achieves the rich creamy consistency and best overall flavor/mouthfeel. Using a low-fat cream cheese can create a bland and runny cheesecake filling, resulting in a gelatinous texture.
Proofing dough the next day can be tricky - I prefer to bake dough the same day. However if you'd like to prep ahead, follow the recipe until you placed your divided dough balls into your pan. Cover and chill pan in fridge overnight. The next day, bring your pan up to room temperature on the counter in a warm area while you prep the cheesecake filling and graham-cracker crumble. Poke the dough with your finger. If the dough springs back immediately to its original shape, it is not ready. Allow it to rise longer. When your finger indent springs back slowly and fills in after a few seconds, that is when it's ready to bake. The amount of total proofing time will vary on your kitchen temperature, typically 3 hours.
You can attempt a 1-to-1 swap using a gluten-free flour blend instead of all-purpose flour. However, the finished bread texture and crumb will always differ with the lack of gluten.
You Might Also Like...

Equipment
- small saucepan
- parchment paper
- Rubber Spatula
- ziplock bag and rolling pin or food processor
- ice cream scooper optional
- zester or microplane
Ingredients
Tangzhong
- 2½ tablespoon all-purpose flour
- ⅓ cup + 1 tbsp milk
Dough
- 3¾ cup all-purpose flour
- 2¼ teaspoon instant dry yeast
- ⅓ cup granulated sugar
- 1½ teaspoon kosher salt
- 1 large whole egg
- 1 egg yolk
- ⅔ cup warm milk approx 95-100°F
- 3 tablespoon unsalted butter softened, room temperature
- 1 egg for egg wash
Cheesecake Filling
- 8 oz cream cheese full-fat
- ⅓ cup granulated sugar
- 1 large egg
- 3 tablespoon sour cream substitute plain/Greek yogurt or buttermilk
- 1 teaspoon vanilla bean paste or vanilla extract
- 1 teaspoon fresh lemon juice save peel for zesting
- ¼ teaspoon kosher salt
Graham Cracker Crumble
- ¾ cup graham crackers approx 6 cracker sheets
- 2 tbsp granulated sugar
- ½ teaspoon ground cinnamon
- pinch kosher salt
- ¼ cup unsalted butter melted
Instructions
- Prepare the tangzhong: Combine ingredients in a small saucepan and stir until all dry flour is absorbed. Turn heat to med-low and stir continuously until it forms a gel-like paste similar to creamy mashed potatoes. This will happen quickly, so do not leave stove unattended. Transfer paste into a bowl, cover, and set aside to cool.
- For the dough: In a large stand mixer bowl, combine all the ingredients (don't forget the tangzhong!) except the butter. Mix until a shaggy dough forms and all dry visible has been incorporated. Add in the softened butter and continue kneading on med-high speed for 10-15 mins or until dough passes the window-pane test - grab a small piece of the dough and stretch it to create a small film. If the dough stretches thin enough for light to pass through without tearing, then it's ready. If it breaks easily, knead dough longer to develop the gluten further.
- Try to avoid adding any additional flour unless absolutely necessary. The dough should be smooth and tacky to the touch, yet detaches fairly clean off the bowl. Flour brands absorb moisture differently, but adding lots of extra flour changes the recipe that can result in a dry tough bread texture.
- Roll dough into a smooth ball, cover, and allow it to rise in a warm area for 2 hours or until it's visible doubled in volume. Prep baking sheet with parchment paper.
- Punch and degas the dough. Divide and roll into 10 equal dough balls, or 12 if you prefer the brioche smaller. Cover and allow them to proof in a warm spot while you prepare the cheesecake filling and crumble.
- Prepare the cheesecake filling: Combine softened cream cheese and sugar in a large bowl with a spatula until sugar has been absorbed. You can use a handheld or stand mixer, but I find it unnecessary. Simply using a spatula to mix well prevents air pockets from forming and yields a smooth consistency. Add in the remaining ingredients and combine until smooth. Cover bowl and set aside.
- To make the graham-cracker crumble: Roughly crush the graham cracker in a ziplock bag or food processor. Combine crumbs with all the crumble ingredients in a bowl and mix until well coated.
- To check if your dough balls are ready to bake: Poke dough with your finger. What you're looking for is the indent to remain for a few seconds, then slowly retract back to its original shape. If the finger poke springs back immediately, then allow it to proof for longer. Under-proofing your dough usually results in gummy and dense bread. Total proof time will vary depending on your kitchen temperature. In my 72℉ house, my brioche will proof in about 2 hours.
- Preheat oven to 375℉ (190℃).
- Brush dough with egg wash. Using your hands or a small cup, create a center crater in each dough ball for the filling. To prevent sticking, apply egg wash to the cup bottom as well.
- Using an ice cream scooper or spoon, scoop 2-3 tablespoon of cheesecake filling into each roll and top with blueberries. Sprinkle graham-cracker crumble generously.
- Bake 20-30 minutes, rotating halfway until brioche is golden and cheesecake center is set. Zest lemon on top, allow to cool for 10 minutes, and enjoy!
Notes
- Nutritional information is only an estimate. The accuracy of the nutritional information for any recipe on this site is not guaranteed.
- For the best consistent results, use a kitchen scale. Measuring ingredients accurately gives you the best chance for success, and a scale will give you the most precise readings.
- Temperature plays an important role in dough fermentation. Use the rise and proof times as guidelines, however be sure to practice learning visual cues to understand your dough stages. Depending on your kitchen temperature, your dough may take more or less time to rise than indicated in the recipe.
Nutrition
Looking for other recipes like this?
Sara says
These are so good, and the bread is so soft and fluffy! My only issue is that the cheesecake filling seeped over the edges, so they weren’t as pretty. I scooped it up and tried to make them look better, but then it just looked messy haha! I thought I made my indents deep enough and I tried not to over fill them, but regardless, they taste amazing!
Jean says
These were absolutely incredible. I tried a few different variations and every single one turned out next-level. The texture is unreal — soft, pillowy, and rich without feeling heavy — and the flavour is perfectly balanced. Even the smell while baking is insane; that warm, buttery, bakery aroma is exactly what you want from something this indulgent.
I bake a lot (from high-end entremets to more professional-style desserts) and I don’t say this lightly: these are definitely in my top 5 for texture, taste, and overall enjoyment. They feel like something you’d buy from a proper pastry shop, not something you casually pull out of your own oven.
Suzy says
Wow! You've made my day, Jean. Truly. Thank you so much for sharing this. This is what makes posting recipes worth it.