
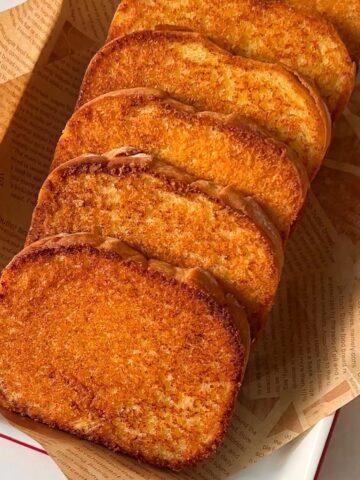
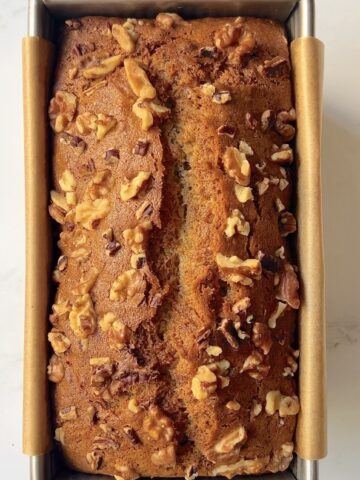
If you haven’t tried making this Dutch Crunch Bread recipe, you’re definitely in for a treat! Think of fluffy white sandwich bread with an irresistible crinkled crust layered on top. Crunchy crust, soft pillowy interior - this bread adds the BEST textural contract to your favorite sandwiches.

Holidays approaching and you need bread for the table? My Festive Holiday Dinner Rolls is it, my friend. And if you remember the famous popular Sizzler Cheese Toast, here's how you can make it at home!
Jump to:
What is Dutch Crunch Bread?
The "crunch" is a coating we brush on top the bread before baking, made with rice flour, yeast, and sugar. This hardens into its signature crackly animal-like spot pattern earning the name Tiger Bread. Many say it originated from bread called Tijgerbolletjes from the Netherlands (hence why it's called "Dutch") and was made an absolute sensation in San Francisco.
I was inspired to make my own version of Dutch Crunch Bread after admiring Juliet_At_Home make hers on her IG stories. We also had a spree of Ike's Sandwiches open here and they are known for this signature crust - it is incredible! This bread is usually shaped as small baguettes or rounds, or you can make longer sub sandwich loaves.

Why You Will Love Dutch Crunch Bread
To put it simply, Dutch Crunch elevates your sandwich to another level. Think of what adding potato chips does for your sandwich - that CRUNCH. I'm so content just picking off that crispy crust and eating it on its own. But don't worry - you still get that slightly sweet fluffy bread from the center. This recipe starts with an enriched yeasted dough process (apologies for the lack of process shots - updated photos coming soon!). Shape them how you like, brush on the rice flour coating, and watch as that iconic crust comes to life.
Notes About A Few Ingredients
- Warm water: Typically 95-100ºF (32-35ºC). Don't have a thermometer? A simple way to check: close your eyes and stick your finger in the warm water. If it feels too hot or cold, then it most likely is. When it feels lukewarm, that indicates the water is close to your body temperature.
- Instant or Active Dry Yeast: Use what you have handy. I prefer to use instant yeast, since you can add it directly into your dough recipe without blooming it.
- Granulated sugar: A small amount to help the yeast and sweeten the dough.
- Bread flour: Using all-purpose flour will work, but we want the higher protein bread flour provides.
- Salt: Essential. Any bread is bland without it.
- Room temperature butter: Creates flavor and tenderizes dough to achieve that pull-apart texture similar to brioche.
- Rice flour: Major ingredient in the paste. Not to be mistaken with glutinous rice flour or sweet rice flour.
- Oil: You can use any neutral oil for the paste. (vegetable, avocado, grapeseed, canola, sunflower, etc). My favorite is using sesame oil to give it a subtle nutty flavor.
Instructions
More dough process shots and updated photos will be uploaded soon. Full written recipes details are all included the recipe card.
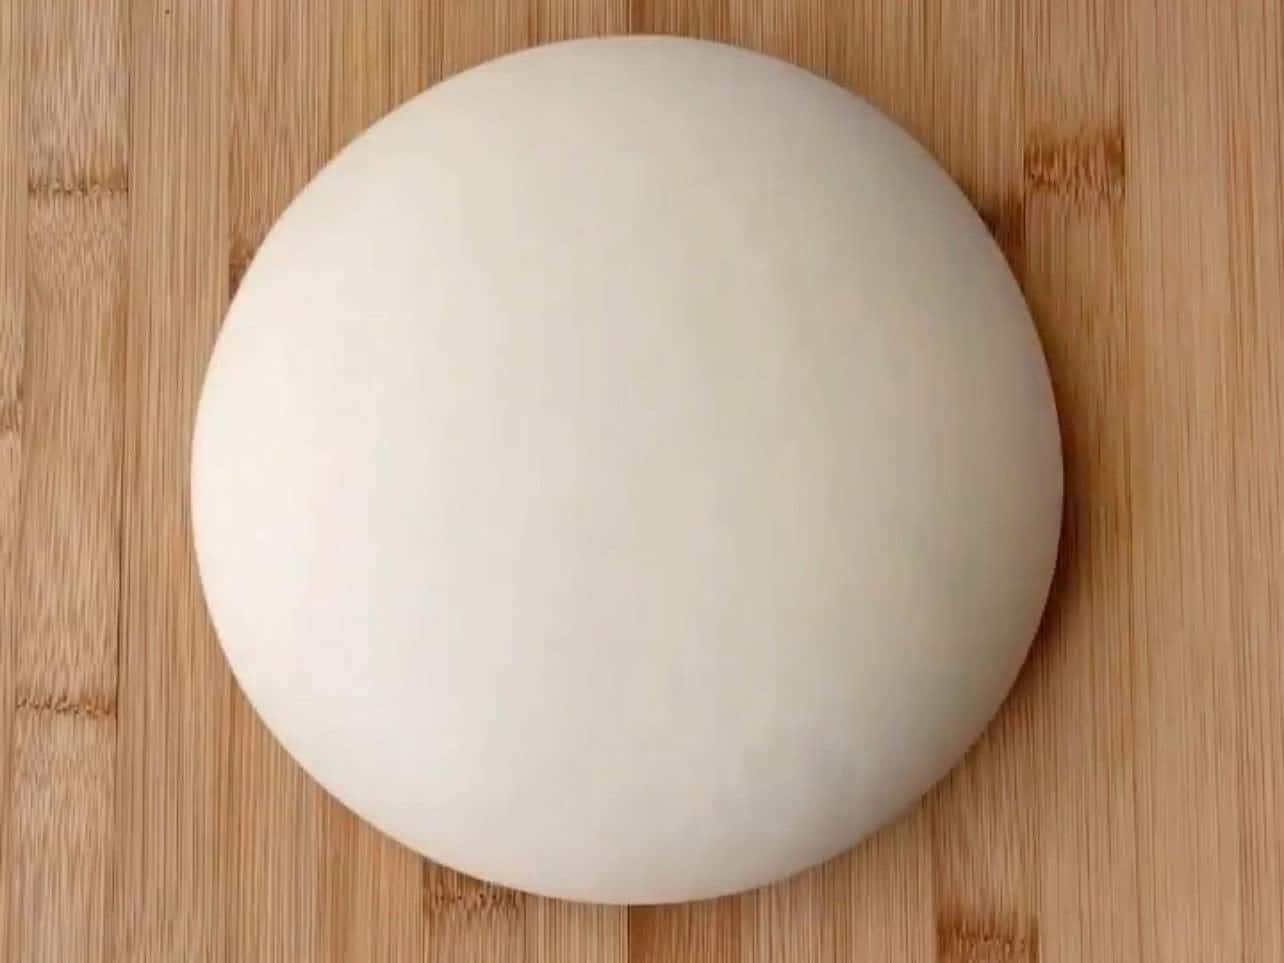
Combine dough ingredients, knead, and let rise until doubled in size. More details in recipe card.
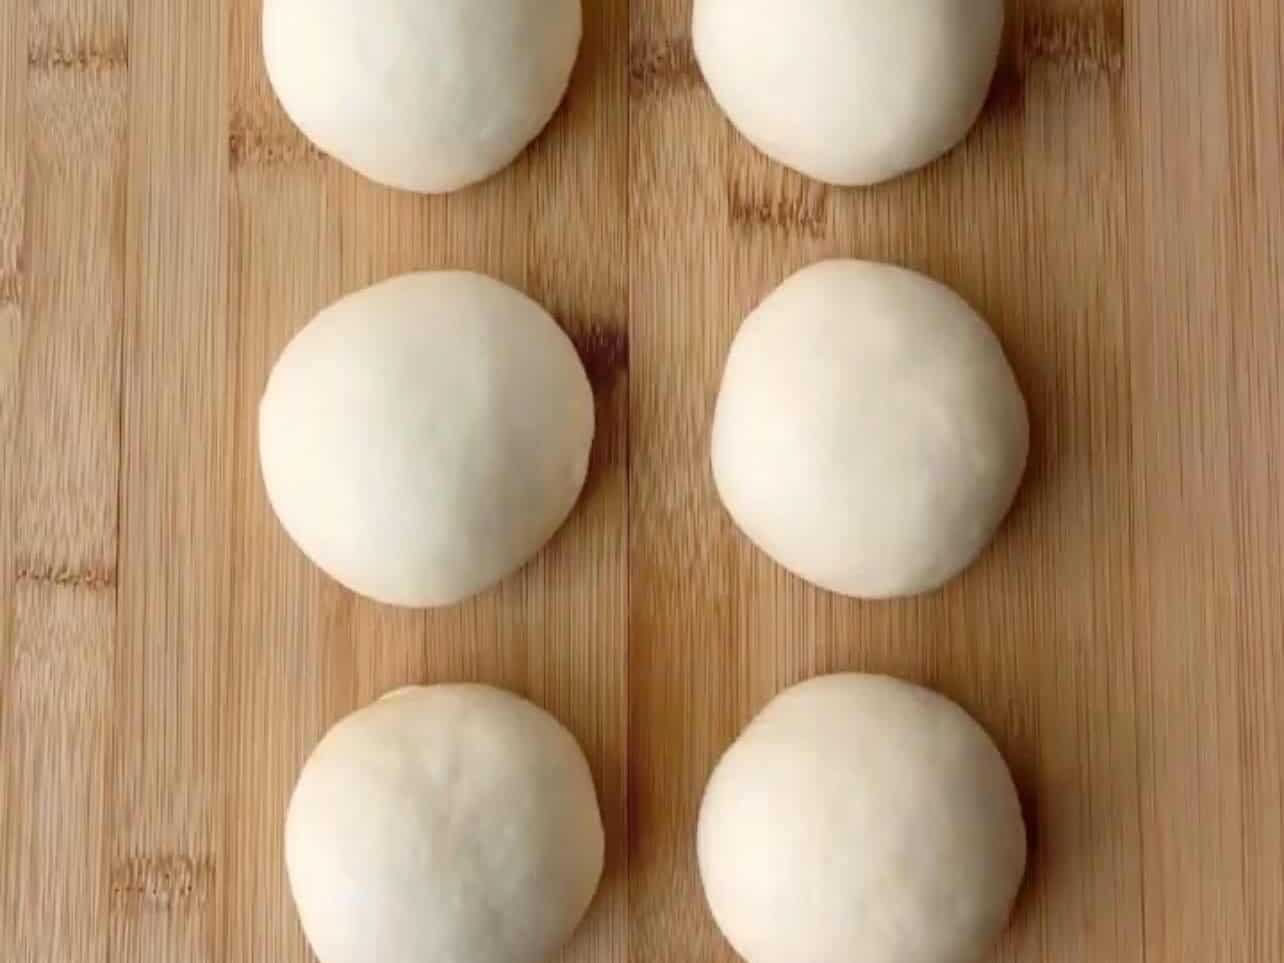
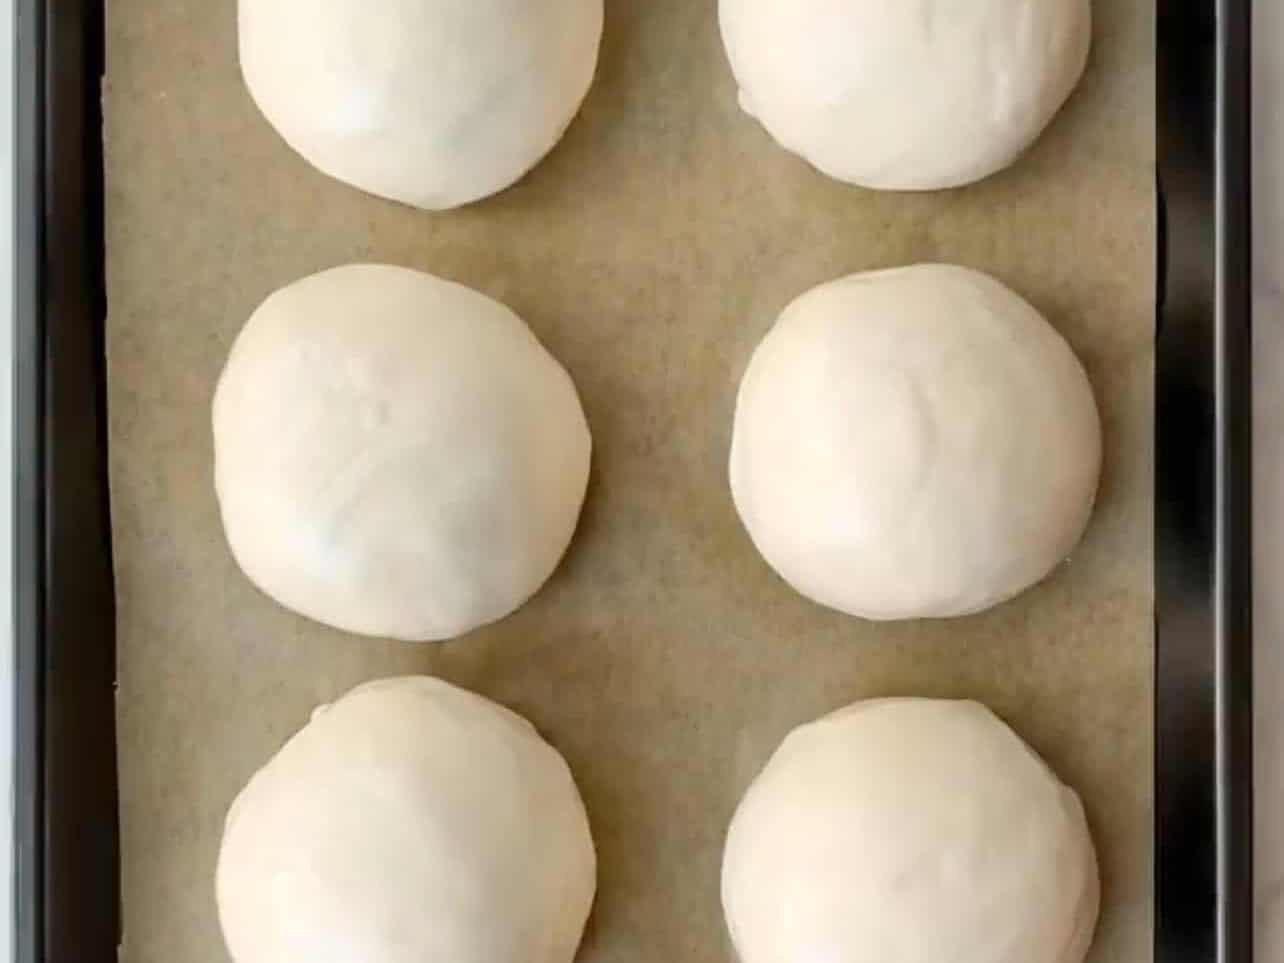
Divide into rounds or small baguettes. Cover for 2nd proof.
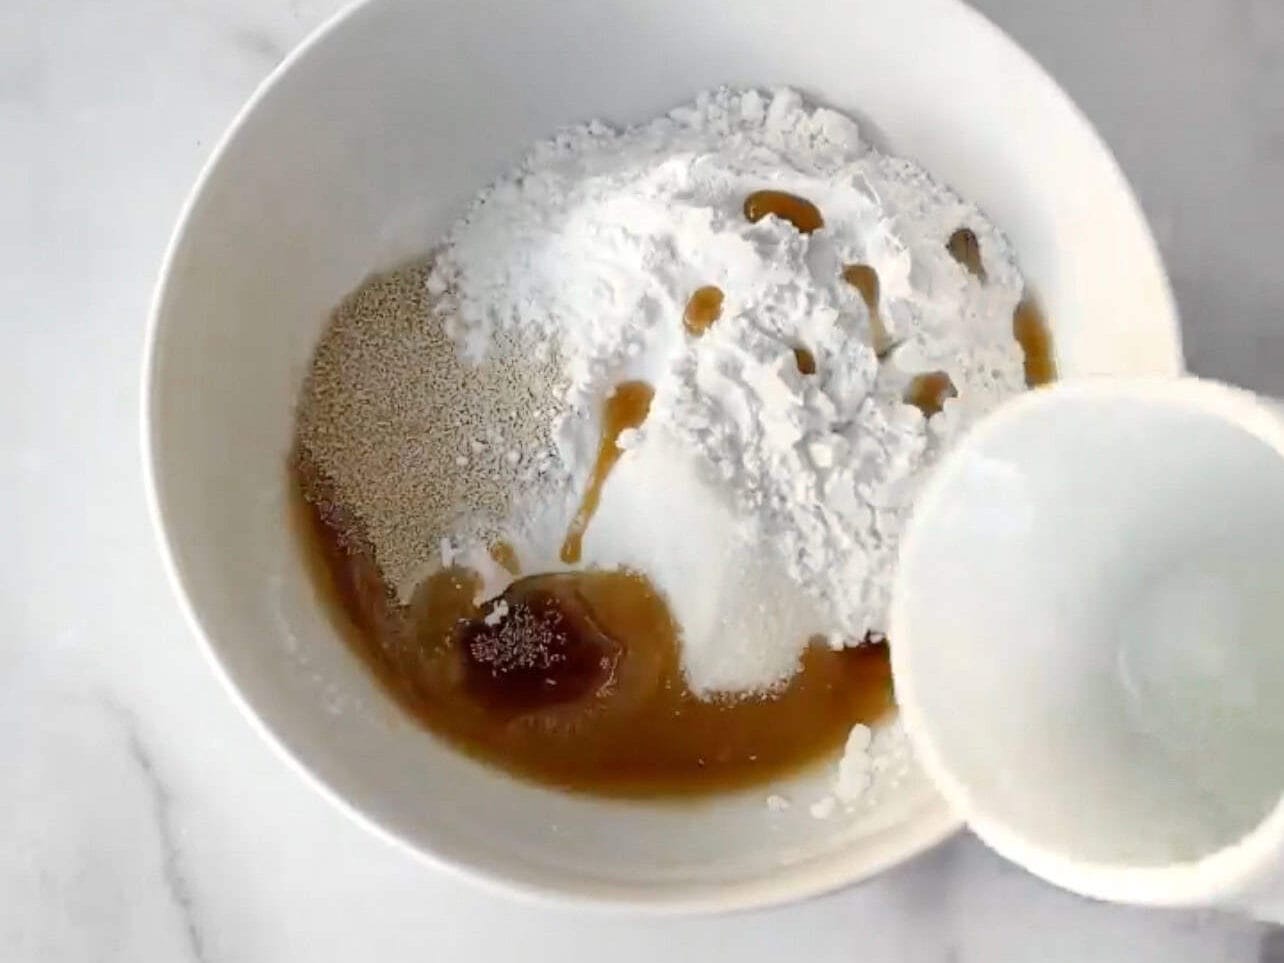
Combine ingredients in small bowl to make rice flour paste.
Allow paste to sit for 10 mins. Consistency will be fairly sloppy, and will foam up with bubbles.
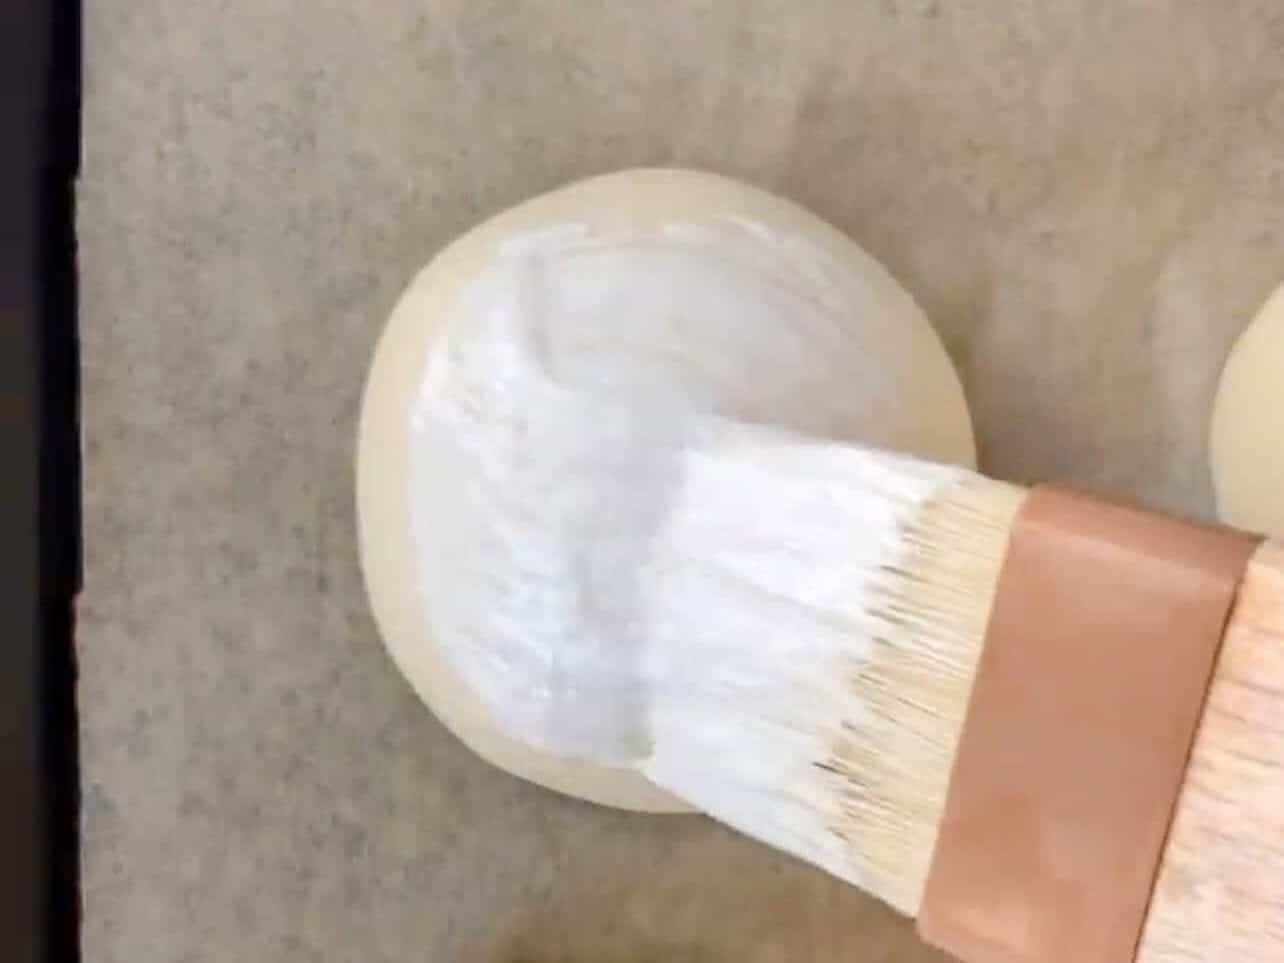
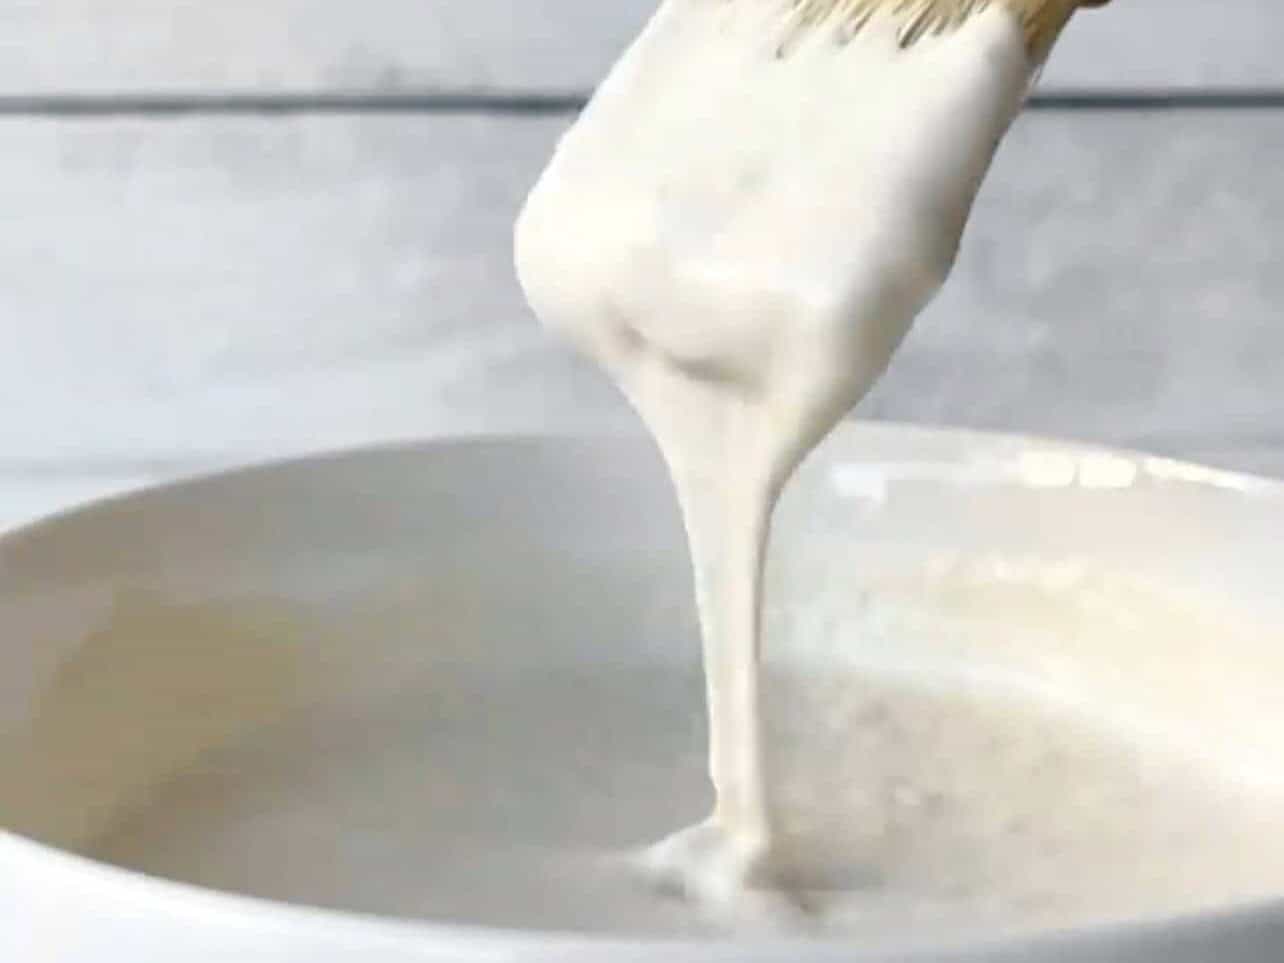
Stir paste mixture and brush on coating evenly over bread. Make sure coating is not too thick.
Preheat oven. Cover bread for final proof.
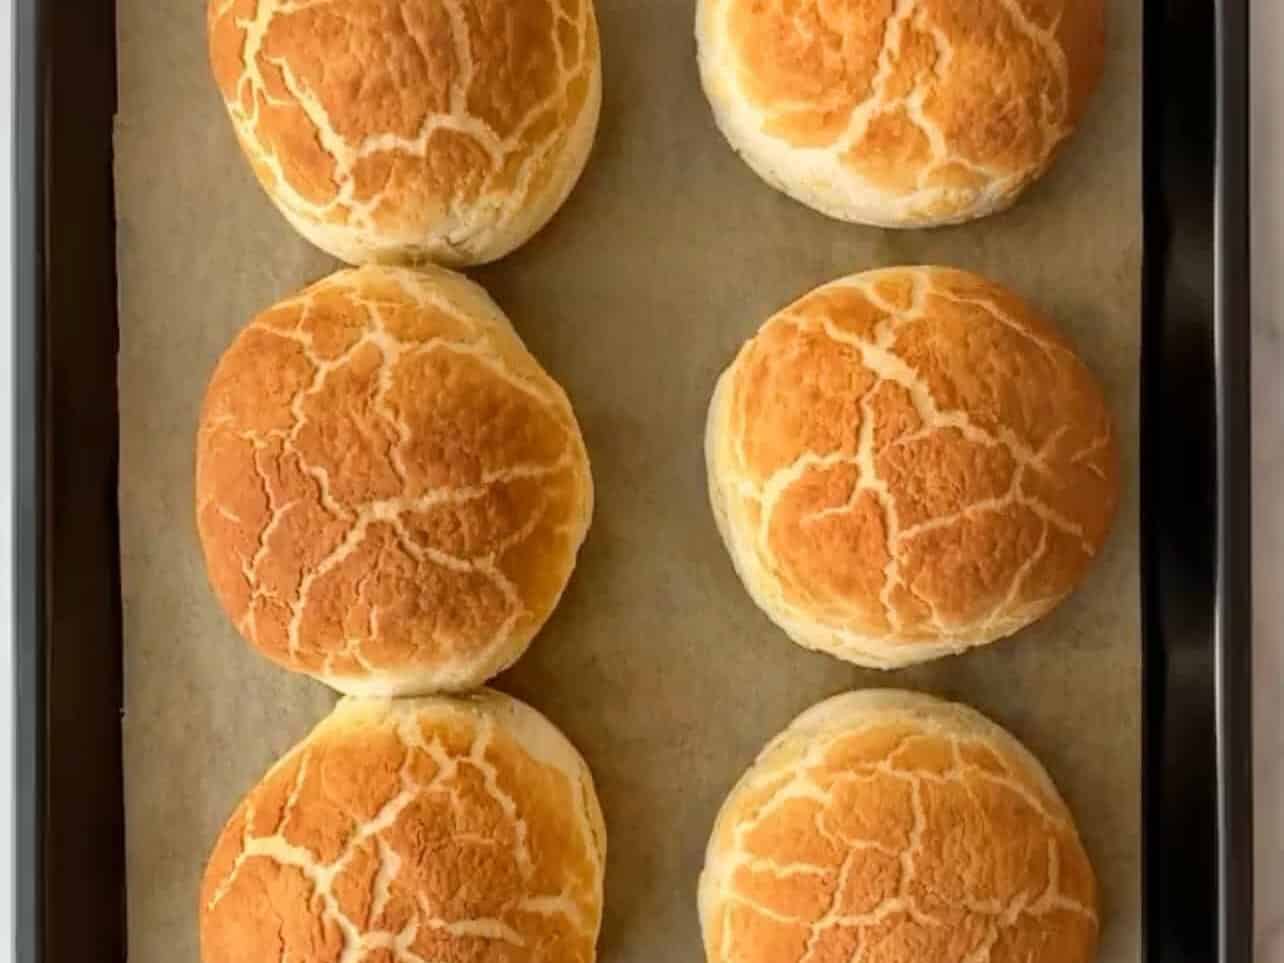
Bake until crust top is golden and crispy.

Cook slightly longer for sandwich baguettes.
Allow to cool slightly. Enjoy with butter or use to make amazing sandwiches.
Suzy's Tips For Success
Measure your flour and ingredients accurately: For best results, use a kitchen scale. If you were to ask 10 people to measure one cup of flour using a measuring cup, you will mostly get 10 different weights. Take out the guesswork and just use a scale - they are so affordable today and available everywhere! I'm certainly not saying you cannot achieve successful bakes measuring by volume, but this is usually achieved after a few years of practicing. It's just a shame if inaccurate amounts from the get-go were the cause for a bake to not go as expected.
Properly knead your dough: Use a stand mixer with hook attachment or knead by hand. Properly kneaded dough will pass the windowpane test, indicating it has enough gluten development. Stretch a small piece of the dough thin enough to see light pass through. If dough does not break easily, this means it has been kneaded properly. Great job!
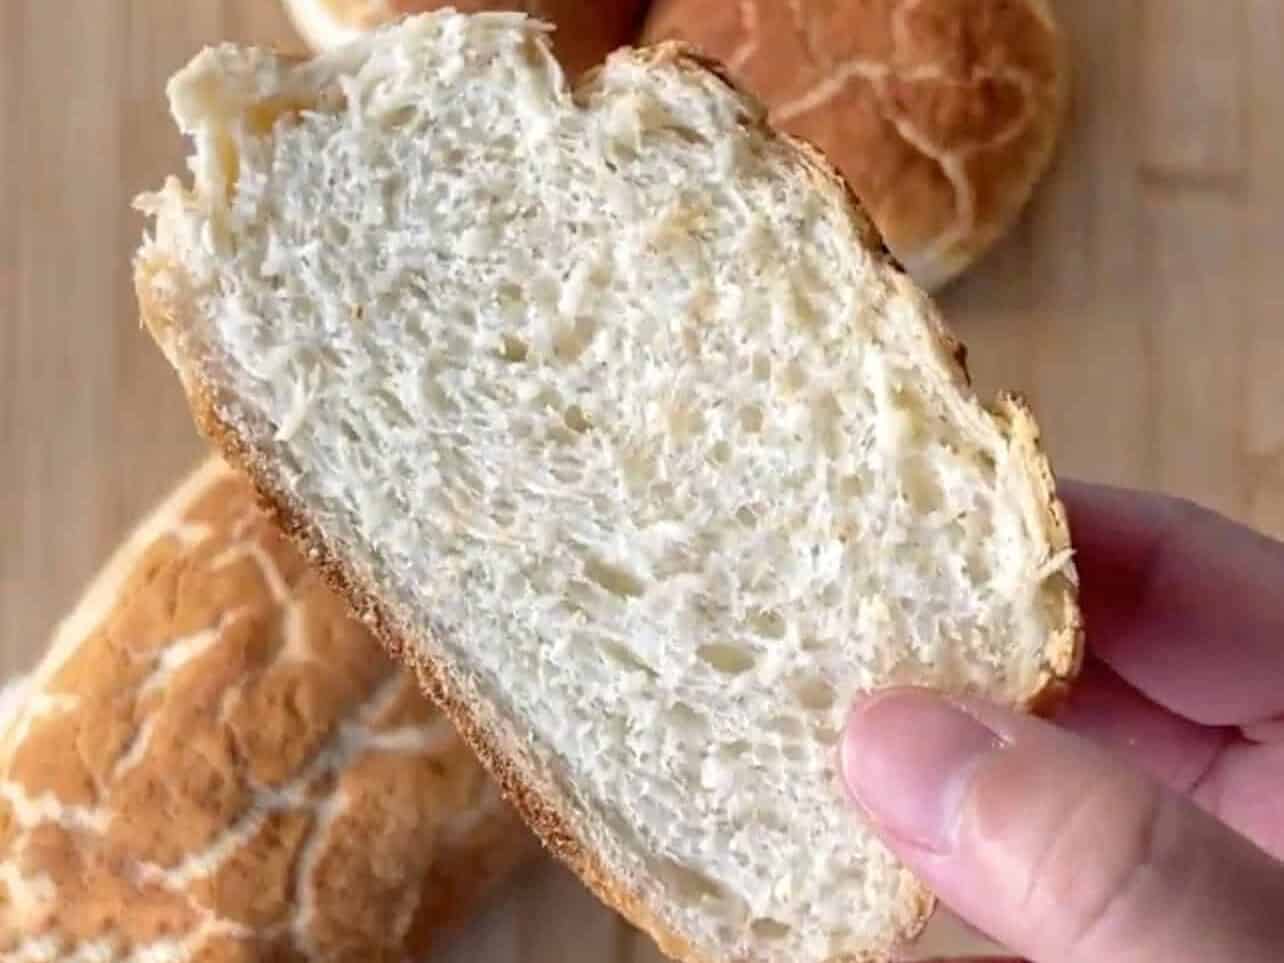
Allow enough time for dough to rise and proof: Once you've kneaded your dough, allow it to rise. In a nutshell, this is when fermentation is happening. Your dough rises from trapped carbon dioxide gas from the gluten. That's when you see us bakers always punching our dough! You also give it time to proof after you've shaped them. It may not double in size as the initial rise, but it should increase in volume. This will all result in a light fluffy bread crumb.
Do a dough poke test: After doing both a proper rise and proof, how do you know when your dough has proofed long enough and is ready to bake? Poke your finger ½ inch into the dough. Observe how the dough responds.
- Under-proofed: your dough will spring back very quickly not leaving any indent. Also, dough would feel tight and dense. Allow it to proof longer.
- Over-proofed: the dough will not spring back at all and indent will remain. Also, it may feel slightly deflated. Bake it anyway - it will still be delicious! Take notes for your next bake.
- Properly proofed dough: your poke will spring back slowly and indent will fill in after a few seconds. It's ready!
Thin coating of paste: Brush paste on proofed dough evenly. If the coating is too thick, the crackly pattern on the crust won't show as well.
How To Store/Reheat Dutch Crunch Bread
Store at room temperature in bread box or plastic bag for up to 3 days, or freeze for up to 3 months. Reheat in the oven. Do not recommend storing in fridge as it stales bread faster.
FAQ
Yes! Follow the recipe as instructed until you divided your dough into desired shape. Cover and chill on pan in fridge overnight. The next day, take out your pan and allow to come to room temperature. Make your rice flour paste and brush onto your bread. Continue to let it proof and rise, then perform your poke test. When your finger indent springs back slowly and fill in after a few seconds, then they are ready to bake.
You can definitely knead this dough by hand - I sometime prefer it. For beginner bread bakers, kneading by hand familiarizes you with the different textures the dough goes through that you can't get from kneading in a mixer. It may take a little longer, but hey - you'll get in a good arm workout.
Your paste was applied too thick a layer. Use a pastry brush and apply a thinner coating.
Small round rolls are baked at 400ºF (204ºC) for 28-30 minutes, and sandwich loaves for 33-35 minutes. Check to see that the top crust is golden brown and crunchy before removing from the oven.
A dense bread crumb is usually a sign the dough was under-fermented. Be sure to let your dough rise and proof properly. Once you allow the yeast to fully do its job, it will result in lighter fluffier crumb. See Suzy's Tips For Success section above for more details.
You Might Also Like...


Equipment
- stand mixer optional
- large baking sheet
Ingredients
Dough
- 3 cups bread flour
- 1 teaspoon instant dry yeast
- 1 tbsp granulated sugar
- 1 teaspoon kosher salt
- ¾ cup+2tbsp warm water 95-100ºF
- 3 tablespoon unsalted butter room temperature
Rice Flour Paste
- ½ cup rice flour
- 2 teaspoon instant dry yeast
- 2 teaspoon granulated sugar
- 2 tsp sesame oil or any neutral oil
- ⅓ cup+2½ tsp warm water 95-100ºF
Instructions
- in a large bowl, combine all the dough ingredients except the butter. Mix until flour has been incorporated. Then smear in the butter and knead until dough is smooth, approx 10 mins. You can use a stand mixer or knead by hand.3 cups bread flour, 1 teaspoon instant dry yeast, 1 tablespoon granulated sugar, 1 teaspoon kosher salt, ¾ cup+2tbsp warm water, 3 tablespoon unsalted butter
- Perform a windowpane test by stretching out a small piece of dough to see if it breaks or tears easily. If you can stretch and see light pass through, then you have developed good gluten. Cover the dough and let it rise in a warm spot for 1 hour or until it's doubled in volume.
- Line your baking sheet with parchment paper.
- Punch out the dough to release the gas. Divide and roll into desired bread shapes and place onto parchment paper about 2 inches apart. Preheat oven to 400ºF (204℃). In a small bowl, combine all paste ingredients and mix well. Allow it to sit for 10 mins.½ cup rice flour, 2 teaspoon instant dry yeast, 2 teaspoon granulated sugar, 2 teaspoon sesame oil or any neutral oil, ⅓ cup+2½ teaspoon warm water
- Stir the paste mixture and spread on an even thin layer of paste across each bread using a pastry brush. Do not re-coat as a thicker coating will prevent the crackly crust to show through. Be sure to also brush the sides. Allow the dough to proof on counter for 40-45 mins, or until a finger poke dough indent retracts back slowly.
- Bake small round buns for 28-30 mins, or larger sandwich loaves for 33-35 mins. Keep dough in oven until fully baked and crust is crispy and golden brown. Cool completely before slicing.
Notes
Nutrition
Looking for other recipes like this?


Did you make this recipe? Let me know!